Snowmobile Arctic Cat (2008 year). Manual - part 165
8-60
0740-796
NOTE: If replacing the headlight assembly, the
adjustment knobs must be removed.
4. If replacing the bulb(s), remove the bulb(s) from
the headlight housing and disconnect the wiring
harness from the bulb(s).
5. Remove the hairpin clips securing the headlight
assembly to the hood; then remove the assembly.
INSTALLING HEADLIGHT BULB/
HEADLIGHT
1. Install the headlight assembly on the hood; then
secure with the hairpin clips.
2. If the bulb(s) was replaced, plug the wiring har-
ness into the headlight bulb and secure with cable
ties.
3. Insert the bulb into the headlight housing.
4. Press the air intake assembly into place on the
hood and secure with the O-rings and hairpin
clips.
5. Carefully push the headlight lenses inward far
enough to access the torx-head screws. Install the
lock nuts and tighten securely.
6. Install the headlight adjustment knobs.
7. Check headlight aim (see Adjusting Headlight
Aim in this sub-section).
Adjusting
Headlight Aim
The headlight can be adjusted for vertical aim of the
HIGH/LOW beam. The geometric center of HIGH
beam zone is to be used for vertical aiming.
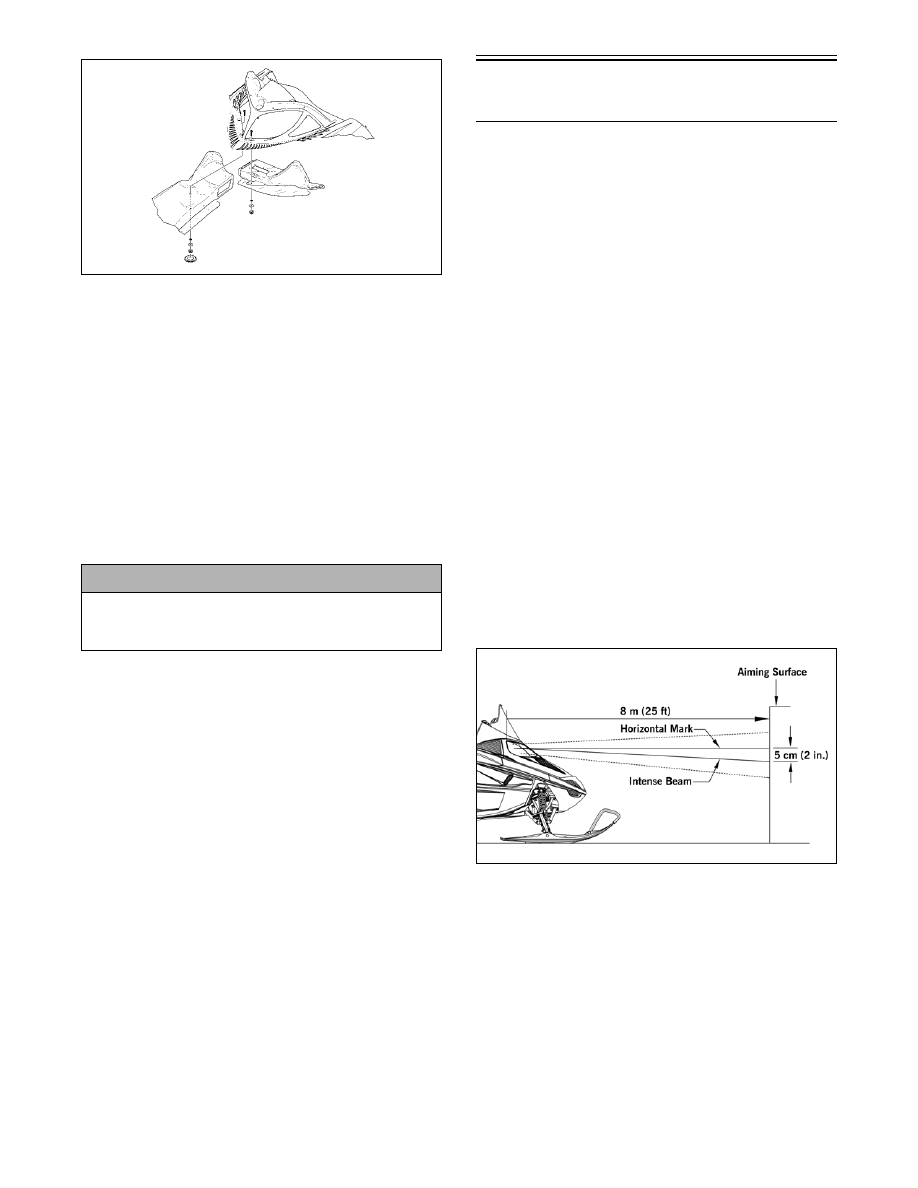
1. Position the snowmobile on a level floor so the
headlight is approximately 8 m (25 ft) from an
aiming surface (wall or similar surface).
NOTE: There should be an “average” operating
load on the snowmobile when adjusting headlight
aim.
2. Measure the distance from the floor to midpoint of
the headlight.
3. Using the measurement obtained in step 2, make a
horizontal mark on the aiming surface.
4. Make a vertical mark which intersects the horizon-
tal mark on the aiming surface directly in front of
the headlight.
5. Start the engine. Select the headlight dimmer
switch HIGH beam position. DO NOT USE LOW
BEAM.
6. Observe the headlight beam aim. Proper aim is
when the most intense beam is centered on the ver-
tical mark 5 cm (2 in.) below the horizontal mark
on the aiming surface.
0741-448
7. Adjust the headlight housing mounting screws (on
the 3-bulb models) or the console adjustment
knobs (on the 4-bulb models) until correct aim is
obtained. Shut the engine off.
! CAUTION
Do not touch the glass portion of the bulb. If the
glass portion is touched, it must be cleaned with a
dry cloth before installing.