Nissan Rogue (2023 year). Manual in english - page 11
WARNING
.
Never put anything on the cargo
cover, no matter how small. Any
object on it could cause an injury
in an accident or sudden stop.
.
Do not leave the cargo cover in
the vehicle with it disengaged
from the holder.
.
The child restraint top tether
strap may be damaged by con-
tact with the cargo cover or items
in the luggage area. Remove the
cargo cover from the vehicle or
secure it in the luggage area. Also
secure any items in the luggage
area. Your child could be seriously
injured or killed in a collision if the
top tether strap is damaged.
WAC0534X
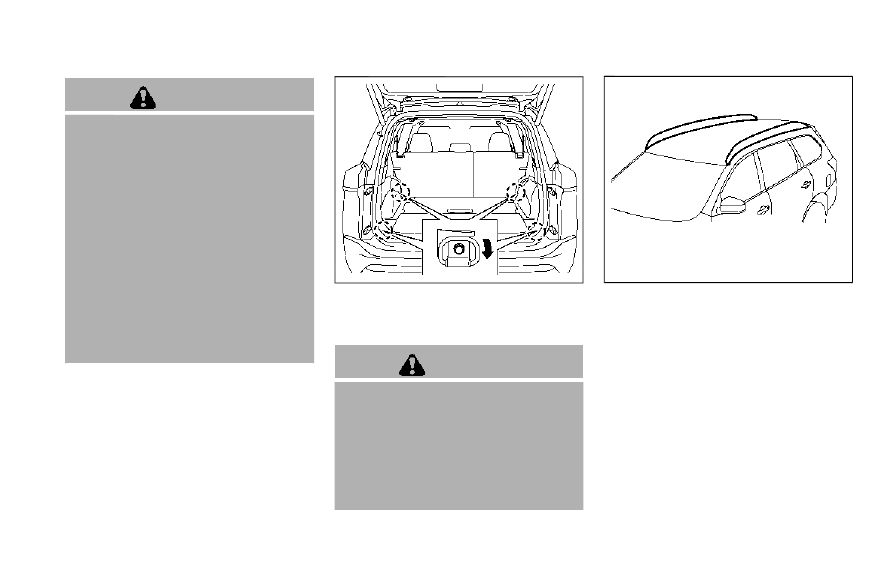
LUGGAGE HOOKS
To use the hook, pull it down as illu-
strated.
WARNING
.
Always make sure that the cargo
is properly secured. Use the sui-
table ropes and hooks.
.
Unsecured cargo can become
dangerous in an accident or sud-
den stop.
.
Do not apply a total load of more
than 22 lb (10 kg) to a single hook.
WAC0889X
Do not apply any load directly to the roof
side rails. Cross bars must be installed
before applying load/cargo/luggage to
the roof of the vehicle. Genuine NISSAN
accessory cross bars are available
through a NISSAN dealer. It is recom-
mended that you visit a NISSAN dealer for
additional information.
The service load capacity for the roof side
rails is 163 lb (74 kg), however do not
exceed the accessory cross bars load
capacity.
Be careful that your vehicle does not
exceed the Gross Vehicle Weight Rating
(GVWR) or its Gross Axle Weight Rating
(GAWR front and rear). The GVWR and
Instruments and controls
2-81
ROOF RACK (if so equipped)