Nissan Titan (2023 year). Manual in english - page 31
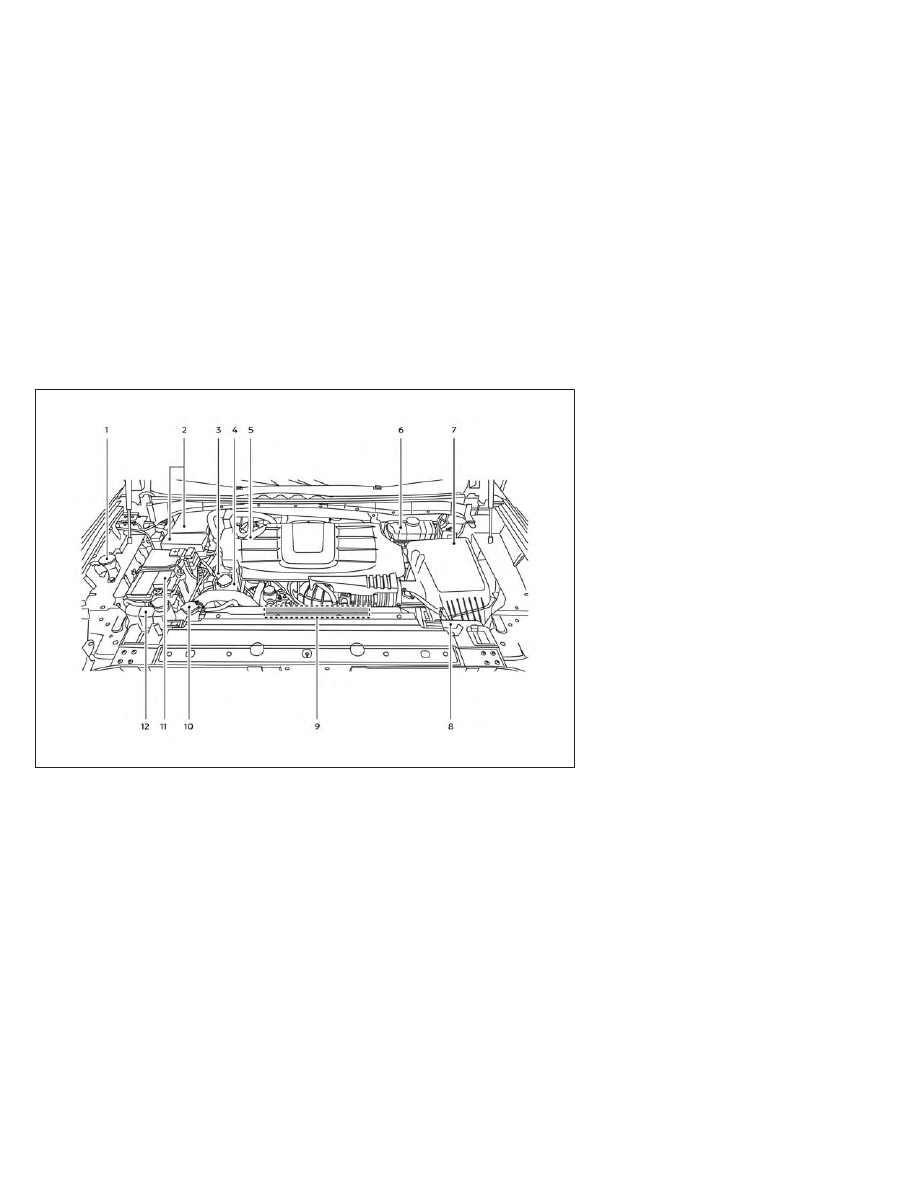
5.6L 8 cylinder (VK56VD engine model)
(non-XD model)
1.
Windshield-washer fluid reservoir
2.
Fuse box
3.
Engine oil dipstick
4.
Power steering fluid reservoir
5.
Engine oil filler cap
6.
Brake fluid reservoir
7.
Air cleaner
8.
Fuse/Fusible link box
9.
Drive belt location
10.
Radiator cap
11.
Battery
12.
Engine coolant reservoir
LDI3292
ENGINE COMPARTMENT CHECK
LOCATIONS
8-4
Do-it-yourself