Nissan Titan (2023 year). Manual in english - page 22


  Index      Manuals     Nissan Titan (2023 year). Manual in english


Search            copyright infringement  


Content      ..     20      21      22      23     ..


Nissan Titan (2023 year). Manual in english - page 22


Do not attempt to test a 4WD
equipped vehicle on a 2-wheel dyna-
mometer (such as the dynamom-
eters used by some states for emis-
sions testing) or similar equipment
even if the other two wheels are
raised off the ground. Make sure you
inform test facility personnel that
your vehicle is equipped with 4WD
before it is placed on a dynamom-
eter. Using the wrong test equipment
may result in drivetrain damage or
unexpected

vehicle

movement

which could result in serious vehicle
damage or personal injury.

Accelerating quickly, sharp steering
maneuvers or sudden braking may
cause loss of control.

If at all possible, avoid sharp turning
maneuvers,

particularly

at

high

speeds. Your NISSAN 4WD vehicle has
a higher center of gravity than a pas-
senger car. The vehicle is not de-
signed for cornering at the same
speeds as passenger cars. Failure to
operate this vehicle correctly could
result in loss of control and/or a roll-
over accident.

Always use tires of the same type,
size, brand, construction (bias, bias-
belted, or radial), and tread pattern
on all four wheels. Install tire chains
on the rear wheels when driving on
slippery roads and drive carefully.

Be sure to check the brakes immedi-
ately after driving in mud or water.
For additional information, see “Wet
brakes” (P. 5-114).

Avoid parking your vehicle on steep
hills. If you get out of the vehicle and
it rolls forward, backward or side-
ways, you could be injured.

Whenever you drive off-road through
sand, mud or water as deep as the
wheel hub, more frequent mainte-
nance may be required. For addi-
tional information, see “Maintenance
schedules” (P. 9-7).
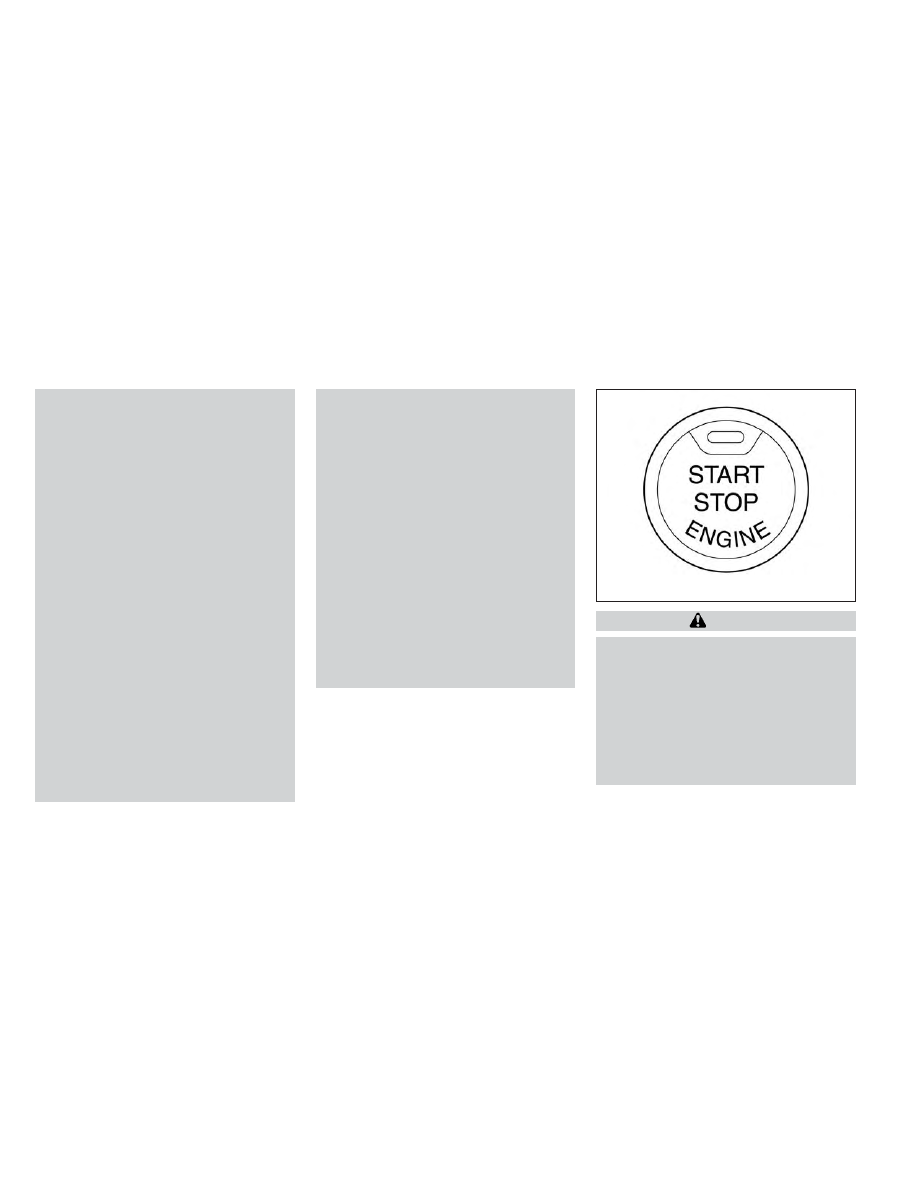
WARNING

Do not operate the push-button igni-
tion switch while driving the vehicle ex-
cept in an emergency. (The engine will
stop when the ignition switch is pushed
three consecutive times in quick suc-
cession or the ignition switch is pushed
and held for more than 2 seconds.) If
the engine stops while the vehicle is
being driven, this could lead to a crash
and serious injury.

LSD2014

PUSH-BUTTON IGNITION SWITCH

5-12

Starting and driving

-------------------------------------------------------------------------------------------------------------------------------------------------------------

When the ignition switch is pushed without
depressing the brake pedal, the ignition
switch position will illuminate as follows:

Push center:
• Once to change to ACC.
• Two times to change to ON.
• Three times to return to OFF.

The ignition switch will automatically re-
turn to the LOCK position when any door is
either opened or closed with the switch in
the OFF position.

The ignition lock is designed so that the
ignition switch position cannot be placed
in the OFF position until the shift lever is
moved to the P (Park) position.

When the ignition switch cannot be pushed
toward the OFF position, proceed as fol-
lows:

1. Move the shift lever into the P (Park)

position.

2. Push the ignition switch. The ignition

switch position will change to the ON
position.

3. Push the ignition switch again to the

OFF position.

The shift lever can be moved from the P
(Park) position if the ignition switch is in
the ON position and the brake pedal is
depressed.

If the battery of the vehicle is discharged,
the push-button ignition switch cannot
be moved from the LOCK position.

Some indicators and warnings for opera-
tion are displayed in the meter. For addi-
tional information, see “Vehicle information
display warnings and indicators” (P. 2-33).

OPERATING RANGE

The Intelligent Key functions can only be
used when the Intelligent Key is within the
specified operating range.

When the Intelligent Key battery is almost
discharged or strong radio waves are pres-
ent near the operating location, the Intelli-
gent Key system’s operating range be-
comes narrower and may not function
properly.

LSD4660

Starting and driving

5-13

-------------------------------------------------------------------------------------------------------------------------------------------------------------

If the Intelligent Key is within the operating
range, it is possible for anyone, even some-
one who does not carry the Intelligent Key,
to push the ignition switch to start the
engine.

The operating range of the engine start
function is inside of the vehicle

O

1

.

• The luggage area is not included in the

operating range, but the Intelligent Key
may function.

• If the Intelligent Key is placed on the in-

strument panel or inside the glove box,
storage bin or door pocket, the Intelligent
Key may not function.

• If the Intelligent Key is placed near the

door or window outside the vehicle, the
Intelligent Key may function.

PUSH-BUTTON IGNITION SWITCH
POSITIONS

LOCK (Normal parking position)

The ignition switch can only be locked in
this position.

The ignition switch will be unlocked when it
is pushed to the ACC position while carry-
ing the Intelligent Key.

The ignition switch will lock when any door
is opened or closed with the ignition
switched off.

ACC (Accessories)

This position activates electrical accesso-
ries, such as the radio, when the engine is
not running.

ACC has a battery saver feature that will
place the ignition switch in the OFF position
after a period of time under the following
conditions:
• All doors are closed.
• The shift lever is in P (Park).
• The hazard lamps are off.
• The turn signals are off.

The battery saver feature will be canceled if
any of the following occur:
• Any door is opened.
• The shift lever is moved out of the P (Park)

position.

• The ignition switch changes position.
• The hazard lamps are turned on.

ON (Normal operating position)

This position turns on the ignition system
and electrical accessories.

ON has a battery saver feature that will
place the ignition switch in the OFF posi-
tion, if the vehicle is not running, after some
time under the following conditions:
• All doors are closed.
• The shift lever is in P (Park).
• The hazard lamps are off.
• The turn signals are off.

The battery saver feature will be canceled if
any of the following occur:
• Any door is opened.
• The shift lever is moved out of the P (Park)

position.

• The ignition switch changes position.
• The hazard lamps are turned on.
• The turn signals are turned on.

CAUTION

Do not leave the vehicle with the igni-
tion switch in the ACC or ON position
when the engine is not running for an
extended period. This can discharge
the battery.

OFF

The ignition switch is in the OFF position
when the engine is turned off using the
ignition switch.

5-14

Starting and driving

-------------------------------------------------------------------------------------------------------------------------------------------------------------

EMERGENCY ENGINE SHUT OFF

To shut off the engine in an emergency
situation while driving, perform the follow-
ing procedure:
• Rapidly push the ignition switch three

consecutive times in less than 1.5 sec-
onds, or

• Push and hold the ignition switch for

more than 2 seconds.

NISSAN INTELLIGENT KEY®
BATTERY DISCHARGE

If the battery of the NISSAN Intelligent Key®
is discharged, or environmental conditions
interfere with the Intelligent Key operation,
start the engine according to the following
procedure:

1. Place the shift lever in the P (Park)

position.

2. Firmly apply the foot brake.

3. Touch the ignition switch with the Intel-

ligent Key as illustrated. (A chime will
sound.)

After step 3 is performed, when the igni-
tion switch is pushed without depress-
ing the brake pedal, the ignition switch
position will change to the ON position.

4. Push the ignition switch while depress-

ing the brake pedal within 10 seconds
after the chime sounds. The engine will
start.

NOTE:

• When the ignition switch is pushed to

the ON position or the engine is started
by the above procedure, the Intelligent
Key battery discharge indicator ap-
pears in the vehicle information dis-
play even when the Intelligent Key is
inside the vehicle. This is not a mal-
function. To turn off the Intelligent Key
battery discharge indicator, touch the
ignition switch with the Intelligent Key
again.

• If the Intelligent Key battery discharge

indicator appears, replace the battery
as soon as possible. For additional in-
formation, see “Battery replacement”
(P. 8-28).

SSD0860

Starting and driving

5-15

-------------------------------------------------------------------------------------------------------------------------------------------------------------

NISSAN VEHICLE IMMOBILIZER
SYSTEM

The NISSAN Vehicle Immobilizer System
will not allow the engine to start without
the use of the registered key.

If the engine fails to start using a registered
key (for example, when interference is
caused by another registered key, an auto-
mated toll road device or automatic pay-
ment device on the key ring), restart the
engine using the following procedures:

1. Leave the ignition switch in the ON posi-

tion for approximately 5 seconds.

2. Place the ignition switch in the OFF or

LOCK position, and wait approximately
10 seconds.

3. Repeat steps 1 and 2.

4. Restart the engine while holding the de-

vice (which may have caused the inter-
ference) separate from the registered
key.

If the no start condition re-occurs, NISSAN
recommends placing the registered key on
a separate key ring to avoid interference
from other devices.

• Make sure the area around the vehicle is

clear.

• Check fluid levels such as engine oil, cool-

ant, brake fluid and windshield-washer
fluid as frequently as possible, or at least
whenever you refuel.

• Check that all windows and lights are

clean.

• Visually inspect tires for their appearance

and condition. Also check tires for proper
inflation.

• Check that all doors are closed.
• Position

seat

and

adjust

head

restraints/headrests.

• Adjust inside and outside mirrors.
• Fasten seat belts and ask all passengers

to do likewise.

• Check the operation of warning lights

when the ignition switch is placed in the
ON position. For additional information,
see “Warning lights, indicator lights and
audible reminders” (P. 2-13).

1. Apply the parking brake.

2. Move the shift lever to P (Park) or N (Neu-

tral). P (Park) is recommended.

The starter is designed not to operate
unless the shift lever is in either P
(Park) or N (Neutral).

3. Push the ignition switch to the ON posi-

tion. Depress the brake pedal and push
the ignition switch to start the engine.

To start the engine immediately, push
and release the ignition switch while de-
pressing the brake pedal with the igni-
tion switch in any position.

• If the engine is very hard to start in

extremely cold weather or when re-
starting,

depress

the

accelerator

pedal a little (approximately 1/3 to the
floor) and while holding, crank the en-
gine. Release the accelerator pedal
when the engine starts.

• If the engine is very hard to start be-

cause it is flooded, depress the accel-
erator pedal all the way to the floor
and hold it. Push the ignition switch to
the ON position to start cranking the
engine. After 5 or 6 seconds, stop
cranking

by

pushing

the

ignition

switch to the LOCK position. After

BEFORE STARTING THE ENGINE

STARTING THE ENGINE

5-16

Starting and driving

-------------------------------------------------------------------------------------------------------------------------------------------------------------

cranking the engine, release the accel-
erator pedal. Crank the engine with
your foot off the accelerator pedal by
depressing the brake pedal and push-
ing the ignition switch to start the en-
gine. If the engine starts, but fails to
run, repeat the above procedure.

CAUTION

Do not operate the starter for more
than 15 seconds at a time. If the engine
does not start, push the ignition switch
to the OFF position and wait 10 seconds
before cranking again, otherwise the
starter could be damaged.

4.

Warm-up

Allow the engine to idle for at least 30
seconds after starting. Do not race the
engine while warming it up. Drive at a
moderate speed for a short distance
first, especially in cold weather. In cold
weather, keep the engine running for a
minimum of 2 to 3 minutes before shut-
ting it off. Starting and stopping the en-
gine over a short period of time may
make the vehicle more difficult to start.

5. To stop the engine, move the shift lever

to the P (Park) position and push the
ignition switch to the OFF position.

In preparation for the next engine start, the
engine may have a slightly delayed shutoff
after placing the ignition switch in the OFF
position,

depending

on

the

driving

conditions.

NOTE:
Care should be taken to avoid situa-
tions that can lead to potential battery
discharge and potential no-start con-
ditions such as:

1. Installation or extended use of elec-

tronic accessories that consume bat-
tery power when the engine is not
running (phone chargers, GPS, DVD
players, etc.).

2. The vehicle is not driven regularly

and/or only driven short distances.

In these cases, the battery may need to
be charged to maintain battery health.

REMOTE ENGINE START (if so
equipped)

Vehicles started with the Remote Engine
Start require the ignition switch to be
placed in the ON position before the shift
lever can be moved from the P (Park) posi-
tion. To place the ignition switch in the ON
position, follow these steps:

1. Make sure that the Intelligent Key is on

you.

2. Apply the brake.

3. Push the ignition switch once to the ON

position.

For additional information, see “NISSAN In-
telligent Key®” (P. 3-2).

Starting and driving

5-17

-------------------------------------------------------------------------------------------------------------------------------------------------------------

ENGINE PROTECTION MODE

The engine has an engine protection mode
to reduce the chance of damage if the
coolant temperature becomes too high
(for example, when climbing steep grades
in high temperatures with heavy loads,
such as when towing a trailer). When the
engine temperature reaches a certain
level:
• The engine coolant temperature gauge

will move toward the H position.

• Engine power may be reduced.
• The air conditioning cooling function may

be automatically turned off for a short
time (the blower will continue to operate).

Engine power and, under some conditions,
vehicle speed will decrease. Vehicle speed
can be controlled with the accelerator
pedal, but the vehicle may not accelerate at
the desired speed. The transmission will
downshift or upshift as it reaches pre-
scribed shift points. You can also shift
manually.

As driving conditions change and engine
coolant temperature is reduced, vehicle
speed can be increased using the accel-
erator pedal, and the air conditioning cool-
ing function will automatically be turned
back on.

The Malfunction Indicator Light (MIL) may
also come on if the engine coolant tem-
perature is not reduced or the air condi-
tioning cooling function does not turn back
on. If

only

it remains on, you do not need to

have your vehicle towed, but have it in-
spected soon. It is recommended that you
visit a NISSAN dealer for this service. For
additional information, see “Malfunction In-
dicator Light (MIL)” (P. 2-22).

WARNING

Overheating can result in reduced en-
gine power and vehicle speed. The re-
duced speed may be lower than other
traffic, which could increase the chance
of a collision. Be especially careful
when driving. If the vehicle cannot
maintain a safe driving speed, pull to
the side of the road in a safe area. Allow
the engine to cool and return to normal
operation. For additional information,
see “If your vehicle overheats” (P. 6-12).

CAUTION

Running the engine with the engine oil
pressure warning light on could cause
serious damage to the engine almost
immediately. Such damage is not cov-
ered by warranty. Turn off the engine as
soon as it is safe to do so.

AUTOMATIC TRANSMISSION (A/T)

WARNING

Do not depress the accelerator pedal
while shifting from P (Park) or N (Neu-
tral) to R (Reverse) or D (Drive). Always
depress the brake pedal until shifting
is completed. Failure to do so could
cause you to lose control and have an
accident.

Cold engine idle speed is high, so use
caution when shifting into a forward
or reverse gear before the engine has
warmed up.

Never shift to either the P (Park) or R
(Reverse) position while the vehicle is
moving forward and P (Park) or D
(Drive) position while the vehicle is
reversing. This could cause an acci-
dent or damage the transmission.

DRIVING THE VEHICLE

5-18

Starting and driving

-------------------------------------------------------------------------------------------------------------------------------------------------------------

Except in an emergency, do not shift
to the N (Neutral) position while driv-
ing. Coasting with the transmission
in the N (Neutral) position may cause
serious damage to the transmission.

Do not downshift abruptly on slip-
pery roads. This may cause a loss of
control.

CAUTION

To avoid possible damage to your ve-
hicle, when stopping the vehicle on an
uphill grade, do not hold the vehicle by
depressing the accelerator pedal. The
foot brake should be used for this
purpose.

The A/T in your vehicle is electronically con-
trolled to produce maximum power and
smooth operation.

The recommended operating procedures
for this transmission are shown on the fol-
lowing pages. Follow these procedures for
maximum vehicle performance and driv-
ing enjoyment.

Starting the vehicle

WARNING

Do not depress the accelerator pedal
while shifting from P (Park) or N (Neu-
tral) to R (Reverse) or D (Drive). Always
depress the brake pedal until shifting
is completed. Failure to do so could
cause you to lose control and have an
accident.

Cold engine idle speed is high, so use
caution when shifting into a forward
or reverse gear before the engine has
warmed up.

Never shift to either the P (Park) or R
(Reverse) position while the vehicle is
moving forward and P (Park) or D
(Drive) position while the vehicle is
reversing. This could cause an acci-
dent or damage the transmission.

Except in an emergency, do not shift
to the N (Neutral) position while driv-
ing. Coasting with the transmission
in the N (Neutral) position may cause
serious damage to the transmission.

Do not downshift abruptly on slip-
pery roads. This may cause a loss of
control.

CAUTION

To avoid possible damage to your ve-
hicle, when stopping the vehicle on an
uphill grade, do not hold the vehicle by
depressing the accelerator pedal. The
foot brake should be used for this
purpose.

1. After starting the engine, fully depress

the foot brake pedal before moving the
shift lever out of the P (Park) position.

2. Keep the foot brake pedal depressed

and move the shift lever into a driving
gear.

3. Release the foot brake, then gradually

start the vehicle in motion.

The automatic transmission is designed
so the foot brake pedal MUST be de-
pressed before shifting from P (Park) to
any drive position while the ignition
switch is in the ON position.

The shift lever cannot be moved out of
the P (Park) position and into any of the
other gear positions if the ignition
switch is placed in the LOCK or OFF
position.

Starting and driving

5-19

-------------------------------------------------------------------------------------------------------------------------------------------------------------

Shifting

To move the shift lever:

: Shift while depressing the brake

pedal

: Shift without depressing the brake

pedal

After starting the engine, fully depress the
brake pedal and move the shift lever out of
the P (Park) position.

WARNING

Apply the parking brake if the shift le-
ver is in any position while the engine is
not running. Failure to do so could
cause the vehicle to move unexpect-
edly or roll away and result in serious
personal injury or property damage.

If the ignition switch is placed in the OFF or
ACC position for any reason while the ve-
hicle is in N (Neutral), or any D (Drive) posi-
tion, the ignition switch cannot be placed in
the LOCK position. Move the shift lever to
the P (Park) position, then the ignition
switch can be placed in the LOCK position.

P (Park)

CAUTION

To prevent transmission damage, use
the P (Park) position only when the ve-
hicle is completely stopped.

Use the P (Park) shift lever position when
the vehicle is parked or when starting the
engine. Make sure the vehicle is completely
stopped.

The brake pedal should be depressed to
move the shift lever from N (Neutral) or
any drive position to P (Park).

The P (Park) position is automatically en-
gaged if you switch off the ignition switch.

Apply the parking brake. When parking on a
hill, apply the parking brake first, then move
the shift lever into the P (Park) position.

R (Reverse)

CAUTION

To prevent transmission damage, use
the R (Reverse) position only when the
vehicle is completely stopped.

Use the R (Reverse) position to back up. Make
sure the vehicle is completely stopped be-
fore selecting the R (Reverse) position.

The

brake pedal must be depressed to move
the shift lever from P (Park), N (Neutral) or
any drive position to R (Reverse).

N (Neutral)

Neither forward nor reverse gear is engaged.
The engine can be started in this position.
You may shift to N (Neutral) and restart a
stalled engine while the vehicle is moving.

D (Drive)

Use this position for all normal forward
driving.

LSD3703

5-20

Starting and driving

-------------------------------------------------------------------------------------------------------------------------------------------------------------

Manual shift mode

When the manual shift mode switch is
pushed while driving, the transmission en-
ters the manual shift mode. Shift ranges
can be selected manually.

In the manual shift mode, the shift range is
displayed on the position indicator in the
meter. After pushing the manual shift
mode switch, the position indicator varies
depending on the gear position and ve-
hicle speed.

In the manual shift mode, the trans-
mission may not shift to the selected
gear immediately because of vehicle
speed. The transmission will upshift or
downshift

when

vehicle

speed

matches the programmed transmis-
sion shift points. This helps maintain
driving performance and reduces the
chance of vehicle damage or loss of
control.

In the manual shift mode, the trans-
mission will not upshift to a higher
gear than is manually selected. When
the vehicle speed decreases, the trans-
mission automatically shifts down and
shifts to 1st gear before the vehicle
comes to a stop.

Shift ranges up or down one by one as
follows:

M1

M2

M3

M4

M5

M6

M7

M8

M9

D

M9 (Ninth)

Use this position for all normal forward
driving at highway speeds.

M1

M2

M3

M4

M5

M6

M7

M8

M9

M9 will be displayed on the position indica-
tor in the meter.

M8 (Eighth)

Use this position for all normal forward
driving at highway speeds.

M1

M2

M3

M4

M5

M6

M7

M8

M8 will be displayed on the position indica-
tor in the meter.

M7 (Seventh)

Use this position for all normal forward
driving at highway speeds.

M1

M2

M3

M4

M5

M6

M7

M7 will be displayed on the position indica-
tor in the meter.

M6 (Sixth)

Use this position for all normal forward
driving at highway speeds.

M1

M2

M3

M4

M5

M6

M6 will be displayed on the position indica-
tor in the meter

M5 (Fifth)

For driving up or down long slopes where
engine braking would be advantageous.

Shift ranges up or down one by one as follows:

M1

M2

M3

M4

M5

M5 will be displayed on the position indica-
tor in the meter.

LSD2457

Starting and driving

5-21

-------------------------------------------------------------------------------------------------------------------------------------------------------------

M4 (Fourth)

Use for hill climbing or engine braking on
downhill grades.

Shift ranges up or down one by one as
follows:

M1

M2

M3

M4

M4 will be displayed on the position indica-
tor in the meter.

M3 (Third)

Use for hill climbing or engine braking on
downhill grades.

Shift ranges up or down one by one as
follows:

M1

M2

M3

M3 will be displayed on the position indica-
tor in the meter.

M2 (Second)

Use for hill climbing or engine braking on
downhill grades.

Shift ranges up or down one by one as
follows:

M1

M2

M2 will be displayed on the position indica-
tor in the meter.

M1 (First)

Use this position when climbing steep hills
slowly or driving slowly through deep snow,
sand or mud, or for maximum engine brak-
ing on steep downhill grades.

M1 will be displayed on the position indica-
tor on the meter.
• Remember not to drive at high speeds for

extended periods of time in lower than
M4 range. This reduces fuel economy.

When shifting up

Push the shift switch to the + (up) side.
(Shifts to higher range.)

When shifting down

Push the shift switch to the − (down) side.
(Shifts to lower range.)
• The

transmission

will

automatically

downshift the gears. (For example, if you
select the 3rd range, the transmission will
shift down between the 3rd and 1st
gears.)

• Pushing the shift switch rapidly will shift

the ranges in succession.

When canceling the manual shift mode

Press and hold the +(UP) button to return
the transmission to the normal driving
mode.

Accelerator downshift
— in D (Drive) position —

For passing or hill climbing, depress the
accelerator pedal to the floor. This shifts
the transmission down into a lower gear,
depending on the vehicle speed.

Fail-safe

When the fail-safe operation occurs, please
note that the transmission will be locked in
any of the forward gears according to the
condition.

If the vehicle is driven under extreme
conditions, such as excessive wheel
spinning and subsequent hard braking,
the fail-safe system may be activated.
This will occur even if all electrical cir-
cuits are functioning properly. In this
case, place the ignition switch in the OFF
position and wait for 3 seconds. Then
place the ignition switch back in the ON
position. The vehicle should return to its
normal operating condition. If it does not
return to its normal operating condition,
have the transmission checked and re-
paired, if necessary. It is recommended
that you visit a NISSAN dealer for this
service.

5-22

Starting and driving

-------------------------------------------------------------------------------------------------------------------------------------------------------------

WARNING

Be sure the parking brake is fully re-
leased before driving. Failure to do so
can cause brake failure and lead to
an accident.

Do not release the parking brake
from outside the vehicle.

Do not use the shift lever in place of
the parking brake. When parking, be
sure

the

parking

brake

is

fully

engaged.

To help avoid risk of injury or death
through unintended operation of the
vehicle and/or its systems, do not
leave children, people who require
the assistance of others or pets unat-
tended in your vehicle. Additionally,
the temperature inside a closed ve-
hicle on a warm day can quickly be-
come high enough to cause a signifi-
cant risk of injury or death to people
and pets.

To engage:

Firmly depress the parking

brake.

To release:

1. Firmly apply the foot brake.

2. Move the shift lever to the P (Park)

position.

3. Firmly depress the parking brake pedal

and it will release.

4. Before

driving,

be

sure

the

brake

warning light goes out.

The TSR system provides the driver with in-
formation about the most recently detected
speed limit. The system captures the road
sign information with the multi-sensing
front camera unit

O

A

located on the wind-

shield in front of the inside rearview mirror
and displays the detected signs in the ve-
hicle

information

display.

For

vehicles

equipped with a navigation system, the
speed limit displayed is based on a combi-
nation of navigation system data and live
camera recognition. TSR information is al-
ways displayed at the top of the vehicle in-
formation display, and optionally in the main
central area of the display screen.

LSD2176

LSD4661

PARKING BRAKE

TRAFFIC SIGN RECOGNITION (TSR) (if
so equipped)

Starting and driving

5-23

-------------------------------------------------------------------------------------------------------------------------------------------------------------

WARNING

The TSR system is only intended to be a
support device to help provide the
driver with information. It is not a re-
placement for the driver’s attention to
traffic conditions or responsibility to
drive safely. It cannot prevent acci-
dents due to carelessness. It is the driv-
er’s responsibility to stay alert and
drive safely at all times.

SYSTEM OPERATION

The Traffic Sign Recognition (TSR) system
displays the following types of road signs:

O

A

Speed sign detected (in Canada)

O

B

Speed sign detected (in USA)

O

C

Speed sign detected (no speed limit

detected)

O

D

“Do not pass” sign detected

CAUTION

The TSR system is intended as an aid
to careful driving. It is the driver’s re-
sponsibility to stay alert, drive safely,
and observe all road regulations that
currently apply, including looking out
for road signs.

The TSR system may not function
properly

under

the

following

conditions:

When the road sign is not clearly
visible, for example, due to dam-
age or weather conditions.

LSD4807

LSD4505

5-24

Starting and driving

-------------------------------------------------------------------------------------------------------------------------------------------------------------

When rain, snow or dirt adheres to
the windshield in front of the
multi-sensing camera unit.

When

the

headlights

are

not

bright, for example, due to dirt on
the lens or if the aiming is not ad-
justed properly.

When strong light enters the cam-
era unit. (For example, the light di-
rectly shines on the front of the
vehicle at sunrise or sunset.)

When a sudden change in bright-
ness occurs. (For example, when
the vehicle enters or exits a tunnel
or under a bridge.)

If there are deviations in relation
to the navigation, for example due
to changes in the road routing.

When overtaking buses or trucks
with speed stickers.

TURNING THE TRAFFIC SIGN
RECOGNITION (TSR) SYSTEM ON
AND OFF

Perform the following steps to enable or
disable the TSR system.

1. Press the

button until “Settings” dis-

plays in the vehicle information display.
Use the

button to select “Driver As-

sistance.” Then press the ENTER button.

2. Select “Speed Limit Sign” and press the

ENTER button to turn the system on or
off.

SYSTEM TEMPORARILY
UNAVAILABLE

If the vehicle is parked in direct sunlight
under high temperature conditions (over
approximately

104°F

[40°C])

and

then

started, the TSR system may be deacti-
vated automatically. The “Not Available
High Camera Temp” warning message will
appear in the vehicle information display.

Action to take:

When the interior temperature is reduced,
the TSR system will resume operating
automatically.

SYSTEM MALFUNCTION

If the TSR system malfunctions, it will be
turned off automatically and the system
“Malfunction” warning message will appear
in the vehicle information display.

Action to take:

If the TSR “Malfunction” message appears,
pull off the road at a safe location and stop
the vehicle. Turn the engine off and restart
the engine. If the TSR “Malfunction” mes-
sage continues to appear, have the system
checked. It is recommended that you visit a
NISSAN dealer for this service.

LSD4808

Starting and driving

5-25

-------------------------------------------------------------------------------------------------------------------------------------------------------------

SYSTEM MAINTENANCE

The TSR system uses the same multi-
sensing front camera unit that is used by
the Lane Departure Warning (LDW) system,
located in front of the interior rearview mir-
ror. For additional information, see ”System
maintenance” (P. 5-30).

WARNING

Failure to follow the warnings and in-
structions for proper use of the LDW
system could result in serious injury or
death.

This system is only a warning device
to inform the driver of a potential un-
intended lane departure. It will not
steer the vehicle or prevent loss of
control. It is the driver’s responsibility
to stay alert, drive safely, keep the
vehicle in the traveling lane, and be in
control of the vehicle at all times.

The LDW system will operate when the ve-
hicle is driven at speeds of approximately
37 mph (60 km/h) and above, and only
when the lane markings are clearly visible
on the road.

The LDW system monitors the lane mark-
ers on the traveling lane using the camera
unit

O

A

located above the inside mirror.

The LDW system warns the driver that the
vehicle is beginning to leave the driving
lane with an indicator and a steering wheel
vibration. For additional information, see
“LDW system operation” (P. 5-27).

LSD4661

LANE DEPARTURE WARNING (LDW)

5-26

Starting and driving

-------------------------------------------------------------------------------------------------------------------------------------------------------------

LDW SYSTEM OPERATION

The LDW system provides a lane departure
warning function when the vehicle is driven
at speeds of approximately 37 mph (60
km/h) and above and the lane markings
are clear. When the vehicle approaches ei-
ther the left or the right side of the traveling
lane, the steering wheel will vibrate and the
LDW indicator on the instrument panel will
blink to alert the driver.

The warning function will stop when the
vehicle returns inside of the lane markers.

LSD3705

Starting and driving

5-27

-------------------------------------------------------------------------------------------------------------------------------------------------------------


Content      ..     20      21      22      23     ..