Nissan Z (2023 year). Manual in english - page 20
You should be aware that incomplete or
improper servicing may result in operat-
ing difficulties or excessive emissions, and
could affect your warranty coverage.
If in
doubt about any servicing, it is recom-
mended you have it done by a NISSAN
dealer.
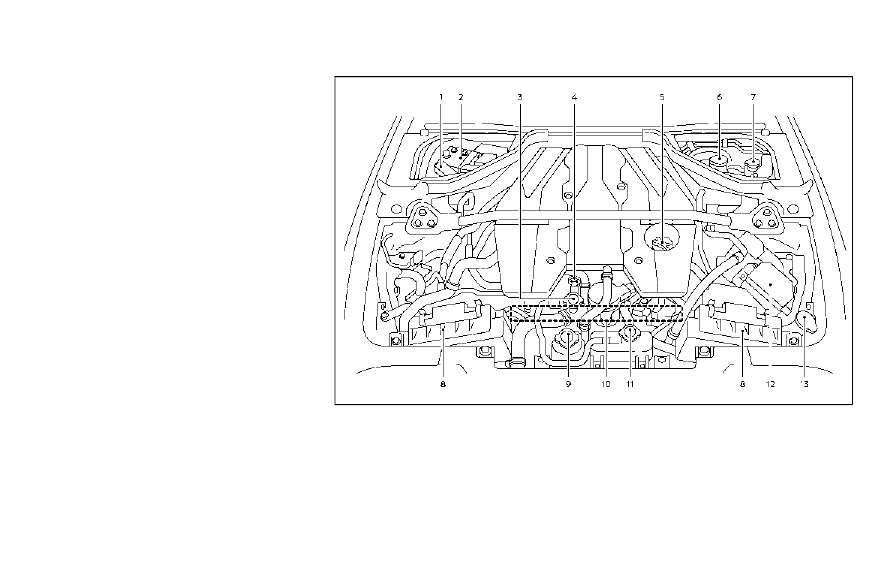
WAA0400X
VR30DDTT ENGINE MODEL
1.
Fuse/fusible link holder
2.
Battery
3.
Radiator filler cap
4.
Engine oil dipstick
5.
Engine oil filler cap
6.
Brake fluid reservoir
7.
Clutch fluid reservoir (Manual Transmis-
sion models)
8.
Air cleaner
9.
Intercooler cooling reservoir
10
Drive belt location
11.
Engine coolant reservoir
12.
Fuse/fusible link holder
13.
Window washer fluid reservoir
Do-it-yourself
8-3
ENGINE COMPARTMENT CHECK LOCATIONS