Nissan Pathfinder (2022 year). Manual in english - page 34
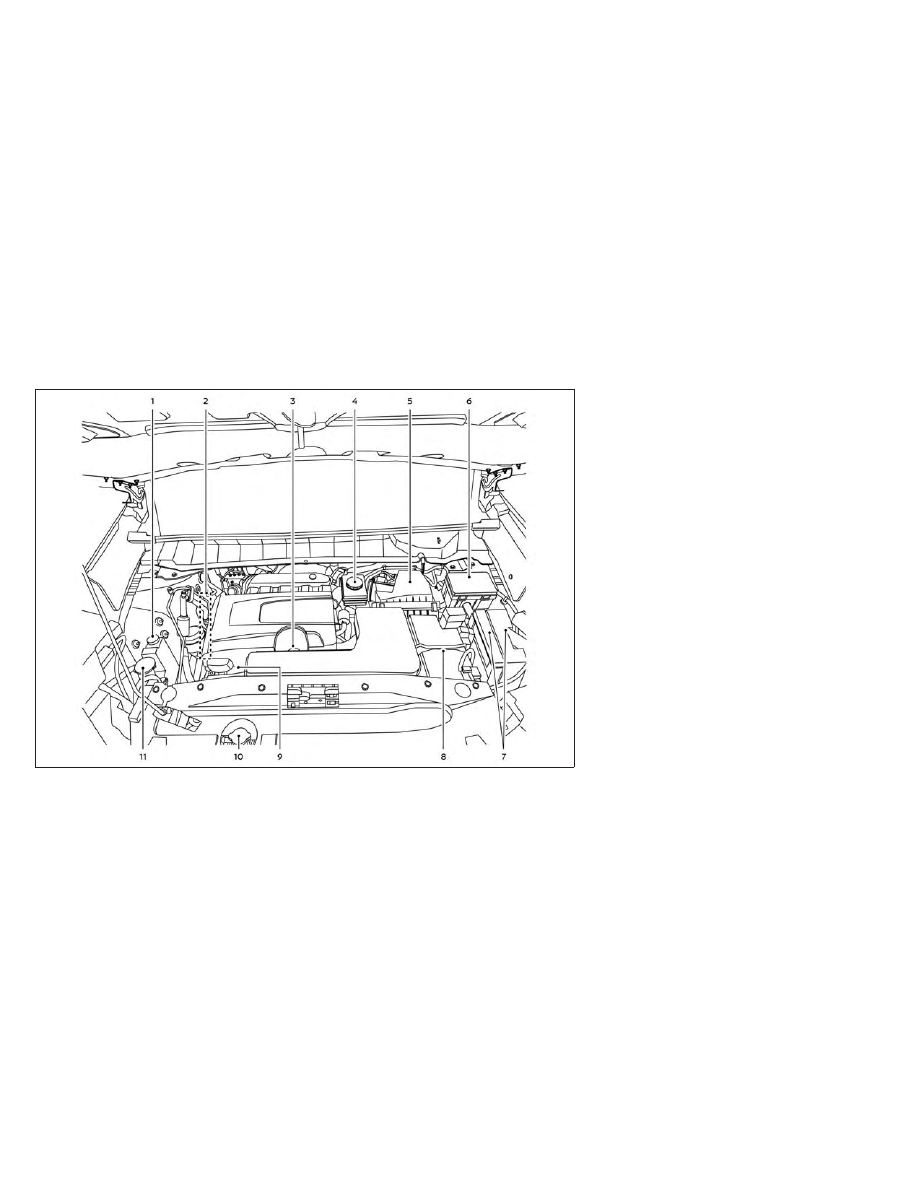
3.5L 6 Cylinder (VQ35DD engine model)
1.
Engine coolant reservoir
2.
Drive belt location
3.
Engine oil filler cap
4.
Brake fluid reservoir
5.
Air cleaner
6.
Fuse box
7.
Fuse/Fusible link box
8.
Battery
9.
Engine oil dipstick
10.
Radiator cap
11.
Windshield-washer fluid reservoir
NOTE:
Your vehicle may not be equipped
with an engine cover.
LDI3596
ENGINE COMPARTMENT CHECK
LOCATIONS
8-4
Do-it-yourself