Nissan Qashqai (2022 year). Manual in english - page 7


  Index      Manuals     Nissan Qashqai (2022 year). Manual in english


Search            copyright infringement  


Content      ..     5      6      7      8     ..


Nissan Qashqai (2022 year). Manual in english - page 7


WAC0086X

This setting allows the customer to en-

able/disable the ECO pedal guide func-

tion.
1. Use the

buttons

to select “DISP

Mode”.

2. Press the OK

to select “Pedal” or

“Inst.FE.”.

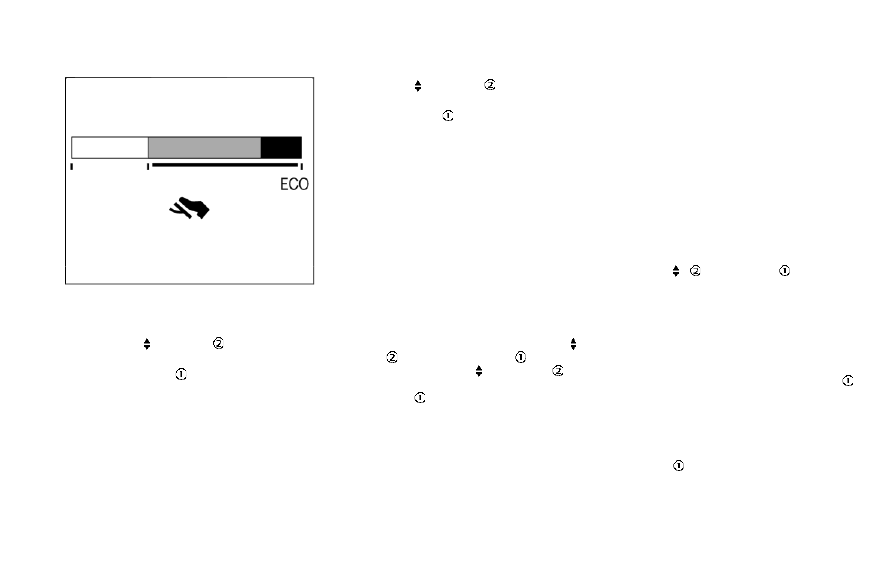
For detailed information, see “ECO mode

system” (P.5-32).

ECO Drive Report:
- Display

This setting allows the customer to en-

able/disable the ECO Drive Report in the

vehicle information display.

1. Use the

buttons

to select “Dis-

play”.

2. Press the OK

to turn ON/OFF the

ECO management display in the vehi-

cle information display.

- View History

This setting allows the customer to reset

the past history of the fuel economy and

the best fuel economy.

Welcome Effect:

You can choose whether or not to display

the welcome screen when the ignition

switch is placed in the ON position. You

can also choose the following items to

define how the welcome screen looks:

.

Dial Effect

.

Display Effect

Select “Welcome Effect” using the

buttons

and press the OK

to select

this menu. Use the

buttons

to

navigate between the menu options and

press the OK

to turn each function ON/

OFF.

Vehicle Settings

The vehicle settings allows the customer

to change settings for the following

settings.

.

Lighting

.

Turn indicator

.

Locking

.

Wipers

.

Driving Position (if so equipped)

.

Rear Door Alert

.

Remote start (if so equipped)

The vehicle settings can be changed

using the

, and the OK

buttons.

Lighting:

The “Lighting” menu has the following

options:

.

Welcome Light
The welcome lighting can be set to be

ON or OFF. From the “Lighting” menu,

select “Welcome Light”. Use the OK

to turn this feature ON or OFF.

.

Auto Room Lamp
The interior light timer can be set to

be ON or OFF. From the “Lighting”

menu, select “Auto Room Lamp”. Use

the OK

to turn this feature ON or

OFF.

.

Light Sensitivity
The sensitivity of the Intelligent Auto

Instruments and controls

2-23

-------------------------------------------------------------------------------------------------------------------------------------------------------------

2-24

Instruments and controls

Headlight can be adjusted. From the

“Lighting” menu, select “Light Sensitiv-

ity”. Use the

buttons

and the OK

to select the required sensitivity.

The following options are available:
— Turn on earliest
— Turn on earlier
— Turn on standard
— Turn on later

.

Light Off Delay
The duration of the automatic head-

lights can be changed from 0 to 180

seconds. From the “Lighting” menu,

select “Light Off Delay”. Use the OK

to change the duration.

Turn indicator:

The “3 Flash Pass” overtaking feature can

be set to be ON or OFF. From the “Turn

indicator” menu, select “3 Flash Pass”. Use

the OK

to turn this feature ON or OFF.

Locking:

There are the following options in the

“Locking” menu:

.

I–Key Door Lock (if so equipped)
When this item is turned on, the

request switch on the door is acti-

vated. From the “Locking” menu, select

“I-Key Door Lock”. Use the OK

to

activate or deactivate this function.

.

Selective Unlock
When this item is turned on, and the

door handle request switch on the

driver’s or front passenger’s side door

is pushed, only the corresponding

door is unlocked. All the doors can

be unlocked if the door handle re-

quest switch is pushed again within 1

minute. When this item is turned to off,

all the doors will be unlocked when

the door handle request switch is

pushed once. From the “Locking”

menu, select “Selective Unlock”. Use

the OK

to activate or deactivate this

function.

.

Auto Door Unlock
The “Auto Door Unlock” feature allows

the customer to customize the auto

door unlock options.
— Ignition OFF
— Shift to Park (for Continuously Vari-

able Transmission (CVT) models)

— Off

.

Answer Bk. Horn (if so equipped)
When the answer back horn is on, the

horn will chirp and the hazard indica-

tors will flash twice when locking the

vehicle with the Intelligent Key or

remote keyless entry function.

Wipers:

.

Speed Dependent
The “Speed Dependent” feature can be

activated or deactivated. From the

“Wipers” menu, select “Speed Depen-

dent”. Use the OK

to turn this

feature ON or OFF.

.

Reverse Link
The “Reverse Link” wiper feature can

be set to be ON or OFF. From the

“Wipers” menu, select “Reverse Link”.

Use the OK

to turn this feature ON

or OFF.

.

Drip wipe
The “Drip wipe” feature can be set to

be ON or OFF. From the “Wipers” menu,

select “Drip wipe”. Use the OK

to turn

this feature ON or OFF.

Driving Position (if so equipped):

.

Exit Seat Slide
When this item is turned on, this

feature will move the driver’s seat

backward for an easy exit when the

ignition switch is turned off and the

driver’s door is opened. After getting

into the vehicle and placing the igni-

tion switch in the ON position, the

driver’s seat will move to the previous

set position. See “Memory Seat” (P.3-

34).

-------------------------------------------------------------------------------------------------------------------------------------------------------------

Rear Door Alert:

.

Horn & Alert
When selected, the alert is displayed

and the horn sounds.

.

Alert Only
When selected, only the alert is dis-

played.

.

OFF
When selected, no alert or horn will be

active.

For additional information, refer to “Rear

door alert” (P.2-63).

Remote start (if so equipped):

The “Remote start” feature allows user to

turn the remote engine start on or off.

When turned on, the engine can be

restarted remotely. For additional infor-

mation, refer to “Remote engine start”

(P.3-23).

Maintenance

The maintenance mode allows you to set

alerts for the reminding of maintenance

intervals. To change an item:
Select “Maintenance” using the

switch

and press OK

.

Oil and Filter:

This indicator appears when the custo-

mer set distance comes for changing the

engine oil and filter. You can set or reset

the distance for checking or replacing

these items. For scheduled maintenance

items and intervals, refer to the “9. Main-

tenance and schedules” section.

Tire:

This indicator appears when the custo-

mer set distance comes for replacing

tires. You can set or reset the distance

for replacing tires.

WARNING

The tire replacement indicator is not

a substitute for regular tire checks,

including tire pressure checks. See

“Changing wheels and tires” (P.8-37).

Many factors including tire inflation,

alignment, driving habits and road

conditions affect tire wear and when

tires should be replaced. Setting the

tire replacement indicator for a cer-

tain driving distance does not mean

your tires will last that long. Use the

tire replacement indicator as a guide

only and always perform regular tire

checks. Failure to perform regular

tire checks, including tire pressure

checks could result in tire failure.

Serious vehicle damage could occur

and may lead to a collision, which

could result in serious personal in-

jury or death.

Other:

This indicator appears when the custo-

mer set distance comes for checking or

replacing maintenance items other than

the engine oil, oil filter and tires. Other

maintenance items can include such

things as air filter or tire rotation. You

can set or reset the distance for checking

or replacing the items.

Instruments and controls

2-25

-------------------------------------------------------------------------------------------------------------------------------------------------------------

2-26

Instruments and controls

Alarm (if so equipped)

This setting allows the customer to set

alarms.
Select “Alarm” using the

button

and

press OK button

.

Timer Alert (if so equipped):

This setting allows the customer to set an

alert to notify the driver that the set time

has been reached.
1. Use the

button

to select “Timer

Alert”.

2. Press the OK button

.

3. To change the timer amount, use the

button

and the OK button

to

save the selected time amount.

Navigation (if so equipped):

This setting allows the customer to en-

able/disable the alert for navigation in the

vehicle information display.
1. Use the

button

to select “Navi-

gation”.

2. Press the OK button

to turn ON/OFF

the alert.

Phone (if so equipped):

This setting allows the customer to en-

able/disable the alert for an incoming call

in the vehicle information display.

1. Use the

button

to select

“Phone”.

2. Press the OK button

to turn ON/OFF

the alert.

Mail (if so equipped):

This setting allows the customer to en-

able/disable the alert for incoming mail in

the vehicle information display.
1. Use the

button

to select “Mail”.

2. Press the OK button

to turn ON/OFF

the alert.

Tire Pressures

The settings in the “Tire pressures” menu

are all related to the Tire Pressure Mon-

itoring System (TPMS). (See “Tire Pressure

Monitoring System (TPMS)” (P.5-5), “Tire

Pressure Monitoring System (TPMS)” (P.6-

3), “Tire Pressure Monitoring System

(TPMS)” (P.8-29).)

-------------------------------------------------------------------------------------------------------------------------------------------------------------

Tire Pressure Unit:

The unit for tire pressure that displays in

the vehicle information display can be

changed to:

.

psi

.

kPa

.

bar

.

Kgf/cm

2

Use the

button

and the OK button

to select and change the unit.

If necessary, refer to the following table to

convert between units.

JVI0938X

Unit

The units that are shown in the vehicle

information display can be changed:

.

Mileage

.

Tire pressures

.

Temperature

Use the

button , and the OK button

to select and change the units of the

vehicle information display.

Mileage:

The unit for the mileage that is shown in

the vehicle information display can be

changed to:

.

km, l/100km

.

km, km/l

.

miles, MPG

Use the

button

and the OK button

to select and change the unit.

Tire pressures:

See “Tire Pressures” (P.2-26).

Temperature:

The temperature that is shown in the

vehicle information display can be chan-

ged from:

.

°C (Celsius)

.

°F (Fahrenheit)

Use the

button

to toggle choices.

Instruments and controls

2-27

-------------------------------------------------------------------------------------------------------------------------------------------------------------

2-28

Instruments and controls

Language

The language of the vehicle information

display can be changed.
Use the

button , and the OK button

to select and change the language of

the vehicle information display.

Factory Reset

The settings in the vehicle information

display can be reset back to the factory

default. To reset the vehicle information

display:
1. Select “Factory Reset” using the

button

and press the OK button

.

2. Select “YES” to return all settings back

to default by pressing the OK button

.

-------------------------------------------------------------------------------------------------------------------------------------------------------------

WAC0175X

Instruments and controls

2-29

-------------------------------------------------------------------------------------------------------------------------------------------------------------

2-30

Instruments and controls

WAC0410X

-------------------------------------------------------------------------------------------------------------------------------------------------------------

VEHICLE INFORMATION DISPLAY

WARNINGS AND INDICATORS

The displayed images may differ depend-

ing on the model.

1. Engine start operation indicator

(for Continuously Variable Trans-

mission (CVT) models)

This indicator appears when the shift

lever is in the P (Park) position.
This indicator means that the engine will

start by pushing the ignition switch with

the brake pedal depressed. You can start

the engine directly in any position of the

ignition switch.

2. Engine start operation indicator

(for Manual Transmission (MT)

models)

This indicator means that the engine will

start by pushing the ignition switch with

the clutch pedal depressed. You can start

the engine directly in any position of the

ignition switch.
You can also start the engine by pushing

the ignition switch with the brake pedal

depressed when the shift lever is in the N

(Neutral) position.

3. No Key detected warning (if so

equipped)

This warning appears when the door is

closed with the Intelligent Key left outside

the vehicle and the ignition switch in the

ON position. Make sure that the Intelligent

Key is inside the vehicle.
See “Intelligent Key system” (P.3-11) for

more details.

4. Shift to Park warning (CVT mod-

els) (if so equipped)

This warning appears when the ignition

switch is pushed to stop the engine with

the shift lever in any position except the P

(Park) position.
If this warning appears, move the shift

lever to the P (Park) position or place the

ignition switch in the ON position.
An inside warning chime will also sound.

(See “Intelligent Key system” (P.3-11).)

5. Key Battery Low warning (if so

equipped)

This warning appears when the Intelli-

gent Key battery is running out of power.
If this indicator appears, replace the

battery with a new one. See “Intelligent

Key battery replacement” (P.8-23).

6. Engine start operation for Intelli-

gent Key system indicator (if so

equipped)

This indicator appears when the Intelli-

gent Key battery is running out of power

and when the Intelligent Key system and

vehicle are not communicating normally.
If this indicator appears, touch the igni-

tion switch with the Intelligent Key while

depressing the brake pedal. (See “Intelli-

gent Key battery discharge” (P.5-17).)

7. Key ID incorrect warning (if so

equipped)

This warning appears when the ignition

switch is placed from the LOCK position

and the Intelligent Key cannot be recog-

nized by the system. You cannot start the

engine with an unregistered key. Use the

registered Intelligent Key.
See “Intelligent Key system” (P.3-11).

8. Release Parking Brake warning

This warning appears when the vehicle

speed is above 4 MPH (7 km/h) (models

not equipped with electronic parking

brake) or 2 MPH (4 km/h) (models

equipped with electronic parking brake)

and the parking brake is applied. Stop the

vehicle and release the parking brake.

Instruments and controls

2-31

-------------------------------------------------------------------------------------------------------------------------------------------------------------

2-32

Instruments and controls

9. Low fuel level warning

This warning appears when the fuel level

in the fuel tank is getting low. Refuel as

soon as it is convenient, preferably before

the fuel gauge reaches 0 (Empty). There

will be a small reserve of fuel in the tank

when the fuel gauge needle reaches 0

(Empty).

10. Low Washer Fluid warning (if so

equipped)

This warning appears when the window

washer fluid is at a low level. Add window

washer fluid as necessary. For additional

information, refer to “Window washer

fluid” (P.8-10).

11. Door/liftgate open warning

This warning appears if any of the doors

and/or the liftgate are open or not closed

securely. The vehicle icon indicates which

door or the liftgate is open on the display.

12. Rear seat belt warning

This rear seat belt warning appears after

the ignition switch is placed in the ON

position. If any of the rear passenger’s

seat belts is not fastened, the seat icon

illuminates in red to show which seat belt

is not fastened. The seat icon illuminates

in red until the corresponding rear pas-

senger’s seat belt is fastened. The warn-

ing will automatically turn off after

approximately 35 seconds. When the

vehicle speed exceeds 10 MPH (15 km/h),

if a rear passenger’s seat belt is unfas-

tened, a buzzer will sound and the seat

icon illuminates in red. The seat icon

illuminates in red until the corresponding

rear passenger’s seat belt is fastened. The

warning will automatically turn off after

approximately 35 seconds. For precau-

tions on seat belt usage, see “Seat belts”

(P.1-12).

13. Key System Error: See Owner’s

Manual warning (if so equipped)

This warning appears if there is a mal-

function in the Intelligent Key system.
If this warning appears while the engine is

stopped, the engine cannot be started. If

this warning appears while the engine is

running, the vehicle can be driven. How-

ever, it is recommended that you visit a

NISSAN dealer for repair as soon as

possible.

14. Loose Fuel Cap warning

This warning appears when the fuel-filler

cap is not tightened correctly after the

vehicle has been refueled. For additional

information, refer to “Fuel-filler cap” (P.3-

28).

15. Tire Pressure Low — Add Air

warning

This warning appears when the low tire

pressure warning light in the meter

illuminates and low tire pressure is de-

tected. The warning appears each time

the ignition switch is placed in the ON

position as long as the low tire pressure

warning light remains illuminated. If this

warning appears, stop the vehicle and

adjust the pressure to the recommended

COLD tire pressure shown on the Tire and

Loading Information label. (See “Low tire

pressure warning light” (P.2-14) and “Tire

Pressure Monitoring System (TPMS)” (P.5-

5).)

16. Low Oil Pressure Stop Vehicle

warning

This warning appears if low engine oil

pressure is detected. If the warning ap-

pears during normal driving, pull off the

road in a safe area and stop the engine

immediately. It is recommended that you

call a NISSAN dealer.
The low oil pressure warning is not

designed to indicate a low oil level. Use

the dipstick to check the oil level. (See

“Engine oil” (P.8-6).)

-------------------------------------------------------------------------------------------------------------------------------------------------------------

CAUTION

Running the engine with the engine

oil pressure warning displayed could

cause serious damage to the engine.

17. AWD Error: See Owner’s Manual

warning (if so equipped)

This warning appears when the All-Wheel

Drive (AWD) system is not functioning

properly while the engine is running.

Reduce vehicle speed and have the sys-

tem checked. It is recommended that you

visit a NISSAN dealer for this service. See

“Intelligent 4x4” (P.5-123).

18. AWD High Temp. Stop vehicle

warning (if so equipped)

This warning may appear while trying to

free a stuck vehicle due to increased oil

temperature. The driving mode may

change to Two-Wheel Drive (2WD). If this

warning is displayed, stop the vehicle with

the engine idling, as soon as it is safe to

do so. Then if the warning turns off, you

can continue driving. See “Intelligent 4x4”

(P.5-123).

19. Tire Size Incorrect: See Owner’s

Manual warning (if so equipped)

This warning may appear if there is a

large difference between the diameters of

the front and rear wheels and tires. Pull

off the road in a safe area, with the engine

idling. Check that all the tire sizes are the

same, that the tire pressure is correct and

that the tires are not excessively worn.

See “Intelligent 4x4” (P.5-123).

20. Battery Voltage Low Charge

Battery warning

This warning appears when the battery

voltage is low and the battery needs to be

charged.

21. Shipping Mode On Push Storage

Fuse warning (if so equipped)

This warning may appear if the extended

storage fuse switch is not pushed in

(switched on). When this warning ap-

pears, push in (switch on) the extended

storage fuse switch to turn off the warn-

ing. For more information, see “Extended

storage fuse switch” (P.8-21).

22. Power will turn off to save the

battery warning

This warning appears after the ignition

switch is in the ON position for a certain

period of time.

23. Power turned off to save the

battery warning

This warning appears after the ignition

switch is automatically turned OFF to

save the battery.

24. Reminder: Turn OFF Headlights

warning

This warning appears when the driver

side door is opened with the headlight

switch is left ON and the ignition switch is

placed in the OFF or LOCK position. Place

the headlight switch in OFF (if so

equipped) or AUTO position. For addi-

tional information, see “Headlight and

turn signal switch” (P.2-52).

25. Headlight System Error: See

Owner’s Manual warning (if so

equipped)

This warning appears if the LED head-

lights are malfunctioning. Have the sys-

tem checked. It is recommended that you

visit a NISSAN dealer for this service.

Instruments and controls

2-33

-------------------------------------------------------------------------------------------------------------------------------------------------------------

2-34

Instruments and controls

26. Timer Alert — Time for a driver

break? indicator

This indicator appears when the set “Time

for a driver break?” indicator activates.

You can set the time for up to 6 hours.

27. Chassis Control System Error:

See Owner’s Manual warning

This warning appears if the chassis con-

trol module detects an error in the

chassis control system. Have the system

checked. It is recommended that you visit

a NISSAN dealer for this service. (See

“Chassis control” (P.5-133).)

28. Cruise control indicator (if so

equipped)

This indicator shows the cruise control

system status. The status is shown by the

color.
See “Cruise control” (P.5-62) for details.

29. Intelligent Cruise Control (ICC)

indicator (if so equipped)

This indicator shows the Intelligent Cruise

Control (ICC) system status. The status is

shown by the color. (See “Intelligent

Cruise Control (ICC)” (P.5-75).)

30. Continuously Variable Trans-

mission (CVT) position indicator

(CVT models)

This indicator shows the automatic shift

position.
In the manual shift mode, when the

transmission does not shift to the se-

lected gear due to a transmission protec-

tion mode, the CVT position indicator will

blink and a chime will sound.
See “Continuously Variable Transmission

(CVT)” (P.5-20) for further details.

31. CVT Error: See Owner’s Manual

warning (CVT models)

This warning appears when there is a

malfunction with the CVT system. If this

warning comes on, have the system

checked. It is recommended that you visit

a NISSAN dealer for this service.

32 Malfunction warning

This warning appears when the following

systems malfunction.

.

Lane Departure Warning (LDW)

.

Intelligent Lane Intervention (I-LI)

.

Blind Spot Warning (BSW)

.

Rear Cross Traffic Alert (RCTA)

.

Automatic Emergency Braking (AEB)

with Pedestrian Detection

.

Intelligent Forward Collision Warning

(I-FCW)

.

Rear Automatic Braking (RAB)

For more details, see “Lane Departure

Warning (LDW)” (P.5-35), “Intelligent Lane

Intervention (I-LI)” (P.5-40), “Blind Spot

Warning (BSW)” (P.5-46), “Rear Cross Traf-

fic Alert (RCTA)” (P.5-54), “ProPILOT assist”

(P.5-64), “Automatic Emergency Braking

(AEB) with Pedestrian Detection system”

(P.5-97), “Intelligent Forward Collision

Warning (I-FCW)” (P.5-107) or “Rear Auto-

matic Braking (RAB)” (P.5-116).

33. Drive mode indicators

These indicators illuminate in the vehicle

information display when either the ECO

or SPORT mode is selected.
For additional information, refer to

“SPORT mode switch” (P.5-32) or “ECO

mode system” (P.5-32).

34. Unavailable: High Cabin Tem-

perature warning

This warning appears if the interior tem-

perature of the vehicle has reached such

a high temperature that the sensor for

the Lane Departure Warning (LDW), Intel-

ligent Lane Intervention (I-LI) or Traffic

Sign Recognition (TSR) (if so equipped)

system can no longer function reliably.

Once the interior temperature has

-------------------------------------------------------------------------------------------------------------------------------------------------------------

reached normal levels, the warning

should disappear.
If the warning continues to display, have

the system checked. It is recommended

that you visit a NISSAN dealer for this

service.
For additional information, refer to “Lane

Departure Warning (LDW)” (P.5-35), “Intel-

ligent Lane Intervention (I-LI)” (P.5-86) or

“Traffic Sign Recognition” (P.2-43).

35. Not Available: Poor Road Con-

ditions warning (if so equipped)

This message appears when the Intelli-

gent Lane Intervention (I-LI) system or the

Intelligent Cruise Control (ICC) system

becomes unavailable because the road

is slippery. See “Intelligent Lane Interven-

tion (I-LI)” (P.5-40) or “Intelligent Cruise

Control (ICC)” (P.5-75).

36. Currently unavailable warning

This message appears when the Intelli-

gent Lane Intervention (I-LI) system or the

Intelligent Cruise Control (ICC) system

becomes unavailable because the VDC is

turned off or operates. For additional

information, refer to “Intelligent Lane

Intervention (I-LI)” (P.5-40) or “Intelligent

Cruise Control (ICC)” (P.5-75).

37. Forward Driving Aids Tempora-

rily Disabled Front Sensor Blocked/

Unavailable: Front Radar Obstruc-

tion warning

This message appears when the front

radar sensor may be obstructed due to:

.

mud, dirt, snow, ice, etc.

.

inclement weather (rain, fog, snow,

etc)

All forward driving aids are temporarily

disabled until the system detects that the

front radar sensor is no longer ob-

structed.
See “Automatic Emergency Braking (AEB)

with Pedestrian Detection system” (P.5-

97), “Intelligent Forward Collision Warning

(I-FCW)” (P.5-107) or “ProPILOT assist” (P.5-

64).

38. Unavailable: Side Radar Ob-

struction warning

This warning appears when the Blind

Spot Warning (BSW)/Rear Cross Traffic

Alert (RCTA) system becomes unavailable

because a radar blockage is detected.

(See “Blind Spot Warning (BSW)” (P.5-46) or

“Rear Cross Traffic Alert (RCTA)” (P.5-54).)

39. Press Brake Pedal warning (for

electronic parking brake equipped

models)

This indicator appears in the following

situations:

.

The driver tries to release the electro-

nic parking brake manually without

depressing the brake pedal.

.

The vehicle is stopped on a steep hill

and there is a possibility of moving

backward, even if the electronic park-

ing brake is applied.

.

This warning appears if the vehicle

moves while the automatic brake hold

(if so equipped) is activated.

40. Lane Departure Warning (LDW)/

Intelligent Lane Intervention (I-LI)

indicator

This indicator shows when the LDW and/

or I-LI systems are engaged.
See “Lane Departure Warning (LDW)” (P.5-

35) or “Intelligent Lane Intervention (I-LI)”

(P.5-40).

Instruments and controls

2-35

-------------------------------------------------------------------------------------------------------------------------------------------------------------

2-36

Instruments and controls

41. Steering assist indicator (if so

equipped)

This indicator appears when the steering

assist system is engaged.
See “ProPILOT assist” (P.5-64).

42. Steering assist alert (if so

equipped)

This message may appear when the

steering assist system is engaged.
It will be displayed under the following

condition:

.

When not holding the steering wheel

or when there is no steering wheel

operation.

Hold on the steering wheel immediately.

When the steering operation is detected,

the warning turns off and the steering

assist function is automatically restored.

For additional information, refer to “Pro-

PILOT assist” (P.5-64).

43. Automatic Emergency Braking

(AEB) emergency warning indicator

This indicator illuminates along, with an

audible warning, when the system de-

tects the possibility of a forward collision.
See “Automatic Emergency Braking (AEB)

with Pedestrian Detection system” (P.5-

97).

44. Rear Door Alert is activated

When the system is enabled, this message

appears when the Rear Door Alert system

is active and can remind the driver to

check the back seat.

.

Using the steering switch, a driver can

select “Dismiss Message” to clear the

display for a period of time. If no

selection is made, this message auto-

matically turns off after a period of

time.

.

Using the steering switch, a driver can

select “Disable Alert” to disable the

horn alert for the remainder of the

current trip.

For additional information, see “Rear door

alert” (P.2-63).

WARNING

Selecting “Dismiss Message” during a

stop within a trip temporarily dis-

misses the message for that stop

without turning the system off.

Alerts can be provided for other

stops during the trip. Selecting “Dis-

able Alert” turns off the Rear Door

Alert system for the remainder of a

trip and no audible alert will be

provided.

NOTE:
This system is disabled until a driver

enables it using the vehicle information

display. See “Vehicle Settings” (P.2-23).

45. Check Back Seat For all articles

When the system is enabled, this message

appears when the vehicle comes to a

complete stop, the shift lever is moved

from the D (Drive) position to P (Park)

position, and the driver exits the vehicle.

This message alerts the driver, after a

period of time, to check for items in the

rear seat after the audible alert has been

provided.

NOTE:
This system is disabled until a driver

enables it using the vehicle information

display. For additional information, see

“Vehicle Settings” (P.2-23).

46. Rear Automatic Braking (RAB)

indicator

This indicator illuminates to indicate the

status of the Rear Automatic Braking

(RAB) system.
See “Rear Automatic Braking (RAB)” (P.5-

116).

-------------------------------------------------------------------------------------------------------------------------------------------------------------

47. Rear Sonar System (RSS) indi-

cator

This indicator illuminates to indicate the

status of the Rear Sonar System.
See “Rear Sonar System (RSS)” (P.5-136).

48. Not Available Bad Weather (if so

equipped)

This message may appear when the

steering assist system is engaged.
Under the following conditions, the steer-

ing assist system is automatically can-

celed:

.

When the wiper low speed or high

speed operates.

.

When lane markers in the traveling

lane cannot be correctly detected for

a period of time due to such items as a

snow rut, reflection of light on a rainy

day or several unclear lane markers

are present.

If you want to use the steering assist

system again, cancel the ProPILOT assist

system and set it again when lane

markers are clearly visible.

49. Not available Front Camera

Obstructed (if so equipped)

This message may appear when the

Intelligent Cruise Control (ICC) system is

engaged.
Under the following conditions, the ICC

system is automatically canceled:

.

The camera area of the windshield is

fogged up or covered with dirt, water,

drops, ice, snow, etc.

.

Strong light, such as sunlight or high

beams from oncoming vehicles, enter

the front camera

50. Not Available Parking Brake On

(if so equipped)

This message may appear when the

Intelligent Cruise Control (ICC) system is

engaged.
Under the following condition, the ICC

system is automatically canceled:

.

The electronic parking brake is ap-

plied.

The above system cannot be used when

the electronic parking brake is activated.

51. Not Available Seat Belt Not

Fastened (if so equipped)

This message may appear when the

Intelligent Cruise Control (ICC) system is

engaged.
Under the following condition, the ICC

system is automatically canceled:

.

When the driver’s seat belt is not

fastened.

The ICC system cannot be used when the

driver’s seat belt is not fastened.

52. Press Brake Pedal (if so

equipped)

This message may appear when the

Intelligent Cruise Control (ICC) system is

engaged.
It will be displayed under the following

condition:

.

While the vehicle is stopped by the ICC

, the driver’s door is opened but the

electronic parking brake was not acti-

vated.

Step on the brake immediately.

Instruments and controls

2-37

-------------------------------------------------------------------------------------------------------------------------------------------------------------

2-38

Instruments and controls

53. Press brake pedal to operate

switch warning (if so equipped)

This warning appears if the automatic

brake hold switch is pushed without

depressing the brake pedal while the

automatic brake hold function is acti-

vated. Depress the brake pedal and push

the switch to deactivate the automatic

brake hold function. For more details, see

“Automatic brake hold” (P.5-29).

54. AUTO HOLD Caution Steep

Slope indicator (if so equipped)

This indicator appears when the auto-

matic brake hold function is activated

while the vehicle is on a steep hill.

55. Steep Slope Apply Foot Brake to

hold vehicle warning (if so

equipped)

This warning appears before the electro-

nic parking brake is applied and the brake

force of the automatic brake hold func-

tion is released when the vehicle is on a

steep hill, to prevent the vehicle rolls out.

56. Intelligent Driver Alertness (I-DA)

malfunction warning (if so

equipped)

This warning appears when the Intelli-

gent Driver Alertness (I-DA) system mal-

functions. See “Intelligent Driver Alertness

(I-DA)” (P.5-94).

57. Traffic Sign Recognition mal-

function warning (if so equipped)

This warning appears when the Traffic

Sign Recognition system malfunctions.

For more details, see “Traffic Sign Recog-

nition” (P.2-43).

58. Parking Sensor Error warning (if

so equipped)

This warning illuminates when there is a

malfunction with the Rear Sonar System

(RSS). For additional information, refer to

“Rear Sonar System (RSS)” (P.5-136).

-------------------------------------------------------------------------------------------------------------------------------------------------------------


Content      ..     5      6      7      8     ..