Nissan Murano Z50 (2007 year). Manual - part 108
CLIP AND FASTENER
EI-11
C
D
E
F
G
H
J
K
L
M
A
B
EI
Revision: 2006 July
2007 Murano
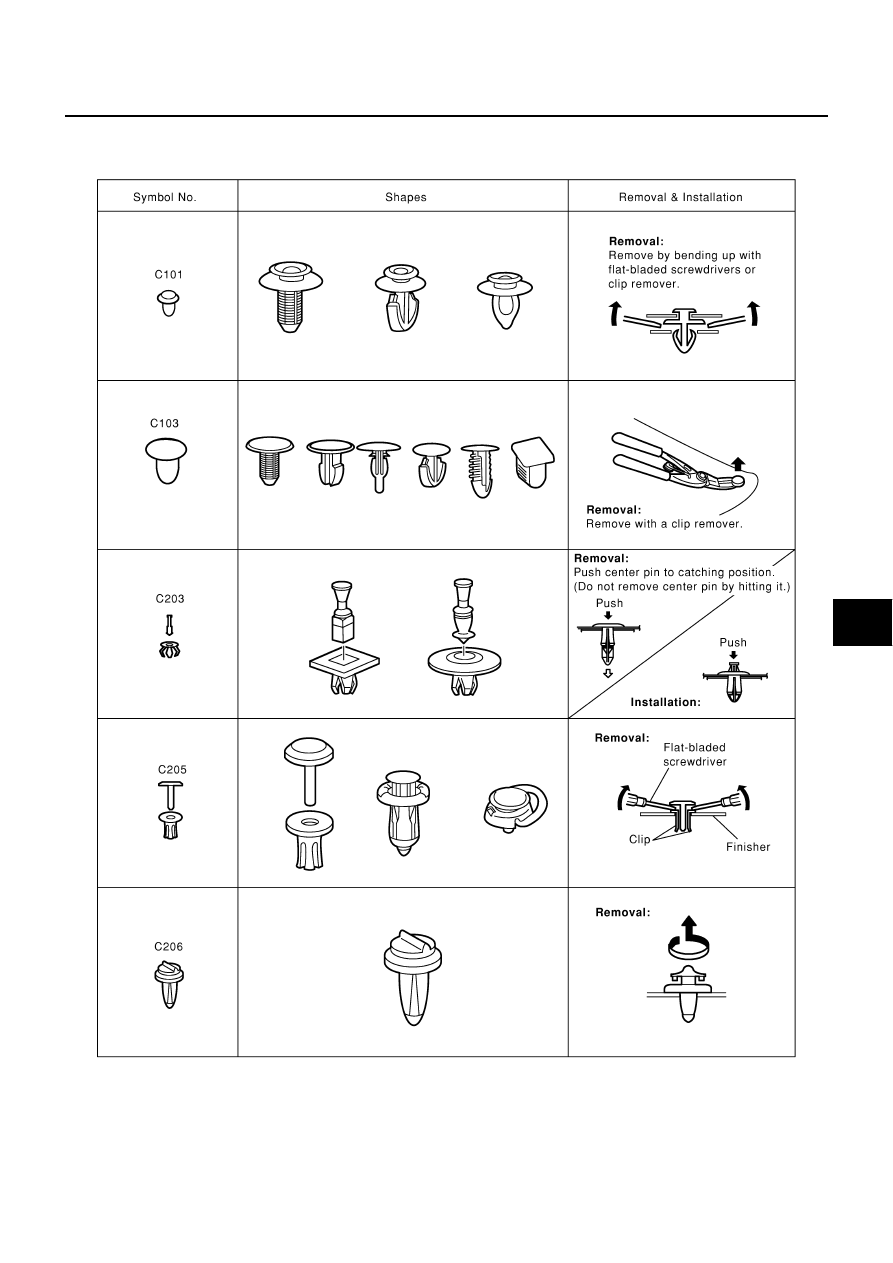
CLIP AND FASTENER
PFP:76906
Clip and Fastener
NIS001DY
SIIA0315E
|
|
|
CLIP AND FASTENER EI-11 C D E F G H J K L M A B EI Revision: 2006 July 2007 Murano CLIP AND FASTENER PFP:76906 Clip and Fastener NIS001DY SIIA0315E |