Nissan Murano Z50 (2007 year). Manual - part 76
 

  Index      Manuals     Nissan Murano Z50 (2007 year) - Service and Repair Manual


Search            copyright infringement  


Content      ..     74      75      76      77     ..


Nissan Murano Z50 (2007 year). Manual - part 76


DTC P0031, P0032, P0051, P0052 A/F SENSOR 1 HEATER

EC-165

C

D

E

F

G

H

I

J

K

L

M

A

EC

Revision: 2006 July

2007 Murano

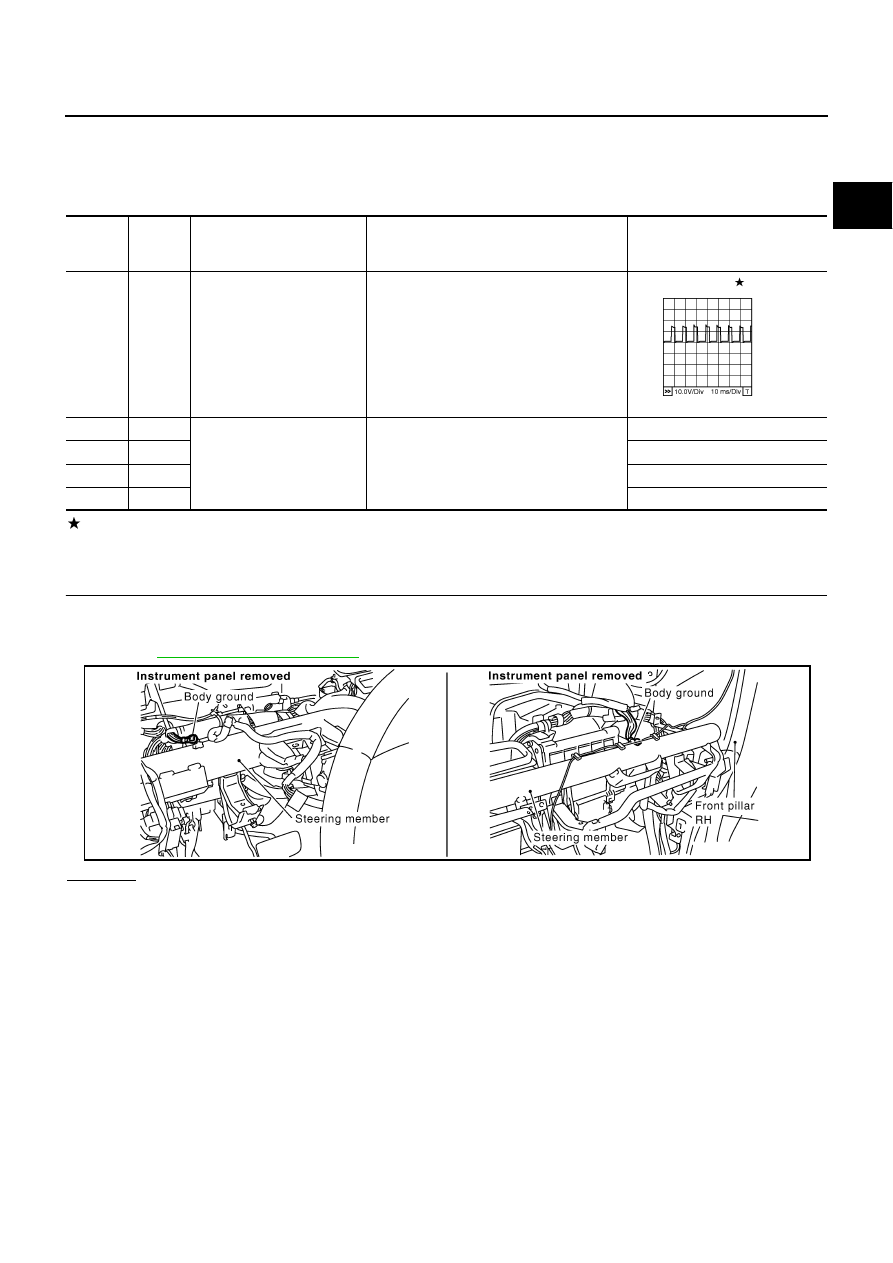
Specification data are reference values and are measured between each terminal and ground.
Pulse signal is measured by CONSULT-II.

CAUTION:

Do not use ECM ground terminals when measuring input/output voltage. Doing so may result in dam-
age to the ECM's transistor. Use a ground other than ECM terminals, such as the ground.

: Average voltage for pulse signal (Actual pulse signal can be confirmed by oscilloscope.)

Diagnostic Procedure

NBS0036V

1. 

CHECK GROUND CONNECTIONS

1.

Turn ignition switch OFF.

2.

Loosen and retighten two ground screws on the body.
Refer to 

EC-150, "Ground Inspection"

 .

OK or NG

OK

>> GO TO 2.

NG

>> Repair or replace ground connections.

TERMI-

NAL 

NO.

WIRE 

COLOR

ITEM

CONDITION

DATA (DC Voltage)

24

V

A/F sensor 1 heater
(Bank 2)

[Engine is running]

Warm-up condition

Idle speed

Approximately 5V

57

P

A/F sensor 1 (Bank 2)

[Engine is running]

Warm-up condition

Idle speed

Approximately 2.6V

58

SB

Approximately 2.3V

76

G/Y

Approximately 3.1V

77

LG

Approximately 2.3V

PBIB1584E

PBIB1835E

EC-166

DTC P0031, P0032, P0051, P0052 A/F SENSOR 1 HEATER

Revision: 2006 July

2007 Murano

2. 

CHECK AIR FUEL RATIO (A/F) SENSOR 1 POWER SUPPLY CIRCUIT

1.

Disconnect air fuel ratio (A/F) sensor 1 harness connector.

2.

Turn ignition switch ON.

3.

Check voltage between A/F sensor 1 terminal 3 and ground with
CONSULT-II or tester.

OK or NG

OK

>> GO TO 8.

NG

>> GO TO 3.

3. 

CHECK CONDENSER CIRCUIT-I

1.

Turn ignition switch OFF.

2.

Disconnect fuse block (J/B) harness connector M1.

3.

Check resistance between fuse block (J/B) terminal 9A and ground.
Refer to Wiring Diagram. 

OK or NG

OK

>> GO TO 4.

NG

>> GO TO 5.

4. 

DETECT MALFUNCTIONING PART

Check the following.

Harness connectors M82, F102

Fuse block (J/B) connector M1

15A fuse

Harness for open or short between A/F sensor 1 and fuse

>> Repair harness or connectors.

Voltage: Battery voltage

PBIB2293E

PBIB1683E

Resistance: Above 1M

 [at 25

°

C (77

°

F)]

DTC P0031, P0032, P0051, P0052 A/F SENSOR 1 HEATER

EC-167

C

D

E

F

G

H

I

J

K

L

M

A

EC

Revision: 2006 July

2007 Murano

5. 

CHECK CONDENSER CIRCUIT-II

1.

Disconnect condenser harness connectors.

2.

Check harness continuity between fuse block (J/B) terminal 9A and condenser terminal 1, condenser ter-
minal 2 and ground.
Refer to Wiring Diagram. 

3.

Also check harness for short to ground and short to power.

OK or NG

OK

>> GO TO 6.

NG

>> Repair open circuit or short to ground or short to power in harness or connectors.

6. 

CHECK CONDENSER

Refer to 

EC-168, "CONDENSER"

 .

OK or NG

OK

>> GO TO 7.

NG

>> Replace condenser.

7. 

CHECK INTERMITTENT INCIDENT

Refer to 

EC-141, "TROUBLE DIAGNOSIS FOR INTERMITTENT INCIDENT"

 .

>> INSPECTION END

8. 

CHECK A/F SENSOR 1 HEATER OUTPUT SIGNAL CIRCUIT

1.

Turn ignition switch OFF.

2.

Disconnect ECM harness connector.

3.

Check harness continuity between ECM terminal 2 (bank 1) or 24 (bank 2) and A/F sensor 1 terminal 4.
Refer to Wiring Diagram.

4.

Also check harness for short to ground and short to power.

OK or NG

OK

>> GO TO 9.

NG

>> Repair open circuit or short to ground or short to power in harness or connectors.

9. 

CHECK A/F SENSOR 1 HEATER

Refer to 

EC-168, "Component Inspection"

 .

OK or NG

OK

>> GO TO 10.

NG

>> GO TO 11.

10. 

CHECK INTERMITTENT INCIDENT

Perform 

EC-141, "TROUBLE DIAGNOSIS FOR INTERMITTENT INCIDENT"

 .

OK or NG

OK

>> GO TO 11.

NG

>> Repair or replace.

Continuity should exist.

Continuity should exist.

EC-168

DTC P0031, P0032, P0051, P0052 A/F SENSOR 1 HEATER

Revision: 2006 July

2007 Murano

11. 

REPLACE AIR FUEL RATIO (A/F) SENSOR 1

Replace malfunctioning air fuel ratio (A/F) sensor 1.

CAUTION:

Discard any air fuel ratio (A/F) sensor which has been dropped from a height of more than 0.5 m
(19.7 in) onto a hard surface such as a concrete floor; use a new one.

Before installing new air fuel ratio (A/F) sensor, clean exhaust system threads using Heated Oxy-
gen Sensor Thread Cleaner tool J-43897-18 or J-43897-12 and approved anti-seize lubricant.

>> INSPECTION END

Component Inspection

NBS0036W

AIR FUEL RATIO (A/F) SENSOR 1 HEATER

Check resistance between terminals 3 and 4.

Check continuity between terminals 3 and 1, 2, 5, 6, terminals 4 and
1, 2, 5, 6.

If NG, replace the A/F sensor 1.

CAUTION:

Discard any A/F sensor which has been dropped from a
height of more than 0.5 m (19.7 in) onto a hard surface such
as a concrete floor; use a new one.

Before installing new A/F sensor, clean exhaust system
threads using Heated Oxygen Sensor Thread Cleaner tool
J-43897-18 or J-43897-12 and approved anti-seize lubricant.

CONDENSER

1.

Turn ignition switch OFF.

2.

Disconnect condenser harness connector.

3.

Check resistance between condenser terminals 1 and 2.

Removal and Installation

NBS0036X

AIR FUEL RATIO (A/F) SENSOR 1

Refer to 

EM-25, "EXHAUST MANIFOLD AND THREE WAY CATALYST"

 .

Resistance: 2.3 - 4.3

 [at 25

°

C (77

°

F)]

Continuity should not exist.

PBIB1684E

Resistance

Above 1 M

 [at 25

°

C (77

°

F)]

PBIB0794E

DTC P0037, P0038, P0057, P0058 HO2S2 HEATER

EC-169

C

D

E

F

G

H

I

J

K

L

M

A

EC

Revision: 2006 July

2007 Murano

DTC P0037, P0038, P0057, P0058 HO2S2 HEATER

PFP:226A0

Description

NBS0030C

SYSTEM DESCRIPTION

The ECM performs ON/OFF control of the heated oxygen sensor 2 heater corresponding to the engine speed,
amount of intake air and engine coolant temperature. 

OPERATION

CONSULT-II Reference Value in Data Monitor Mode

NBS0030D

Specification data are reference values.

On Board Diagnosis Logic

NBS0030E

Sensor

Input signal to ECM

ECM function

Actuator

Camshaft position sensor (PHASE)

Engine speed

Heated oxygen sensor 2 
heater control

Heated oxygen sensor 2 heater

Crankshaft position sensor (POS)

Engine coolant temperature sensor

Engine coolant temperature

Mass air flow sensor

Amount of intake air

Engine speed rpm

Heated oxygen sensor 2 heater

Above 3,600

OFF

Below 3,600 rpm after the following conditions are met.

Engine: After warming up

Keeping the engine speed between 3,500 and 4,000 rpm for 1 
minute and at idle for 1 minute under no load

ON

MONITOR ITEM

CONDITION

SPECIFICATION

HO2S2 HTR (B1)
HO2S2 HTR (B2)

Engine speed: Below 3,600 rpm after the following conditions are met.

Engine: After warming up

Keeping the engine speed between 3,500 and 4,000 rpm for 1 minute and 
at idle for 1 minute under no load

ON

Engine speed: Above 3,600 rpm

OFF

DTC No.

Trouble diagnosis 

name

DTC detecting condition

Possible cause

P0037
0037
(Bank 1)

Heated oxygen 
sensor 2 heater 
control circuit low

The current amperage in the heated oxygen sen-
sor 2 heater circuit is out of the normal range.
(An excessively low voltage signal is sent to ECM 
through the heated oxygen sensor 2 heater.)

Harness or connectors
(The heated oxygen sensor 2 heater circuit is 
open or shorted.)

Heated oxygen sensor 2 heater

P0057
0057
(Bank 2)

P0038
0038
(Bank 1)

Heated oxygen 
sensor 2 heater 
control circuit high

The current amperage in the heated oxygen sen-
sor 2 heater circuit is out of the normal range.
(An excessively high voltage signal is sent to 
ECM through the heated oxygen sensor 2 
heater.)

Harness or connectors
(The heated oxygen sensor 2 heater circuit is 
shorted.)

Heated oxygen sensor 2 heater

P0058
0058
(Bank 2)

EC-170

DTC P0037, P0038, P0057, P0058 HO2S2 HEATER

Revision: 2006 July

2007 Murano

DTC Confirmation Procedure

NBS0030F

NOTE:
If DTC Confirmation Procedure has been previously conducted, always turn ignition switch OFF and wait at
least 10 seconds before conducting the next test.
TESTING CONDITION:
Before performing the following procedure, confirm that battery voltage is between 11V and 16V at
idle.

 WITH CONSULT-II

1.

Turn ignition switch ON and select “DATA MONITOR” mode with CONSULT-II.

2.

Start engine and warm it up to the normal operating tempera-
ture.

3.

Turn ignition switch OFF and wait at least 10 seconds.

4.

Start the engine and keep the engine speed between 3,500 rpm
and 4,000 rpm for at least 1 minute under no load.

5.

Let engine idle for 1 minute.

6.

If 1st trip DTC is detected, go to 

EC-174, "Diagnostic Procedure"

.

 WITH GST

Follow the procedure “WITH CONSULT-II” above.

SEF174Y

DTC P0037, P0038, P0057, P0058 HO2S2 HEATER

EC-171

C

D

E

F

G

H

I

J

K

L

M

A

EC

Revision: 2006 July

2007 Murano

Wiring Diagram

NBS0030G

BANK 1

TBWA0687E

EC-172

DTC P0037, P0038, P0057, P0058 HO2S2 HEATER

Revision: 2006 July

2007 Murano

Specification data are reference values and are measured between each terminal and ground.

CAUTION:

Do not use ECM ground terminals when measuring input/output voltage. Doing so may result in dam-
age to the ECM's transistor. Use a ground other than ECM terminals, such as the ground.

TER-

MINAL 

NO.

WIRE 

COLOR

ITEM

CONDITION

DATA (DC Voltage)

25

P/L

Heated oxygen sensor 2 
heater (Bank 1)

[Engine is running]

Engine speed: Below 3,600 rpm after the 
following conditions are met

Engine: After warming up

Keeping the engine speed between 3,500 
and 4,000 rpm for 1 minute and at idle for 1 
minute under no load.

0 - 1.0V

[Ignition switch: ON]

Engine stopped

[Engine is running]

Engine speed: Above 3,600 rpm

BATTERY VOLTAGE
(11 - 14V)

74

W

Heated oxygen sensor 2 
(Bank 1)

[Engine is running]

Revving engine from idle to 3,000 rpm 
quickly after the following conditions are met

Engine: After warming up

Keeping the engine speed between 3,500 
and 4,000 rpm for 1 minute and at idle for 1 
minute under no load

0 - Approximately 1.0V

78

B

Sensor ground
(Heated oxygen sensor 2)

[Engine is running]

Warm-up condition

Idle speed

Approximately 0V

DTC P0037, P0038, P0057, P0058 HO2S2 HEATER

EC-173

C

D

E

F

G

H

I

J

K

L

M

A

EC

Revision: 2006 July

2007 Murano

BANK 2

TBWA0688E

EC-174

DTC P0037, P0038, P0057, P0058 HO2S2 HEATER

Revision: 2006 July

2007 Murano

Specification data are reference values and are measured between each terminal and ground.

CAUTION:

Do not use ECM ground terminals when measuring input/output voltage. Doing so may result in dam-
age to the ECM's transistor. Use a ground other than ECM terminals, such as the ground.

Diagnostic Procedure

NBS0030H

1. 

CHECK GROUND CONNECTIONS

1.

Turn ignition switch OFF.

2.

Loosen and retighten two ground screws on the body.
Refer to 

EC-150, "Ground Inspection"

 .

OK or NG

OK

>> GO TO 2.

NG

>> Repair or replace ground connections.

TER-

MINAL 

NO.

WIRE 

COLOR

ITEM

CONDITION

DATA (DC Voltage)

6

L/R

Heated oxygen sensor 2 
heater (Bank 2)

[Engine is running]

Engine speed: Below 3,600 rpm after the 
following conditions are met

Engine: After warming up

Keeping the engine speed between 3,500 
and 4,000 rpm for 1 minute and at idle for 1 
minute under no load.

0 - 1.0V

[Ignition switch: ON]

Engine stopped

[Engine is running]

Engine speed: Above 3,600 rpm

BATTERY VOLTAGE
(11 - 14V)

55

W

Heated oxygen sensor 2 
(Bank 2)

[Engine is running]

Revving engine from idle to 3,000 rpm 
quickly after the following conditions are met

Engine: After warming up

Keeping the engine speed between 3,500 
and 4,000 rpm for 1 minute and at idle for 1 
minute under no load

0 - Approximately 1.0V

78

B

Sensor ground
(Heated oxygen sensor 2)

[Engine is running]

Warm-up condition

Idle speed

Approximately 0V

PBIB1835E

DTC P0037, P0038, P0057, P0058 HO2S2 HEATER

EC-175

C

D

E

F

G

H

I

J

K

L

M

A

EC

Revision: 2006 July

2007 Murano

2. 

CHECK HO2S2 POWER SUPPLY CIRCUIT

1.

Disconnect heated oxygen sensor 2 harness connector.

2.

Turn ignition switch ON.

3.

Check voltage between HO2S2 terminal 3 and ground with
CONSULT-II or tester.

OK or NG

OK

>> GO TO 7.

NG

>> GO TO 3.

3. 

CHECK CONDENSER CIRCUIT-I

1.

Turn ignition switch OFF.

2.

Disconnect fuse block (J/B) harness connector M1.

3.

Check resistance between fuse block (J/B) terminal 9A and ground.
Refer to Wiring Diagram. 

OK or NG

OK

>> GO TO 4.

NG

>> GO TO 5.

4. 

DETECT MALFUNCTIONING PART

Check the following.

Harness connectors M82, F102

Fuse block (J/B) connector M1

15A fuse

Harness for open or short between heated oxygen sensor 2 and fuse

>> Repair harness or connectors.

PBIB1352E

Voltage: Battery voltage

PBIB0112E

Resistance: Above 1M

 [at 25

°

C (77

°

F)]

EC-176

DTC P0037, P0038, P0057, P0058 HO2S2 HEATER

Revision: 2006 July

2007 Murano

5. 

CHECK CONDENSER CIRCUIT-II

1.

Disconnect condenser harness connectors.

2.

Check harness continuity between fuse block (J/B) terminal 9A and condenser terminal 1, condenser ter-
minal 2 and ground.
Refer to Wiring Diagram. 

3.

Also check harness for short to ground and short to power.

OK or NG

OK

>> GO TO 6.

NG

>> Repair open circuit or short to ground or short to power in harness or connectors.

6. 

CHECK CONDENSER

Refer to 

EC-177, "Component Inspection"

 .

OK or NG

OK

>> GO TO 9.

NG

>> Replace condenser.

7. 

CHECK HO2S2 OUTPUT SIGNAL CIRCUIT FOR OPEN AND SHORT

1.

Turn ignition switch OFF.

2.

Disconnect ECM harness connector.

3.

Check harness continuity between ECM terminal and HO2S2 terminal as follows.
Refer to Wiring Diagram.

4.

Also check harness for short to ground and short to power.

OK or NG

OK

>> GO TO 8.

NG

>> Repair open circuit or short to ground or short to power in harness or connectors.

8. 

CHECK HEATED OXYGEN SENSOR 2 HEATER

Refer to 

EC-177, "Component Inspection"

 .

OK or NG

OK

>> GO TO 9.

NG

>> Replace malfunctioning heated oxygen sensor 2.

9. 

CHECK INTERMITTENT INCIDENT

Refer to 

EC-141, "TROUBLE DIAGNOSIS FOR INTERMITTENT INCIDENT"

 .

>> INSPECTION END

Continuity should exist.

DTC

Terminals

Bank

ECM

Sensor

P0037, P0038

25

2

1

P0057, P0058

6

2

2

Continuity should exist.

DTC P0037, P0038, P0057, P0058 HO2S2 HEATER

EC-177

C

D

E

F

G

H

I

J

K

L

M

A

EC

Revision: 2006 July

2007 Murano

Component Inspection

NBS0030I

HEATED OXYGEN SENSOR 2 HEATER

1.

Check resistance between HO2S2 terminals as follows.

2.

If NG, replace heated oxygen sensor 2.

CAUTION:

Discard any heated oxygen sensor which has been dropped
from a height of more than 0.5 m (19.7 in) onto a hard sur-
face such as a concrete floor; use a new one.

Before installing new oxygen sensor, clean exhaust system
threads using Oxygen Sensor Thread Cleaner tool J-43897-
18 or J-43897-12 and approved anti-seize lubricant.

CONDENSER

1.

Turn ignition switch OFF.

2.

Disconnect condenser harness connector.

3.

Check resistance between condenser terminals 1 and 2.

Removal and Installation

NBS0030J

HEATED OXYGEN SENSOR 2

Refer to 

EM-25, "EXHAUST MANIFOLD AND THREE WAY CATALYST"

 .

Terminal No.

Resistance

2 and 3

5.0 - 7.0 

 [at 25

°

C (77

°

F)]

1 and 2, 3, 4


(Continuity should not exist)

4 and 1, 2, 3

SEF249Y

Resistance

Above 1 M

 [at 25

°

C (77

°

F)]

PBIB0794E

EC-178

DTC P0075, P0081 IVT CONTROL SOLENOID VALVE

Revision: 2006 July

2007 Murano

DTC P0075, P0081 IVT CONTROL SOLENOID VALVE

PFP:23796

Component Description

NBS00373

Intake valve timing control solenoid valve is activated by ON/OFF
pulse duty (ratio) signals from the ECM.
The intake valve timing control solenoid valve changes the oil
amount and direction of flow through intake valve timing control unit
or stops oil flow.
The longer pulse width advances valve angle.
The shorter pulse width retards valve angle.
When ON and OFF pulse widths become equal, the solenoid valve
stops oil pressure flow to fix the intake valve angle at the control
position.

CONSULT-II Reference Value in Data Monitor Mode

NBS00374

Specification data are reference values.

On Board Diagnosis Logic

NBS00375

DTC Confirmation Procedure

NBS00376

NOTE:
If DTC Confirmation Procedure has been previously conducted, always turn ignition switch OFF and
wait at least 10 seconds before conducting the next test.

 WITH CONSULT-II

1.

Turn ignition switch ON.

2.

Select “DATA MONITOR” mode with CONSULT-II.

3.

Start engine and let it idle for 5 seconds.

4.

If 1st trip DTC is detected, go to 

EC-183, "Diagnostic Procedure"

.

 WITH GST

Following the procedure “WITH CONSULT-II” above.

PBIB1842E

MONITOR ITEM

CONDITION

SPECIFICATION

INT/V SOL (B1)
INT/V SOL (B2)

Engine: After warming up

Shift lever: P or N

Air conditioner switch: OFF

No load

Idle

0% - 2%

2,000 rpm

Approx. 0% - 50%

DTC No.

Trouble diagnosis name

DTC detecting condition

Possible cause

P0075
0075
(Bank 1)

Intake valve timing control 
solenoid valve circuit

An improper voltage is sent to the ECM 
through intake valve timing control solenoid 
valve.

Harness or connectors
(Intake valve timing control solenoid valve 
circuit is open or shorted.)

Intake valve timing control solenoid valve

P0081
0081
(Bank 2)

SEF058Y

DTC P0075, P0081 IVT CONTROL SOLENOID VALVE

EC-179

C

D

E

F

G

H

I

J

K

L

M

A

EC

Revision: 2006 July

2007 Murano

Wiring Diagram

NBS00377

BANK 1

TBWB0806E

EC-180

DTC P0075, P0081 IVT CONTROL SOLENOID VALVE

Revision: 2006 July

2007 Murano

Specification data are reference values and are measured between each terminal and ground.
Pulse signal is measured by CONSULT-II.

CAUTION:

Do not use ECM ground terminals when measuring input/output voltage. Doing so may result in dam-
age to the ECM's transistor. Use a ground other than ECM terminals, such as the ground.

: Average voltage for pulse signal (Actual pulse signal can be confirmed by oscilloscope.)

TER-

MINAL 

NO.

WIRE 

COLOR

ITEM

CONDITION

DATA (DC Voltage)

11

P

Intake valve timing control 
solenoid valve (Bank 1)

[Engine is running]

Warm-up condition

Idle speed

BATTERY VOLTAGE
(11 - 14V)

[Engine is running]

Warm-up condition

Engine speed: 2,000 rpm

7 - 12V

111

W/B

ECM relay
(Self shut-off)

[Engine is running]
[Ignition switch: OFF]

For a few seconds after turning ignition 
switch OFF

0 - 1.5V

[Ignition switch: OFF]

More than a few seconds after turning igni-
tion switch OFF

BATTERY VOLTAGE
(11 - 14V)

119

120

R/B
R/B

Power supply for ECM

[Ignition switch: ON]

BATTERY VOLTAGE
(11 - 14V)

PBIB1790E


Content      ..     74      75      76      77     ..