Nissan Murano Z50 (2005 year). Manual - part 123
COWL TOP
EI-21
C
D
E
F
G
H
J
K
L
M
A
B
EI
Revision: 2005 August
2005 Murano
COWL TOP
PFP:66100
Removal and Installation
AIS002A6
REMOVAL
1.
Remove both right/left wiper arms. Refer to
WW-32, "Removal and Installation of Front Wiper Arms,
Adjustment of Wiper Arms Stop Location"
.
2.
Remove cowl top seal rubber.
3.
Remove clips of cowl top cover and remove cowl top cover (right).
4.
Remove clips of cowl top cover and remove cowl top cover (left).
5.
Remove washer nozzles and hose from cowl top cover.
INSTALLATION
Install in the reverse order of removal.
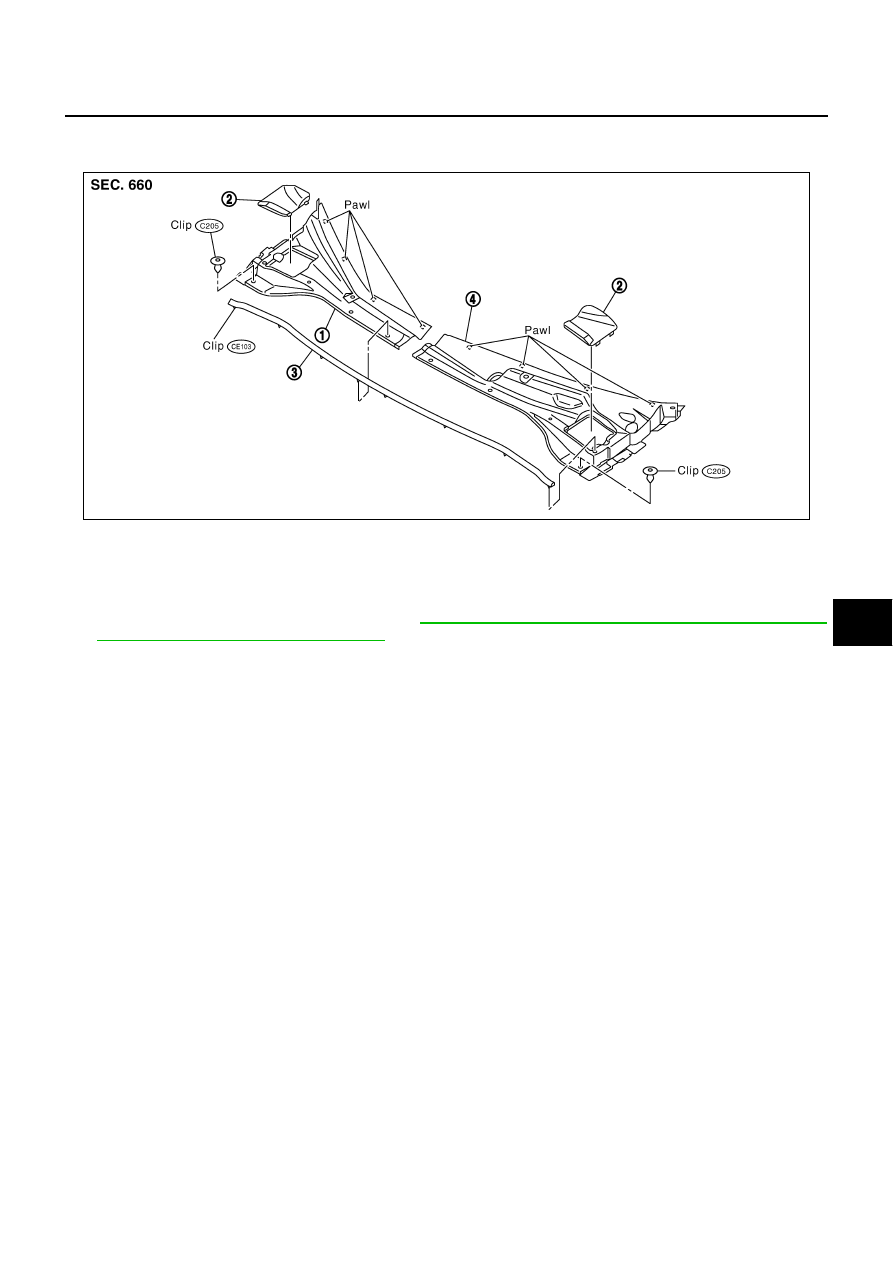
PIIA3832E
1.
Cowl top cover (right)
2.
Cap (left / right)
3.
Cowl top seal rubber
4.
Cowl top cover (left)