Nissan Murano Z50 (2003 year). Manual - part 37
REMOTE KEYLESS ENTRY SYSTEM
BL-115
C
D
E
F
G
H
J
K
L
M
A
B
BL
Revision; 2004 April
2003 Murano
2.
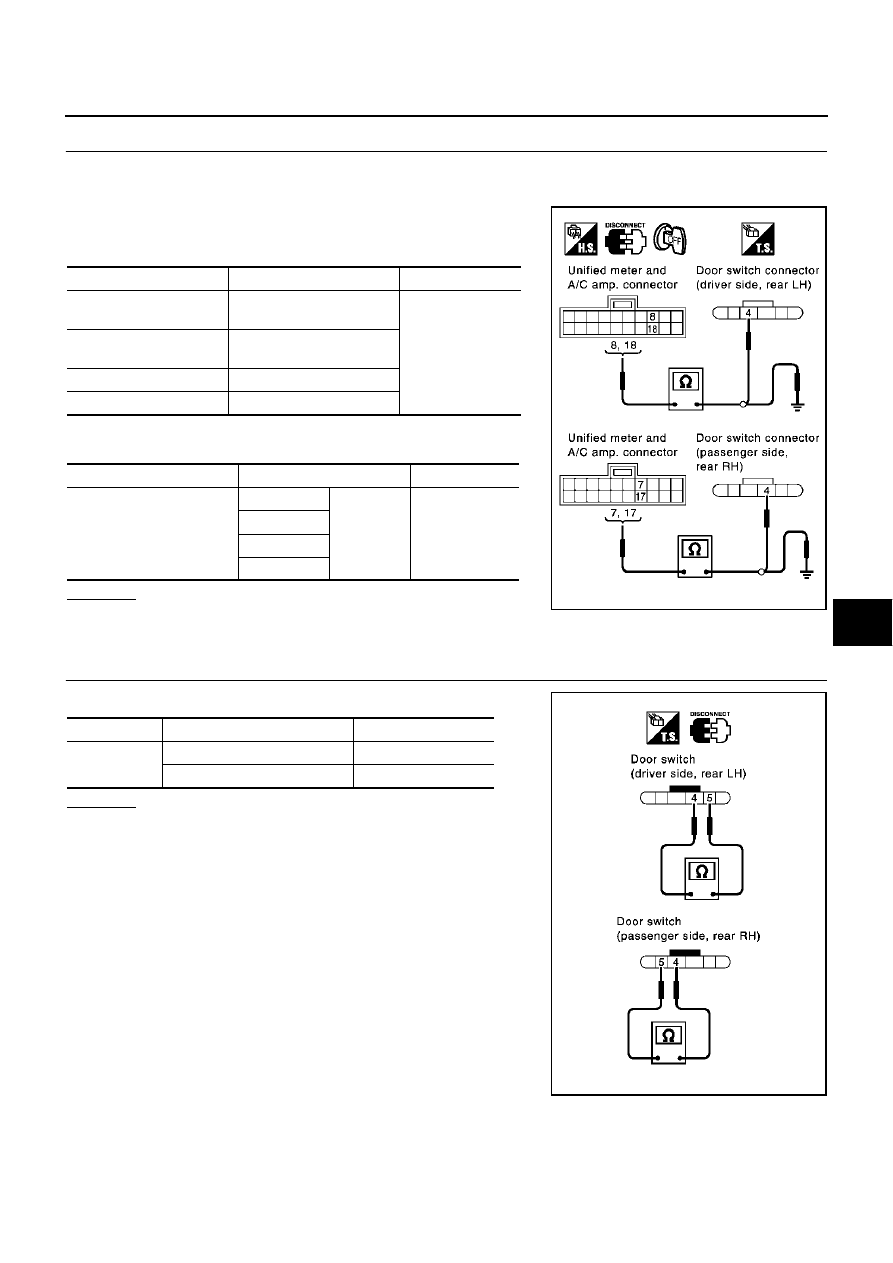
CHECK DOOR SWITCH
1.
Turn ignition switch OFF.
2.
Disconnect door switch and unified meter and A/C amp. connectors.
3.
Check continuity between door switch connectors D10, D38,
D56, D76 terminals 4 and unified meter and A/C amp. connector
M49 terminals 8, 7, 18, 17.
4.
Check continuity between unified meter and A/C amp. connector
M49 terminals 7, 8, 17, 18 and ground.
OK or NG
OK
>> GO TO 3.
NG
>> Repair or replace harness.
3.
CHECK DOOR SWITCH
Check continuity between door switch terminals 4 and 5.
OK or NG
OK
>> GO TO 4.
NG
>> Replace door switch.
Item
Terminal
Continuity
Front door switch
(driver side)
4 (SB) – 8 (SB)
Yes
Front door switch
(passenger side)
4 (R/G) – 7 (R)
Rear door switch LH
4 (V) – 18 (R/W)
Rear door switch RH
4 (R/W) – 17 (R/Y)
Item
Terminal
Continuity
Unified meter and A/C amp.
7 (R)
Ground
No
8 (SB)
17 (R/Y)
18 (R/W)
PIIA4312E
Terminal
Door switch condition
Continuity
4 - 5
Open position
Yes
Closed position
No
PIIA4314E