Nissan Murano Z51 (2008 year). Manual - part 245
INT-24
< ON-VEHICLE REPAIR >
FLOOR TRIM
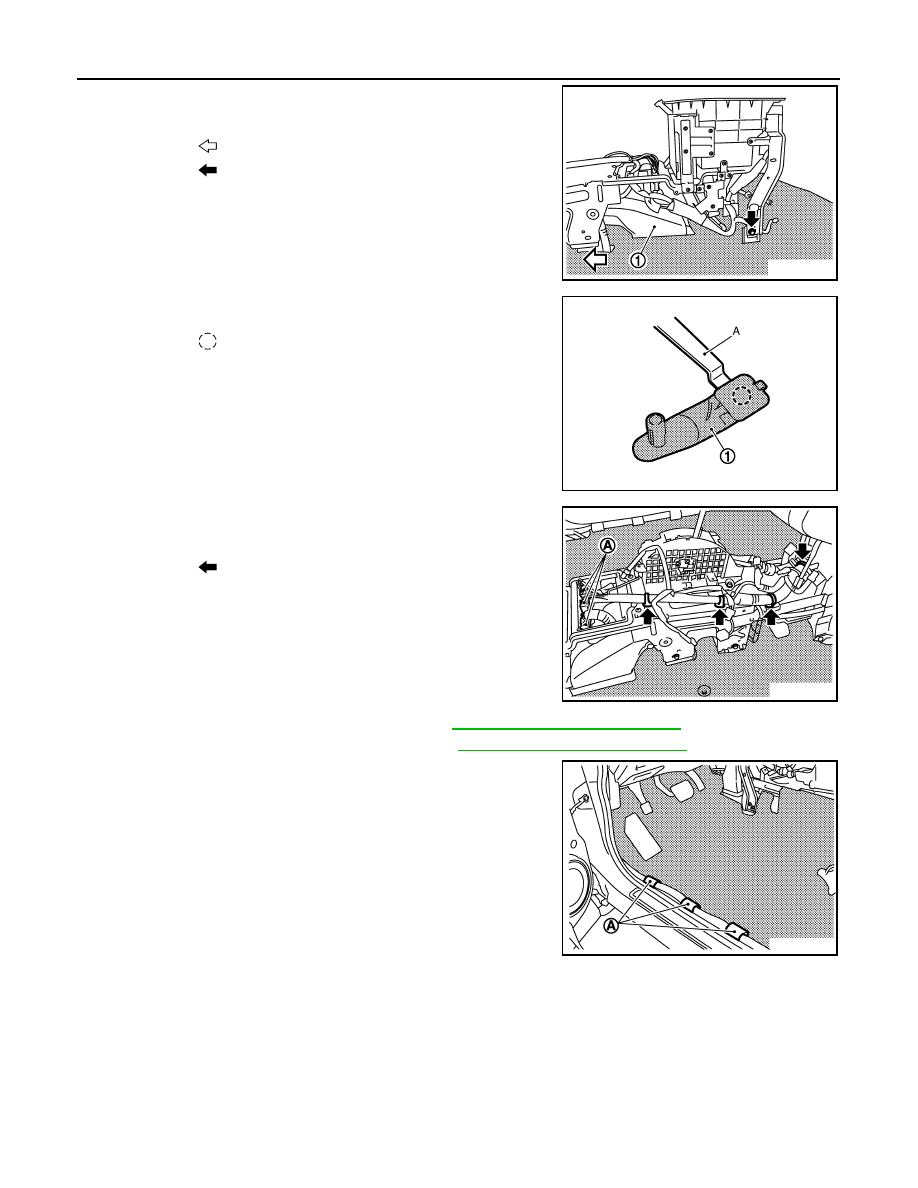
7.
Remove screw shown by the arrow in the figure, and then
remove rear ventilator duct (1).
8.
Disengage the clip of floor hook (1) with a remover tool (A).
9.
Disconnect harness connectors (A) and remove floor harness
mounting clips as shown by the arrows in the figure.
10. Remove rear console bracket assembly. Refer to
IP-20, "Removal and Installation"
11. Remove the center console sub harness. Refer to
IP-20, "Removal and Installation"
.
12. Remove floor carpet fixing clips (A) and then remove floor car-
pet.
INSTALLATION
Install in the reverse order of removal.
: Vehicle front
: Bolt
JMJIA1375ZZ
: Clip
JMJIA0092GB
: Clip
JMJIA1374ZZ
JMJIA1376ZZ
Revision: 2008 October
2009 Murano