Content .. 1842 1843 1844 1845 ..
Infiniti FX35, FX50 (S51). Manual - part 1844
TRANSMISSION ASSEMBLY
TM-183
< UNIT REMOVAL AND INSTALLATION >
[7AT: RE7R01A (VQ35HR)]
C
E
F
G
H
I
J
K
L
M
A
B
TM
N
O
P
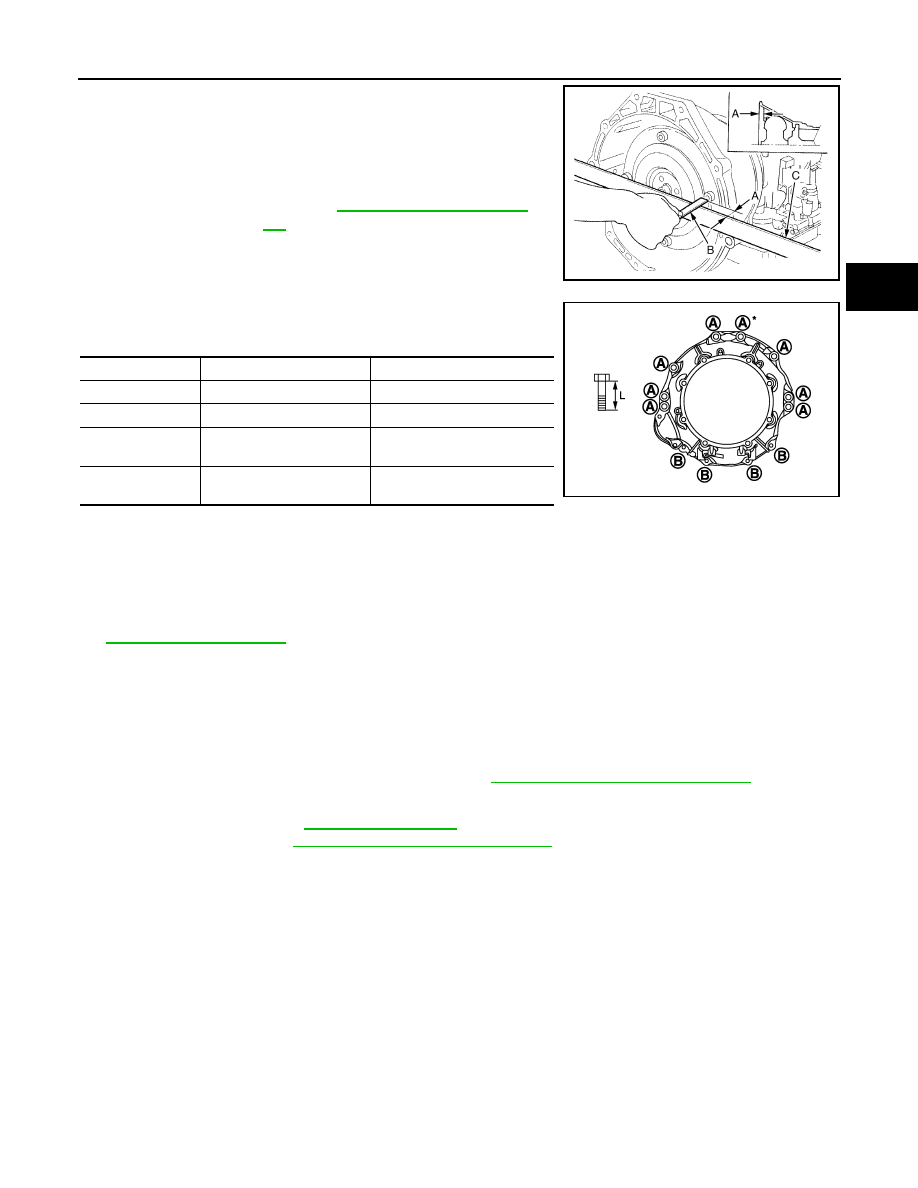
• When installing A/T assembly to the engine, be sure to check
dimension “A” to ensure it is within the reference value limit.
• When installing A/T assembly to the engine, attach the fixing bolts
in accordance with the following standard.
*: Tightening the bolt with bracket.
• Align the positions of tightening bolts for drive plate with those of the torque converter, and temporarily
tighten the bolts. Then, tighten the bolts with the specified torque.
CAUTION:
• When turning crankshaft, turn it clockwise as viewed from the front of the engine.
• When tightening the tightening bolts for the torque converter after fixing the crankshaft pulley
bolts, be sure to confirm the tightening torque of the crankshaft pulley mounting bolts. Refer to
.
• Rotate crankshaft several turns and check to be sure that A/T rotates freely without binding after
converter is installed to drive plate.
2WD : Inspection and Adjustment
INFOID:0000000005250174
INSPECTION AFTER INSTALLATION
• Check A/T fluid leakage.
• Check A/T position after adjusting A/T positions. Refer to
TM-167, "Inspection and Adjustment"
ADJUSTMENT AFTER INSTALLATION
• Adjust A/T fluid level. Refer to
• Adjust A/T position. Refer to
TM-167, "Inspection and Adjustment"
AWD
B
: Scale
C
: Straightedge
Dimension “A”
: Refer to
JPDIA0042ZZ
Bolt symbol
A
B
Insertion direction
A/T assembly to engine
Engine to A/T assembly
Number of bolts
8
4
Bolt length “L”
mm (in)
65 (2.56)
35 (1.38)
Tightening torque
N·m (kg-m, ft-lb)
75 (7.7, 55)
46.6 (4.8, 34)
JPDIA0979ZZ