Content .. 1255 1256 1257 1258 ..
Infiniti FX35, FX50 (S51). Manual - part 1257
INT-30
< REMOVAL AND INSTALLATION >
LUGGAGE FLOOR TRIM
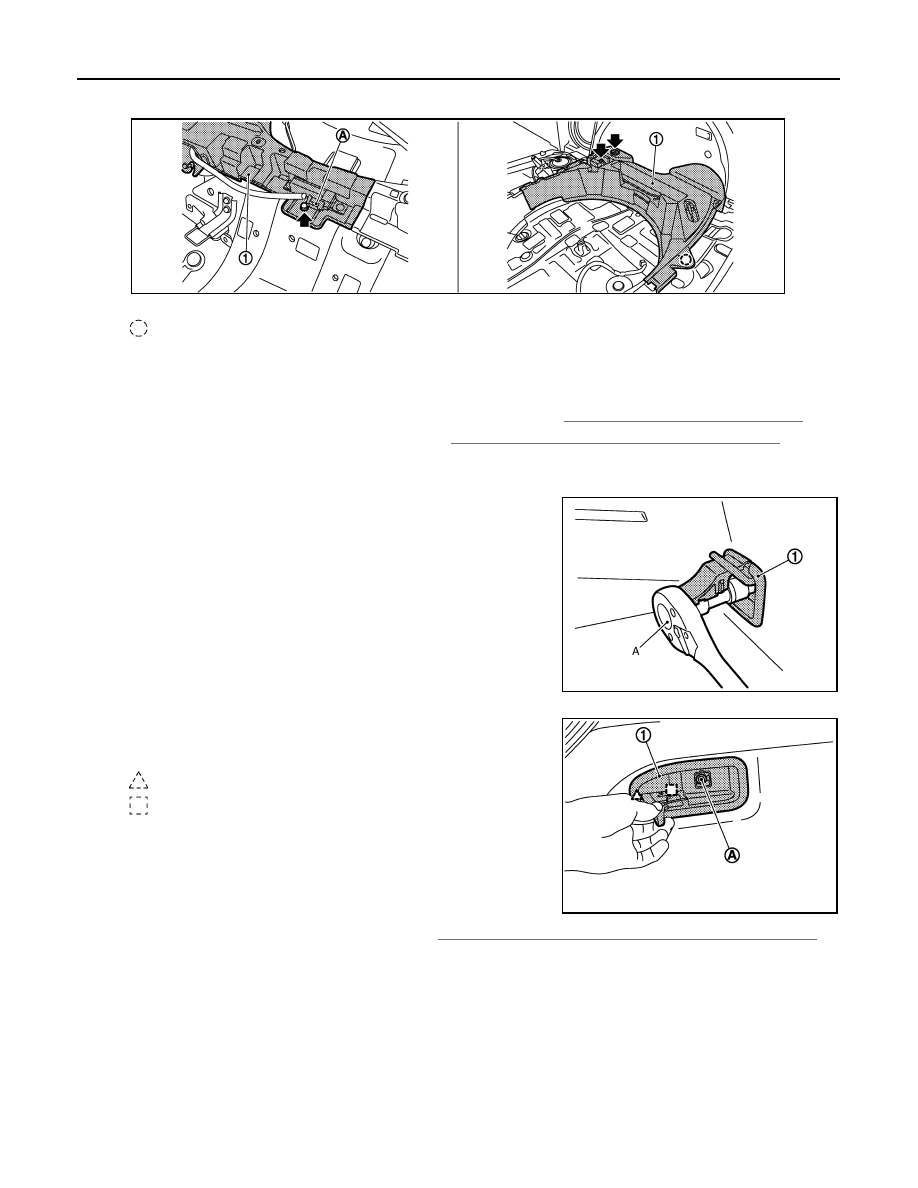
1.
Disconnect the harness connector (A), remove the bolts shown by the arrows in the figure below, then
remove the luggage floor spacer (1) (RH/LH).
2.
Remove the bolts located inside the luggage floor spacer and then remove luggage floor spacer. (RH/LH)
LUGGAGE SIDE FINISHER LOWER
1.
Remove rear kicking plate inner and rear body side welt. Refer to
INT-17, "Removal and Installation"
.
2.
Remove rear seat assembly fixing bolts. Refer to
SB-15, "SEAT BELT BUCKLE : Exploded View"
.
3.
Remove luggage rear plate.
4.
Remove luggage floor spacers (LH/RH).
5.
Disengage rope hook mounting bolt caps, and remove rope
hook mounting bolts with socket wrench (A), and then remove
rope hooks (1) (LH/RH).
6.
Remove seatback control cable finisher (1) fixing bolt (A), then
remove the seatback control cable finisher (LH/RH).
7.
Remove the luggage room lamp (RH). Refer to
INL-196, "LUGGAGE SIDE : Removal and Installation"
.
8.
Remove luggage side finisher lower fixing clips with remover tool.
: Clip
JMJIA2068ZZ
JMJIA0617ZZ
: Pawl
: Metal clip
JMJIA2075ZZ