Mazda Automatic Transaxle JA5A-EL. Manual - part 26


  Index      Mazda     Mazda Automatic Transaxle JA5A-EL - service manual 2002 year


Search            


Content   ..  24  25  26  27   ..


Mazda Automatic Transaxle JA5A-EL. Manual - part 26


AUTOMATIC TRANSAXLE 

K1–9

K1

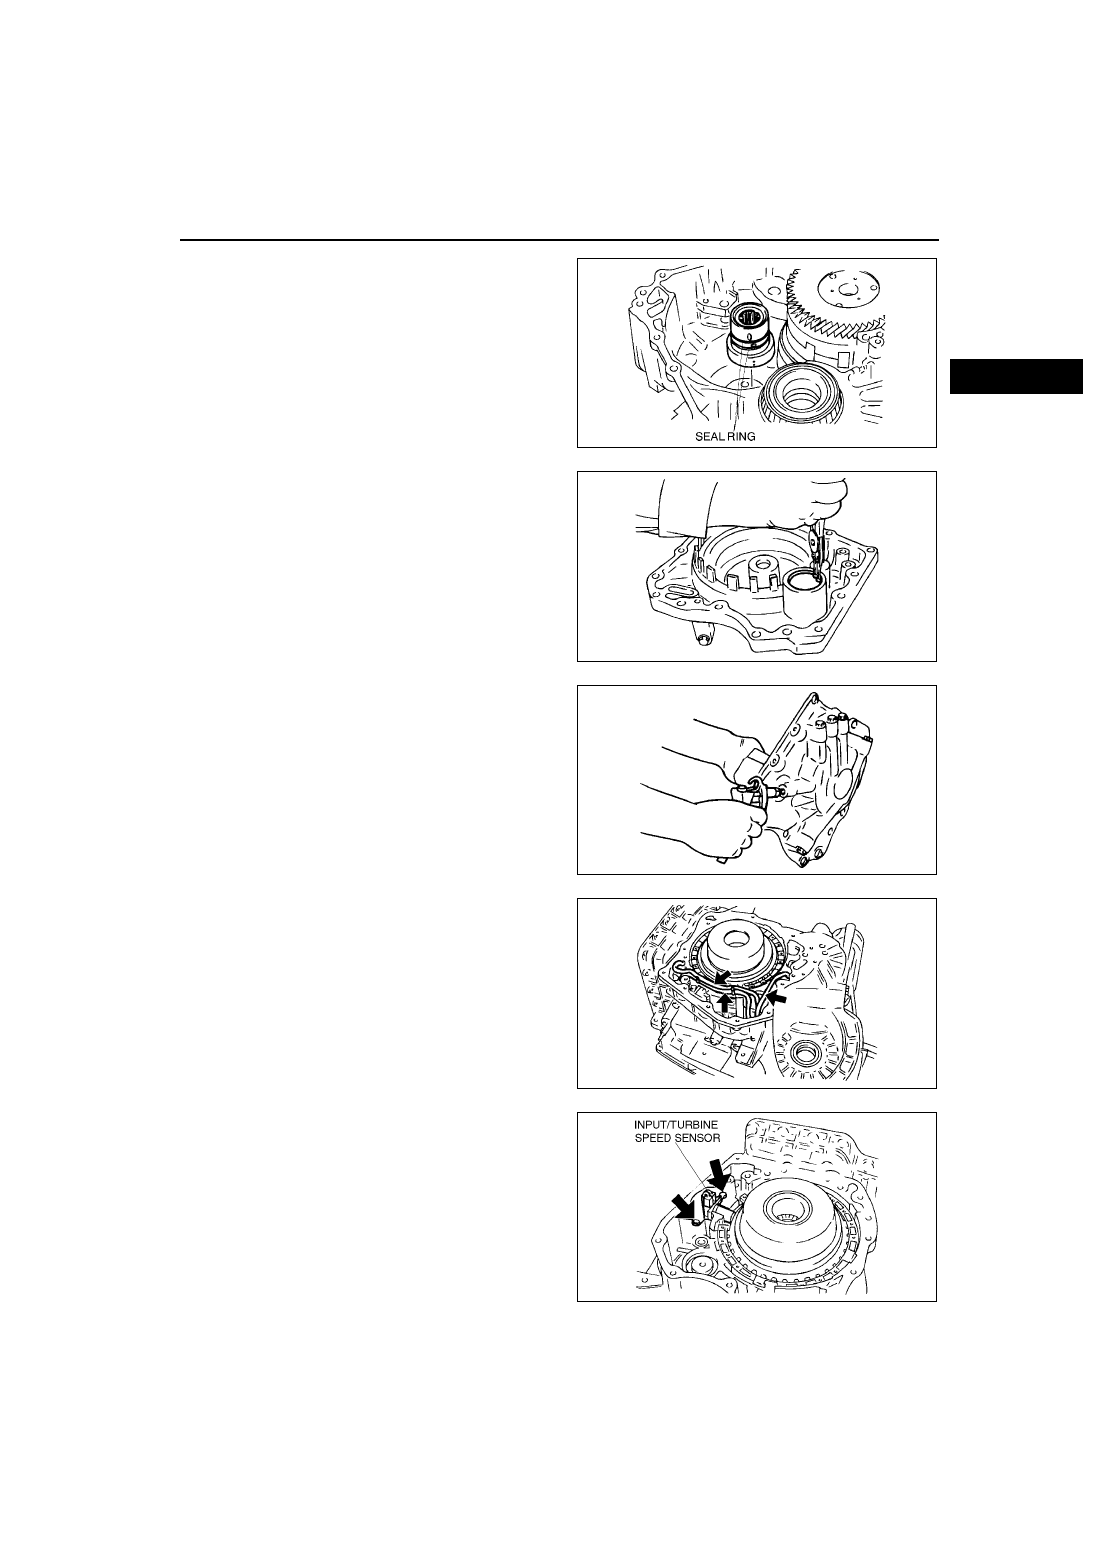
34. Remove the seal rings from the one-way clutch 

inner race.

35. Remove the snap ring which secures the 2-4 

brake accumulator onto the end cover.

36. Remove the 2-4 brake accumulator cover and 

spring.

Note

• Do not reuse the O-ring.

37. Remove the O-ring from the 2-4 brake 

accumulator cover.

38. Hold the 2-4 brake accumulator piston by hand. 

Then, blow out the piston using an air gun to blow 

air into oil circuit as shown in the figure.

Note

• Do not reuse the O-ring.

39. Remove the O-rings from the 2-4 brake 

accumulator piston.

40. Pull out the oil pipes.

41. Disconnect the connector from the turbine 

sensor.

42. Remove the bolts, then remove the turbine 

sensor.

AMU0517A028

AMU0517A029

AMU0517A030

AMU0517A031

AMU0517A032

K1–10

AUTOMATIC TRANSAXLE 

43. Remove the return spring and spring retainer.

44. Remove the reverse clutch and high clutch 

component.

45. Remove the needle bearing from the reverse 

clutch and high clutch component.

46. Remove the high clutch hub.

47. Remove the race bearing from the high clutch 

hub.

48. Remove the reverse clutch hub.

49. Remove the race bearing and bearing race from 

the reverse clutch hub.

50. Remove the front planetary carrier component.

51. Remove the needle bearing and race bearing 

from the front planetary carrier component.

AMU0517A033

AMU0517A034

AMU0517A035

AMU0517A036

AMU0517A037

AUTOMATIC TRANSAXLE 

K1–11

K1

52. Remove the rear sun gear.

53. Remove the rear planetary carrier component.

54. Remove the needle bearing and bearing race 

from the rear planetary carrier component.

55. Remove the rear internal gear.

56. Remove the needle bearing from the rear internal 

gear.

57. Remove the low clutch component.

58. Remove the needle bearing.

59. Remove the 2-4 brake.

(1) Remove the snap ring.

(2) Remove 2-4 brake retaining plates, drive 

plates, and driven plates as a unit.

AMU0517A038

AMU0517A039

AMU0517A040

AMU0517A041

K1–12

AUTOMATIC TRANSAXLE 

60. Remove the low and reverse brake.

Caution

•••• Depress the spring retainer only enough to remove the snap ring. Overpressing will damage the 

retainer component edges.

(1) Install the SSTs in the transaxle case as 

shown in the figure.

(2) Remove the snap ring.

(3) Remove the SSTs.

(4) Remove the piston and retainer, return spring, 

and spring retainer.

(5) Remove the low and reverse brake dished 

plate, drive plates, driven plates, and retaining 

plate as a unit.

(6) Remove the snap ring.

(7) Remove the low one-way clutch.

Caution

•••• Be careful not to drop the low one-way 

clutch rollers.

61. Remove the direct clutch accumulator.

(1) Remove the snap ring.

Warning

•••• Using compressed air can cause dirt and 

other particles to fly out, causing injury 

to the eyes. Wear protective eye wear 

whenever using compressed air.

AMU0517A167

AMU0517A043

AMU0517A044

AMU0517A159


Content   ..  24  25  26  27   ..