Mazda CX-9 Grand Touring. Manual - part 566
1. Remove the following parts:
1. Trunk box (See TRUNK BOX REMOVAL/INSTALLATION .)
2. Seat side box (See SEAT SIDE BOX REMOVAL/INSTALLATION .)
3. Trunk end trim (See TRUNK END TRIM REMOVAL/INSTALLATION .)
4. Third-row seat (See THIRD-ROW SEAT REMOVAL/INSTALLATION .)
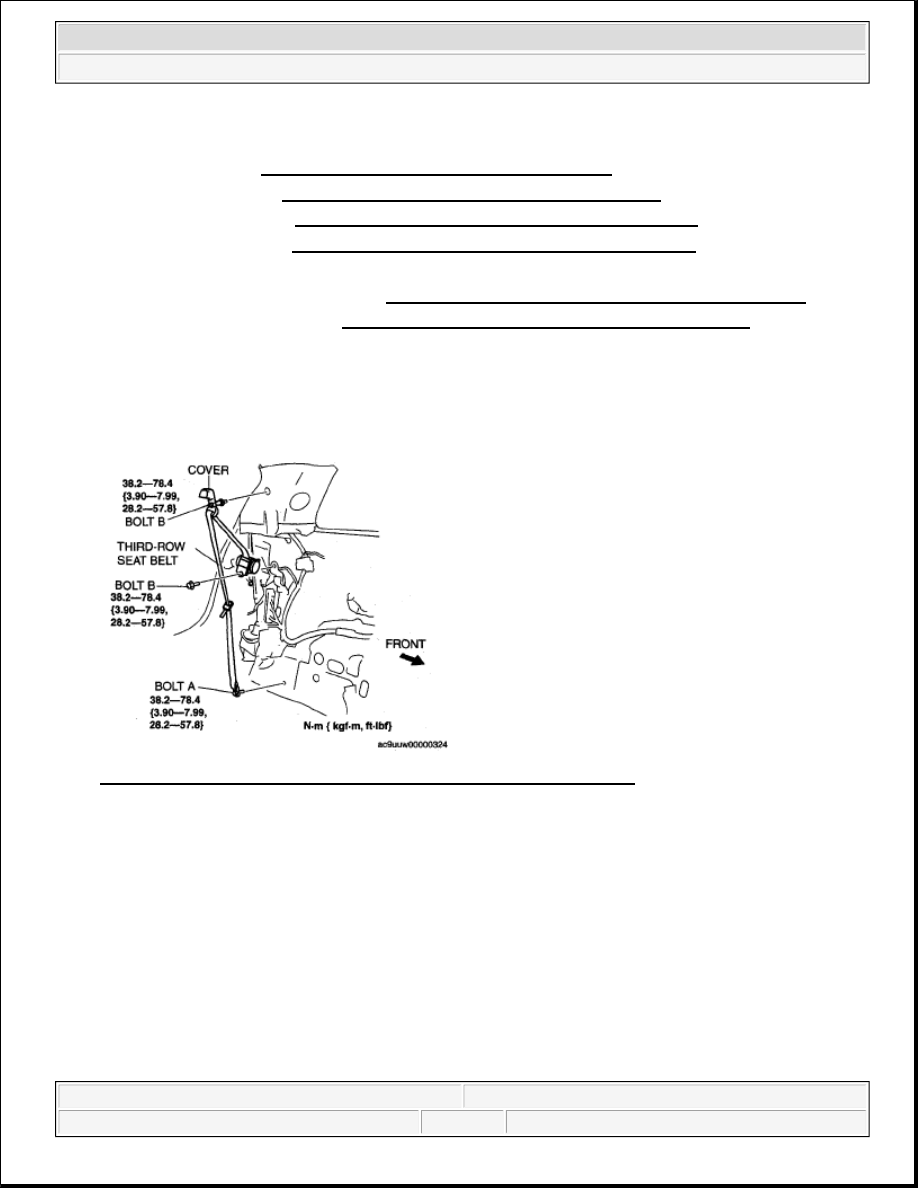
2. Remove the bolt A.
3. Remove the rear scuff plate inner. (See REAR SCUFF PLATE REMOVAL/INSTALLATION .)
4. Remove the trunk side trim. (See TRUNK SIDE TRIM REMOVAL/INSTALLATION .)
5. Remove the cover.
6. Remove the bolt B.
7. Remove the third-row seat belt.
8. Install in the reverse order of removal.
Fig. 7: Identifying Third-Row Seat Belt, Bolt & Torque Specifications
Courtesy of MAZDA MOTORS CORP.
SEAT BELT INSPECTION
BELT
1. Verify that the belt is installed properly with no twists or kinks.
2. Verify that there is no damage to the seat belt and no deformation of the metal fittings.
If there is any malfunction, replace the seat belt.
ELR
1. Verify that the belt can be pulled out smoothly, and that it retracts smoothly.
2008 Mazda CX-9 Grand Touring
2008 RESTRAINTS Seat Belt - Mazda CX-9
Microsoft
Sunday, November 15, 2009 10:19:40 AM
Page 7
© 2005 Mitchell Repair Information Company, LLC.