Mazda CX-9 Grand Touring. Manual - part 66


  Index      Mazda     Mazda CX-9 Grand Touring - service repair manual 2008 year


Search            


Content   ..  64  65  66  67   ..


Mazda CX-9 Grand Touring. Manual - part 66


Courtesy of MAZDA MOTORS CORP. 

Assembly Procedure 

1. Apply ATF to the new O-rings and the intermediate shaft.  

2. Install the O-rings to the intermediate shaft. 

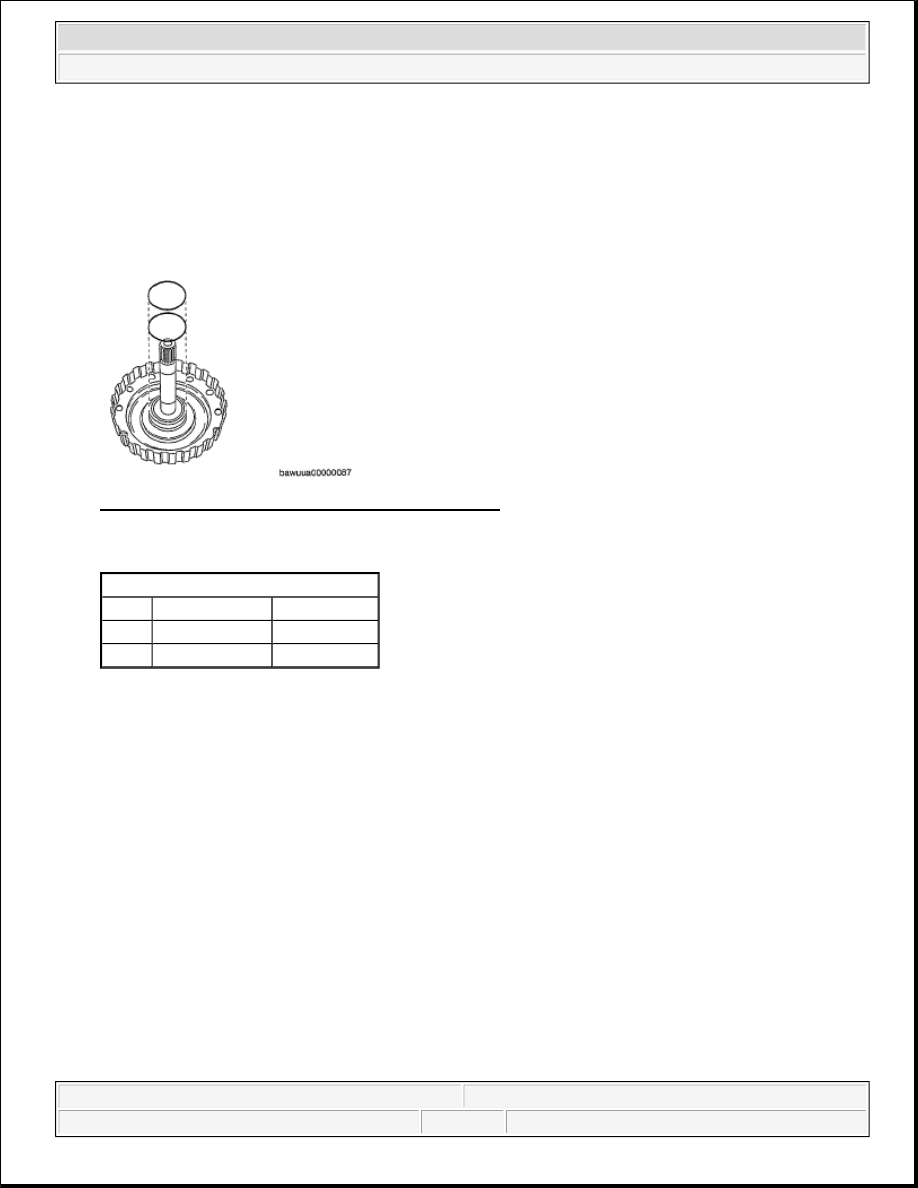
Fig. 184: Identifying O-Rings Of Intermediate Shaft 
Courtesy of MAZDA MOTORS CORP. 

O-RING SIZE 

3. Apply ATF to the sliding surface of the C2 clutch piston. 

4. Install the C2 clutch piston to the intermediate shaft.  

5. Apply ATF to the seal on the clutch balancer and sliding surface. 

mm {in}


Inner diameter Thickness

Upper 51.90 {2.043} 1.60 {0.0630}

Lower 50.40 {1.984} 2.62 {0.1031}

CAUTION:

Do not damage the seal on the piston and O-ring. 

CAUTION:

Do not damage the seal on the clutch balancer. 

Do not damage the O-ring.  


2008 Mazda CX-9 Grand Touring 

2005-08 TRANSMISSION Automatic Transaxle Overhaul (AW6A-EL) - CX-7, CX-9 & Mazda 6


Microsoft 


Sunday, November 15, 2009 10:28:17 AM

Page 98 

© 2005 Mitchell Repair Information Company, LLC. 

Fig. 185: Identifying C2 Clutch Piston Of Intermediate Shaft 
Courtesy of MAZDA MOTORS CORP. 

6. Install the spring retainer, return spring and the clutch balancer to the intermediate shaft. 

Fig. 186: Identifying Spring Retainer, Return Spring And Clutch Balancer 
Courtesy of MAZDA MOTORS CORP. 

7. Place the SST on the clutch balancer and compress the return spring with a press. 

CAUTION:

Be careful not to shorten the spring too much. If it is too short, 
it will bite into the O-ring.  

CAUTION:

Do not expand the snap ring too much. 


2008 Mazda CX-9 Grand Touring 

2005-08 TRANSMISSION Automatic Transaxle Overhaul (AW6A-EL) - CX-7, CX-9 & Mazda 6


Microsoft 


Sunday, November 15, 2009 10:28:17 AM

Page 99 

© 2005 Mitchell Repair Information Company, LLC. 

Fig. 187: Placing SST On Clutch Balancer 
Courtesy of MAZDA MOTORS CORP. 

8. Install the snap ring into the groove using snap ring pliers.  

9. Install the driven plates, drive plates and the retaining plate in the following order to the intermediate 

shaft as shown in the figure. 

Three drive plates type  

Driven- Drive- Driven- Drive- Driven- Drive- Retaining  

Four drive plates type  

Driven- Drive- Driven- Drive- Driven- Drive- Driven- Drive- Retaining 

Fig. 188: Identifying Driven Plates, Drive Plates And Retaining Plate 
Courtesy of MAZDA MOTORS CORP. 

CAUTION:

Inspect the number and order of the retaining plate, drive and 
driven plates.  


2008 Mazda CX-9 Grand Touring 

2005-08 TRANSMISSION Automatic Transaxle Overhaul (AW6A-EL) - CX-7, CX-9 & Mazda 6


Microsoft 


Sunday, November 15, 2009 10:28:17 AM

Page 100 

© 2005 Mitchell Repair Information Company, LLC. 

Fig. 189: Inspecting Number And Order Of Retaining Plate, Drive And Driven Plates 
Courtesy of MAZDA MOTORS CORP. 

10. Using a flathead screwdriver, install the snap ring into the groove. 

Fig. 190: Installing Snap Ring Into Groove 
Courtesy of MAZDA MOTORS CORP. 

11. Apply ATF to the thrust bearing. 

12. Install the thrust bearing to the intermediate shaft. 

NOTE:

Install the bearing in the correct direction as shown in the figure. 


2008 Mazda CX-9 Grand Touring 

2005-08 TRANSMISSION Automatic Transaxle Overhaul (AW6A-EL) - CX-7, CX-9 & Mazda 6


Microsoft 


Sunday, November 15, 2009 10:28:17 AM

Page 101 

© 2005 Mitchell Repair Information Company, LLC. 


Content   ..  64  65  66  67   ..