Mazda CX 7. Manual - part 379
GLASS/WINDOWS/MIRRORS
09-12–3
09-12
End Of Sie
WM: DOOR GLASS
FRONT DOOR GLASS REMOVAL/INSTALLATION
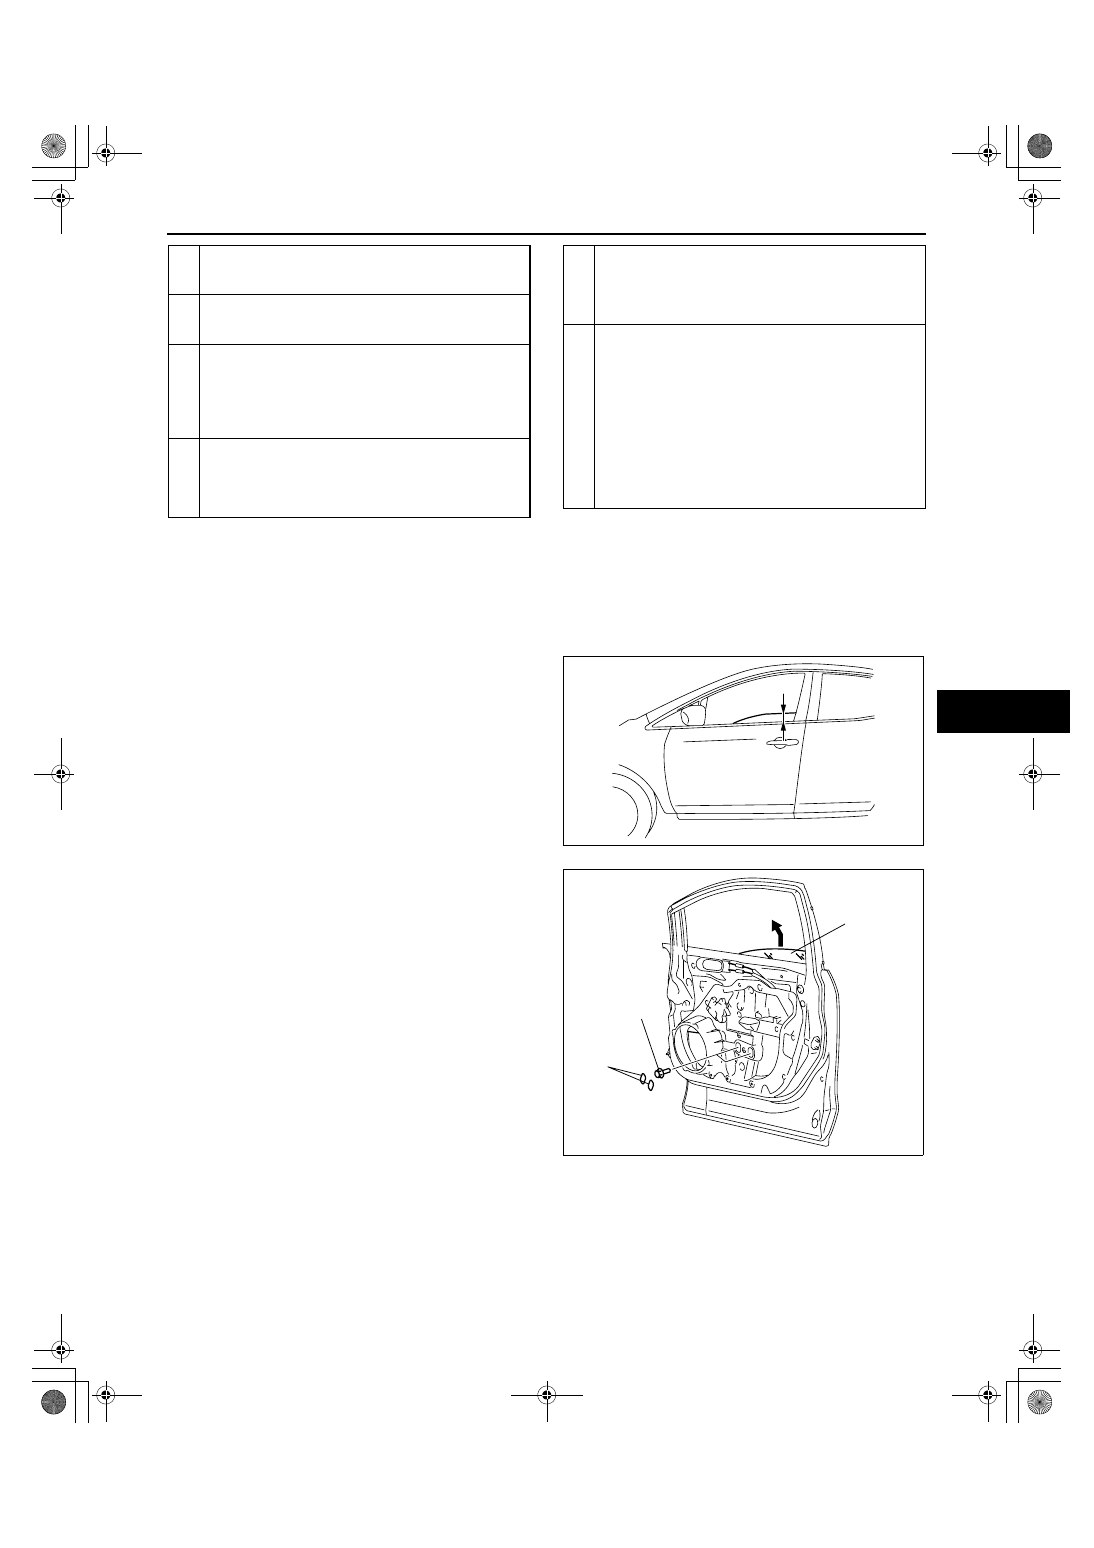
id091200800400
1. Adjust the door glass position as shown in the
figure.
2. Disconnect the negative battery cable.
3. Remove the inner garnish. (See 09-17-20 INNER
GARNISH REMOVAL/INSTALLATION.)
4. Remove the front door trim. (See 09-17-20
FRONT DOOR TRIM REMOVAL/
INSTALLATION.)
5. Remove the front door speaker. (See 09-20-6
FRONT DOOR SPEAKER REMOVAL/
INSTALLATION.)
6. Remove the hole cover.
7. Remove the bolts. (See 09-12-4 Front door glass
removal note.)
8. Lift the front door glass up and remove it in the
direction of the arrow.
9. Install in the reverse order of removal.
Note
• When installing the front door glass, align
the glass edge with the glass run channel by
hand through the speaker installation hole.
9
Front power window regulator
(See 09-12-5 FRONT POWER WINDOW
REGULATOR REMOVAL/INSTALLATION.)
10 Rear power window regulator
(See 09-12-6 REAR POWER WINDOW REGULATOR
REMOVAL/INSTALLATION.)
11 Rear window glass
(See 09-12-20 REAR WINDOW GLASS REMOVAL.)
(See 09-12-21 REAR WINDOW GLASS
INSTALLATION.)
(See 09-12-31 FILAMENT INSPECTION.)
(See 09-12-31 FILAMENT REPAIR.)
12 Power window subswitch
(See 09-12-11 POWER WINDOW SUBSWITCH
REMOVAL/INSTALLATION.)
(See 09-12-11 POWER WINDOW SUBSWITCH
INSPECTION.)
13 Power outer mirror switch
(See 09-12-34 POWER OUTER MIRROR SWITCH
REMOVAL/INSTALLATION.)
(See 09-12-35 POWER OUTER MIRROR SWITCH
INSPECTION.)
14 Power window main switch
(See 09-12-8 POWER WINDOW MAIN SWITCH
REMOVAL/INSTALLATION.)
(See 09-12-8 POWER WINDOW MAIN SWITCH
INSPECTION.)
(See 09-12-13 POWER WINDOW INITIALIZATION
PROCEDURE.)
(See 09-12-14 TWO-STEP DOWN FUNCTION
OPERATIVE/NON-OPERATIVE SWITCHING
PROCEDURE.)
(See 09-12-15 DOOR GLASS POSITION CHANGE
PROCEDURE.)
70 mm
{2.8 in}
acxuuw00001473
FRONT DOOR
GLASS
HOLE COVER
BOLT
4.5—6.5 N·m
{46 —66 kgf·cm,
40—57 in·lbf}
acxuuw00001474