Range Rover Classic. Manual - part 102


  Index      Land Rover     Range Rover Classic - service manual 1995 year


Search            


Content   ..  100  101  102  103   ..


Range Rover Classic. Manual - part 102


57

STEERING

2

REPAIR

POWER STEERING BOX

Service repair no - 57.10.01

General precautions

1. Whenever any part of system, is removed or

disconnected, utmost cleanliness must be
observed.

2. Disconnected ports and hoses must be plugged

to prevent ingress of dirt. If metal sediment is
found in system, establish cause rectify and
flush system.

3. Do not start engine until reservoir is full as pump

will be damaged.

4. Metric pipe fittings are used with ’O’ ring pipe

ends on fittings to steering box.

5. Follow normal ’O’ ring replacement procedure

whenever pipes are disconnected.

6. Ensure compatible metric components when

fitting replacement pipes.

CAUTION: Before removing any parts of
steering linkage, it is imperative that road
wheels are positioned straight ahead.

Then steering wheel removed to prevent rotary
coupler being wound up or damaged.

CAUTION: After refitting steering linkage
parts follow correct procedure to ensure
that road wheels, steering box and

steering wheel are correctly positioned relative to
each other when in straight ahead condition. If
steering wheel requires repositioning, ensure that
drive pegs on rotary coupler are correctly
positioned before steering wheel is replaced.

This ensures drive pegs locate in their holes in
rear of steering wheel.

After final alignment connect rotary coupler
multiplug, tighten steering wheel securing nut and
fit air bag - if fitted or steering wheel trim pad.

NOTE: When drag link is disconnected
from steering box, travel available at
steering wheel to each full lock is not

equal.

Remove

1. Site vehicle on level surface.
2. Open bonnet[hood].
3. Remove filler cap from power steering fluid

reservoir.

4. Clean steering box.
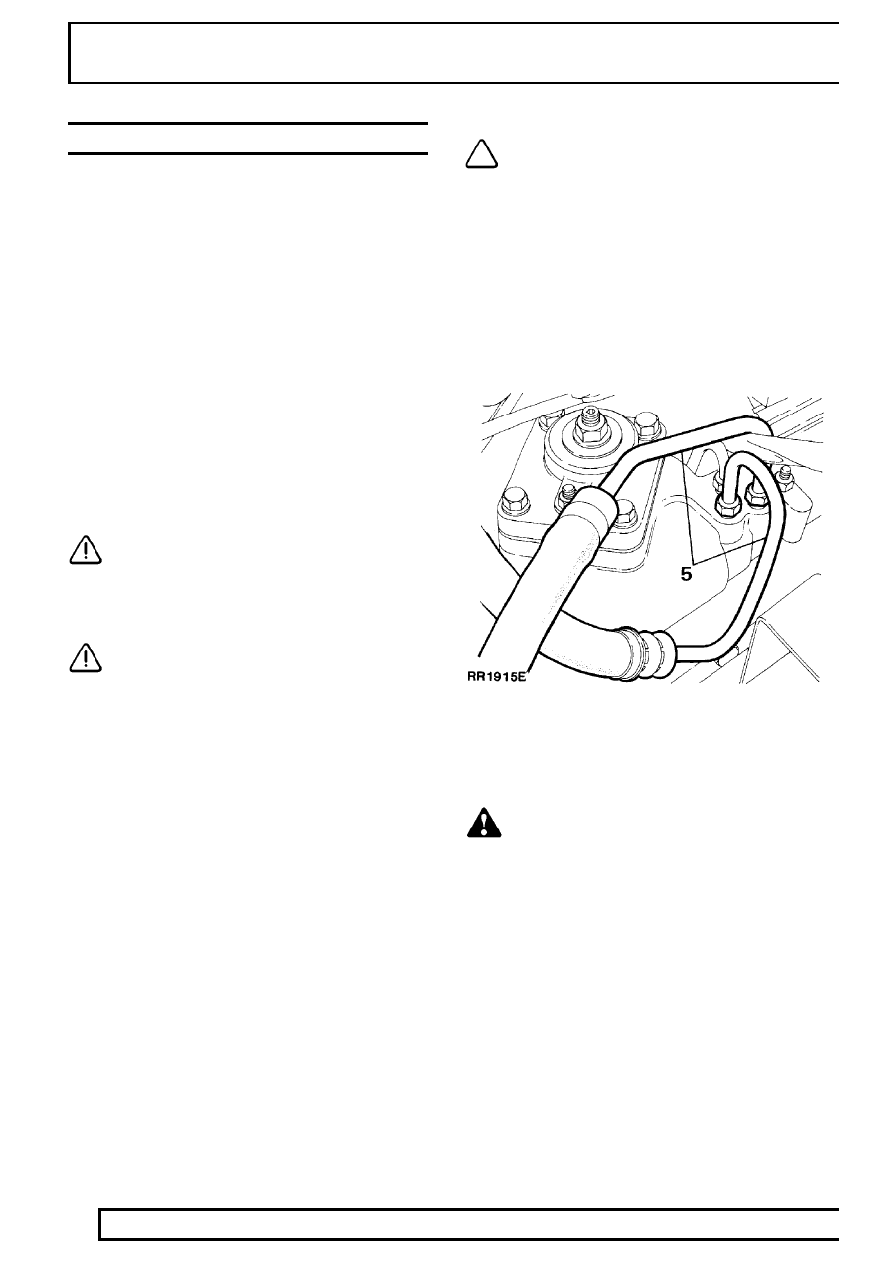
5. Disconnect feed and return pipes from steering

box.

6. Plug open pipes and steering box ports to

prevent ingress of dirt.

7. Support chassis front on axle stands. Or raise

vehicle on a hoist.

WARNING: Ensure wheels are chocked,
parking brake is applied, and low range
selected.

STEERING

3

REPAIR

8. Remove undertray

9. Disconnect drag link from drop arm using a

suitable extractor.

10. Remove pinch bolt securing lower shaft

universal joint to power steering box.

11. Loosen but do not remove nut securing tie bar to

mounting.

12. Remove bolts securing tie bar, move tie bar

aside.

13. Remove bolts securing power steering box to

chassis side member.

14. Withdraw power steering box.

57

STEERING

4

REPAIR

Refit

15. Position steering box to chassis side member,

ensuring locating peg is engaged. Tighten bolts
to

81 Nm.

16. Fit pinch bolt and nut securing universal joint to

power steering box. Tighten to

25 Nm.

17. Position tie bar, tighten bolts and nut to

81 Nm,

starting with tie bar to mounting nut, then
loosen nut and bolts by one complete turn.

18. Check steering box, adjust if necessary.

See

Adjustment, Power Steering Box

19. Refit drag link to drop arm tighten nut to

40 Nm.

20. Fit undertray.
21. Lower vehicle to ground.
22. Remove plugs and refit pipes to steering box.

Tighten 16mm thread to

20 Nm.

14mm thread to 15 Nm.

23. Remove filler cap. Fill reservoir to oil level mark

on dipstick. Use recommended fluid.

See

LUBRICANTS, FLUIDS AND CAPACITIES,
Information, Recommended Lubricants and
Fluids 
and bleed power steering system. See
Power Steering System - Bleed

24. Recheck fluid level and replace cap.
25. With engine running, test steering system for

leaks by holding steering in both full lock
directions.

CAUTION: Do not maintain this pressure
for more than 30 seconds in any one
minute, to avoid oil overheating and

possible seal damage.

26. Test drive vehicle: using both full lock directions,

to settle steering components. If possible, drive
vehicle over speed bumps and include harsh
braking.

WARNING: Do not test drive vehicle on
public highway.

27. Drive vehicle in a straight line on level ground

and stop.

28. Tighten tie bar to mounting nut to

110 Nm.

29. Tighten bolts securing tie bar to

81 Nm.

30. Ensure steering wheel is correctly aligned when

wheels are positioned straight ahead.

31. If necessary reposition steering wheel.

See

Steering Wheel

32. Road test vehicle.

STEERING

5

REPAIR

POWER STEERING SYSTEM - BLEED

Service repair no - 57.15.02

1. Ensure fluid in reservoir reaches dipstick

maximum.

2. Run engine to normal operating temperature.
3. Recheck and correct reservoir fluid level.

NOTE: During instructions 4 to 6, maintain
maximum fluid level in reservoir. Do not
increase engine speed or move steering

wheel.

4. With engine at idle speed, loosen bleed screw.

When fluid seeps past bleed screw retighten
screw.

5. Check fluid level.
6. Clean away fluid around bleed screw.
7. Check hose connections, pump and steering box

for fluid leaks by holding steering on full lock in
both directions.

CAUTION: Do not maintain this pressure
for more than 30 seconds in any one
minute to avoid overheating fluid and

possibly damaging seals.

8. Carry out road test.

POWER STEERING FLUID RESERVOIR

Service repair no - 57.15.08

Remove

1. Remove undertray.
2. Position drain tin beneath reservoir.

3. Loosen mounting bracket clamp bolt, raise

reservoir to gain access to pipe clamps.

4. Loosen clamps, disconnect feed and return

hoses from reservoir, allow fluid to drain.

CAUTION: Plug the connections.

5. Remove reservoir.

CAUTION: Discard fluid drained from
system. Do not allow fluid to contact
paintwork, if spilled, remove fluid and

clean area with warm water.


Content   ..  100  101  102  103   ..