Range Rover. Manual - part 147
TRANSFER BOX
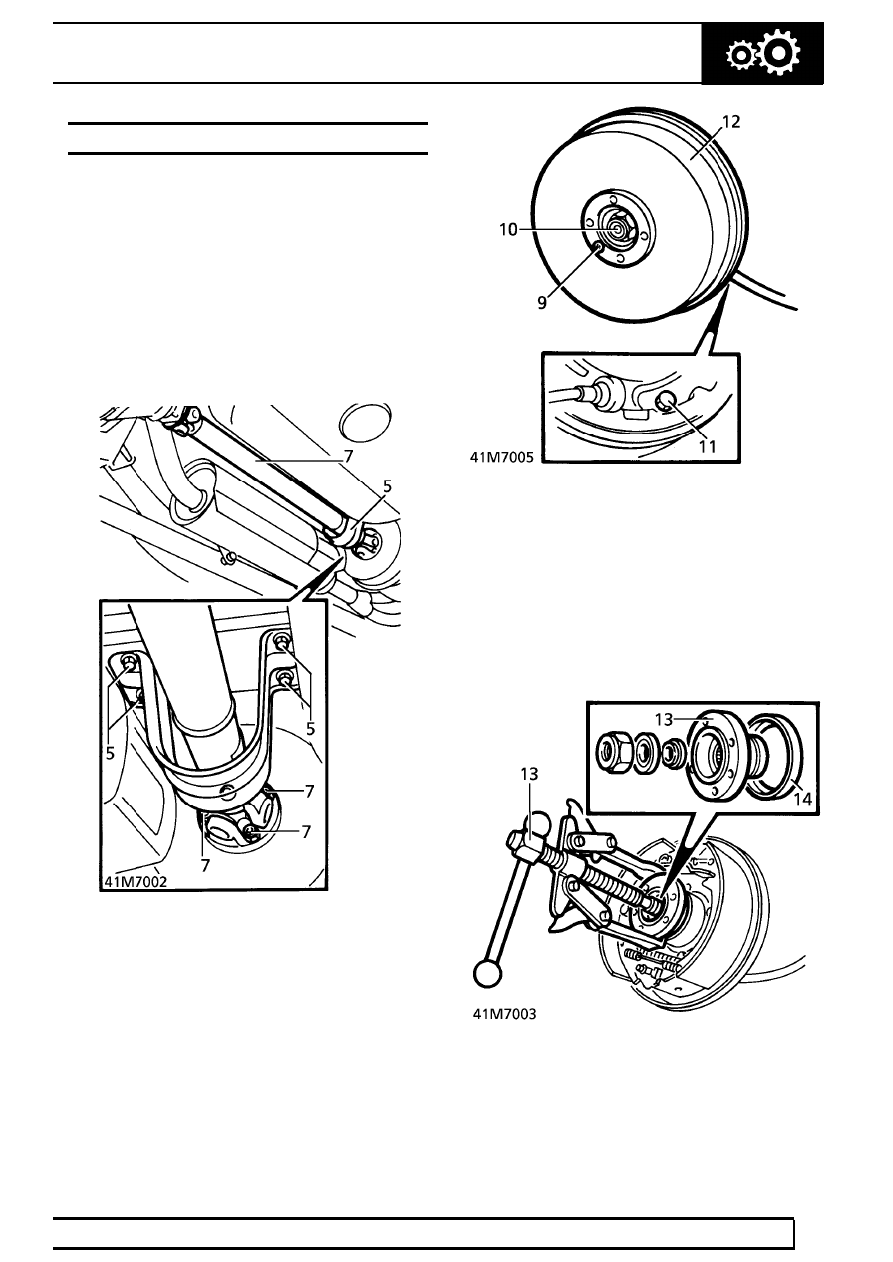
5
REPAIR
OUTPUT SHAFT OIL SEAL - REAR
Service repair no - 41.20.54
Remove
1. Raise vehicle on four post lift.
2. Disconnect battery negative lead.
3. Release handbrake.
4. Raise lift.
5. Remove 4 bolts securing propeller shaft guard to
floor pan. Remove guard.
6. Mark propeller shaft flange and brake drum to
aid assembly.
7. Remove 4 nuts securing propeller shaft flange to
brake drum. Release shaft. Tie aside.
8. Apply handbrake.
9. Remove screw securing brake drum to flange.
10. Remove nut and washer securing flange to
output shaft, discard nut.
11. Release handbrake. Slacken park brake drum
adjusting screw.
12. Remove park brake drum.
13. Using LRT-99-500 if necessary, withdraw flange
from transfer box. Collect sealing washer.
14. Remove dust shield.
15. Lever seal from location in casing.