Range Rover. Manual - part 111
LAND ROVER V8
45
REPAIR
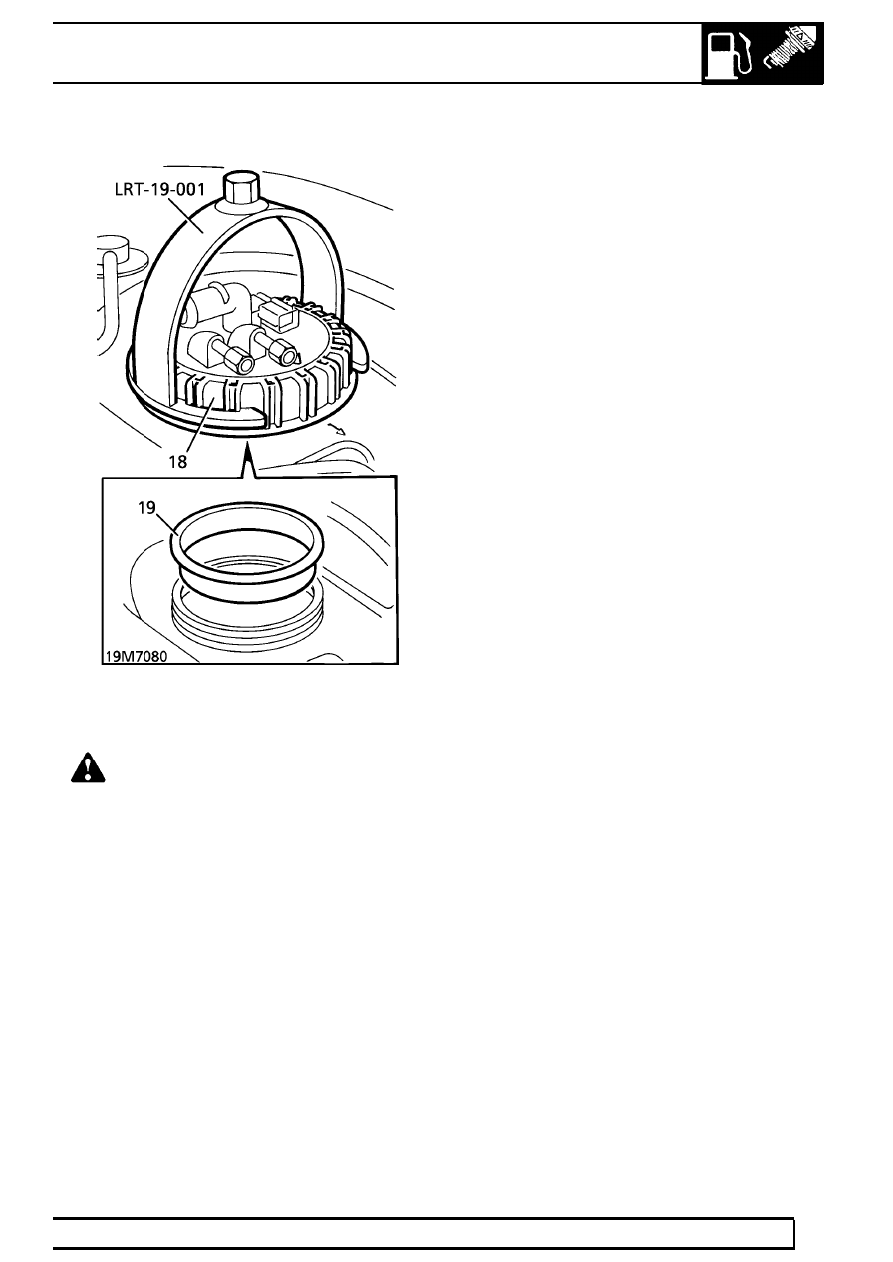
WARNING: A quantity of fuel will be
retained in the unit, care must be taken to
avoid excessive spillage during removal.
19. Remove tank unit sealing rubber and discard.
Reassemble
20. Fit new sealing rubber.
21. Fit tank unit. Align location marks.
22. Fit retaining ring using LRT-19-001.
23. Connect fuel feed and return pipes to tank unit.
Tighten to
16 Nm (12 lbf.ft)
24. Secure pipes to fuel tank clips.
25. Position fill breather pipe to tank unit. Secure
with clip.
26. Position tank in cradle.
Refit
27. Raise fuel tank assembly on jack until multiplug
can be connected to tank unit.
28. Raise tank. Align cradle mounting points. Secure
with nuts and bolts.
29. Remove plugs from pipes and connections.
30. Petrol Models Only: Using new ’O’ ring,
connect fuel spill return pipe. Tighten to
16 Nm
(12 lbf.ft)
31. Petrol Models Only: Using new ’O’ ring,
connect fuel feed pipe to filter. Tighten to
20 Nm
(15 lbf.ft)
32. Diesel Models Only: Connect fuel feed and
return pipes.
33. Lower vehicle.
34. Refit fuel filler neck.
See this section.
35. Refill fuel tank.
36. Reconnect battery negative lead.