Range Rover. Manual - part 38
BMW DIESEL
43
REPAIR
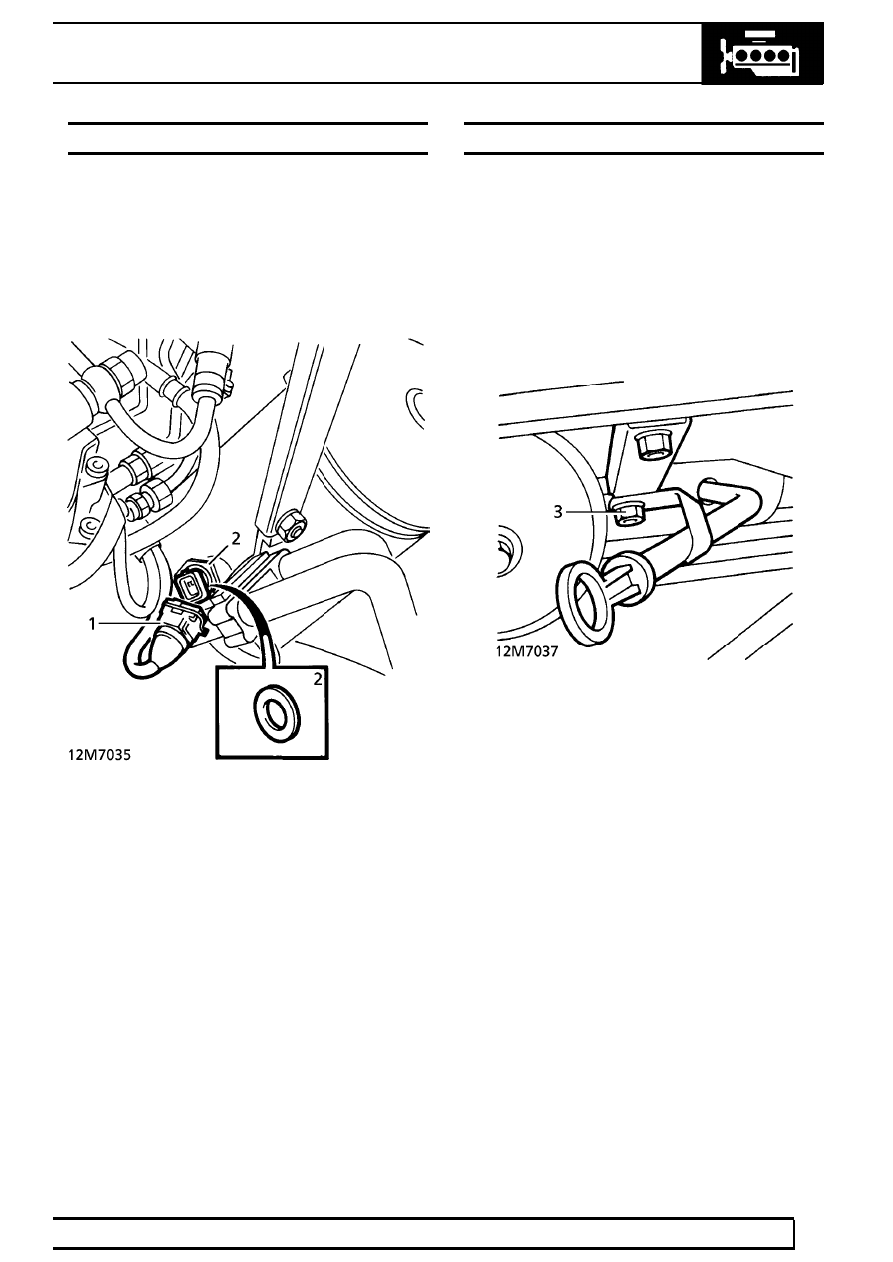
OIL PRESSURE SWITCH
Service repair no - 12.60.50
Remove
1. Disconnect switch multiplug.
2. Remove switch. Collect sealing washer and
discard.
Refit
3. Ensure mating faces are clean.
4. Fit a new sealing washer, oil threads of switch
and fit switch. Tighten to
40 Nm (30 lbf.ft)
5. Connect multiplug.
SUMP
Service repair no - 12.60.44
Remove
1. Raise vehicle on four post lift.
2. Disconnect battery negative lead.
3. Remove nut and bolt securing dipstick tube.
Remove tube. Remove and discard ’O’ ring.
4. Raise lift.
5. Position support under chassis front cross
member.