Frelander 2. Manual - part 651


  Index      Land Rover     Land Rover Frelander 2 - service repair manual 2006-2010 year


Search            


Content   ..  649  650  651  652   ..


Frelander 2. Manual - part 651


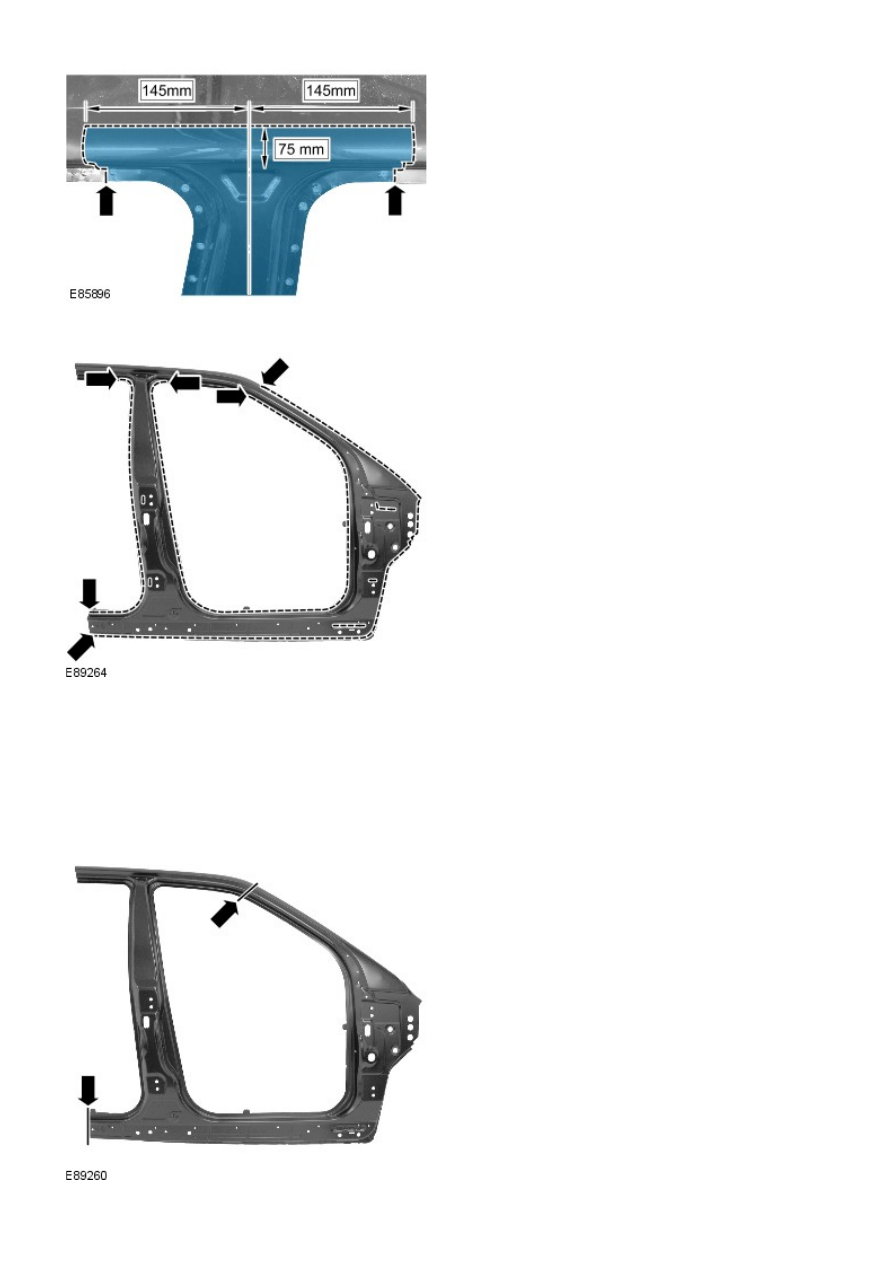
27. Saw cut the old panel at the B-Pillar, as illustrated,

observe the measurements to allow access to the B-Pillar

reinforcement.

28. Mill out the spot welds.

29. Separate the joints and remove the old panel, also releasing

the NVH elements.

Installation

1. Offer up and align the new panel and clamp into position,

overlapping the old panel remaining on the vehicle. Check

alignment, if correct, proceed to next step, if not, rectify and

recheck before proceeding.

2. Saw cut through the new and old panels at the rocker panel

and A-Pillar, where the MIG butt joints are to be made.

3. Saw cut through the new and old panels at the B-Pillar,

where the MIG butt joint is to be made.

4. Remove the new panel and the old remnants.

5. NOTE: MIG slots should be installed in accordance with the

spacing shown in the illustration. Where this is not possible,

due to the indents in the panel, the slot should be made in the

location of the original spot weld.

Cut slots in the new panel ready for MIG brazing.

6. Prepare the old and new panel joint surfaces.
7. If necessary, renew the NVH element/s.

8. Apply sealer adhesive to the NVH element at the A-Pillar.

9. Apply sealer adhesive to the NVH element at the B-Pillar.

10. Apply adhesive to the A-Pillar as illustrated.

11. Offer up the new panel and clamp into position.
12. Tack weld the butt joints.

13. MIG braze the slots.

14. Dress the tack welds.

15. MIG weld the butt joint at the upper B-Pillar.


Content   ..  649  650  651  652   ..