Freelander 1. Manual - part 264


  Index      Land Rover     Freelander 1 - service manual 2002 year


Search            


Content   ..  262  263  264  265   ..


Freelander 1. Manual - part 264


HEATING AND VENTILATION

REPAIRS

80-5

Refit

1. Fit filters and retainers to air intake moulding 

and secure with clips.

2. Fit bonnet sealing rubber to air intake moulding.
3. Fit air intake moulding and secure with studs. 

Fit front studs first.

4. Fit wiper arms.


 + 

 WIPERS AND WASHERS, REPAIRS, 

Arm - wiper - each.

Heater unit 

$% 80.20.01

Remove

1. Drain cooling system.


 + 

 COOLING SYSTEM - Td4, 

ADJUSTMENTS, Coolant - drain and refill.
 

 + 

 COOLING SYSTEM - K SERIES 1.8, 

ADJUSTMENTS, Coolant - drain & refill.
 

 + 

 COOLING SYSTEM - K SERIES KV6, 

ADJUSTMENTS, Coolant - drain and refill.

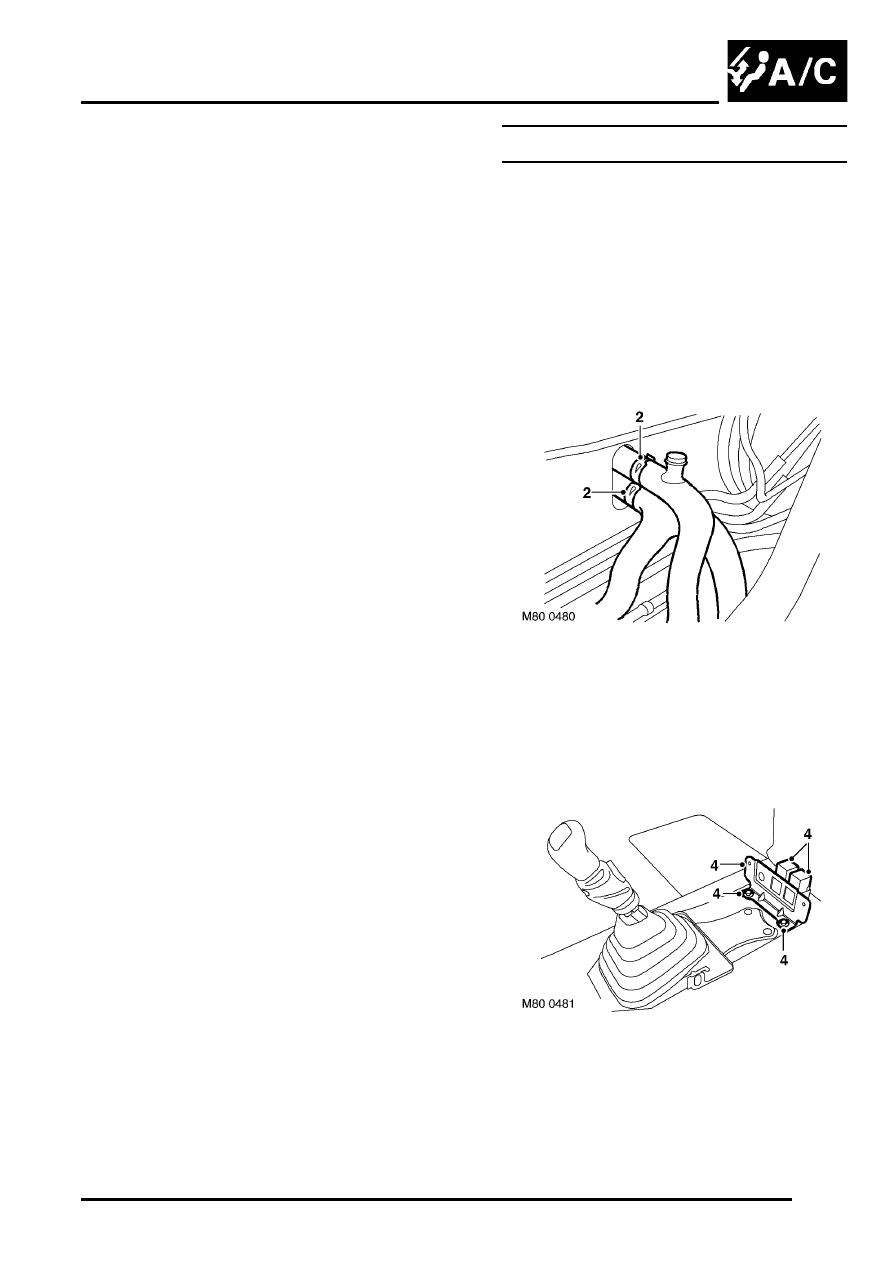
2. Release 2 clips securing heater hoses to heater 

and disconnect hoses.

3. Remove fascia.


 + 

 INTERIOR TRIM COMPONENTS, 

REPAIRS, Fascia.

4. Remove 2 bolts from console support bracket, 

release 2 relays and remove bracket.

HEATING AND VENTILATION

80-6

REPAIRS

5. Disconnect 4 multiplugs from heater controls.

6. Disconnect multiplug from heater and release 

diagnostic socket.

7. Models with A/C: Disconnect multiplug from 

evaporator.

8. Remove bolt from duct of LH outer face level 

vent and release duct from heater.

9. Remove bolt from duct of RH outer face level 

vent and release duct from heater.

10. Release duct of RH demister vent.
11. Release duct of LH demister vent.
12. Release air inlet connector hose.
13. Release harness from 2 clips on heater.
14. Remove 2 nuts and 1 bolt securing heater to 

body and remove heater.

NOTE: Do not carry out further dismantling if 
component is removed for access only.

HEATING AND VENTILATION

REPAIRS

80-7

15. Disconnect 2 multiplugs from heater controls.
16. Release air blend control cable from lever and 

abutment.

17. Release air distribution cable from lever and 

abutment.

18. Remove heater controls.

Refit

1. Position heater controls to replacement heater.
2. Connect air distribution cable to lever and 

abutment.

3. Connect air blend cable to lever and abutment.
4. Connect multiplugs to heater controls.
5. Fit heater and secure with nuts and bolt.
6. Position harness and connect to clips on 

heater.

7. Fit air inlet connector hose.
8. Fit RH demister vent duct to heater.
9. Fit RH outer face level vent duct to heater and 

secure to body with bolt.

10. Fit LH demister vent duct to heater.
11. Fit LH outer face level vent duct to heater and 

secure to body with bolt.

12. Models with A/C: Connect multiplug to 

evaporator.

13. Connect multiplug to heater and secure 

diagnostic socket.

14. Connect multiplugs to heater controls.
15. Fit console support bracket and secure with 

bolts.

16. Fit relays to console support bracket.
17. Fit fascia.


 + 

 INTERIOR TRIM COMPONENTS, 

REPAIRS, Fascia.

18. Connect heater hoses and secure with clips.
19. Refill cooling system.


 + 

 COOLING SYSTEM - Td4, 

ADJUSTMENTS, Coolant - drain and refill.
 

 + 

 COOLING SYSTEM - K SERIES 1.8, 

ADJUSTMENTS, Coolant - drain & refill.
 

 + 

 COOLING SYSTEM - K SERIES KV6, 

ADJUSTMENTS, Coolant - drain and refill.

Element - positive temperature co-
efficient (PTC) heater - Td4 models

$% 80.20.05

Remove

1. Remove heater assembly.


 + 

 HEATING AND VENTILATION, 

REPAIRS, Heater unit.

2. Remove 2 screws from matrix cover, remove 

cover.

3. Remove screw securing saddle clamp, remove 

clamp.

4. Remove heater matrix.

5. Release PTC top and bottom retaining stud 

bosses from locating holes.

HEATING AND VENTILATION

80-8

REPAIRS

6. Release PTC element harness grommet from 

passenger side of heater unit.

7. Carefully remove element also guiding harness 

through assembly

Refit

1. Carefully fit  PTC element into heater 

assembly, also guide harness through opposite 
side.

2. Fit harness grommet.
3. Locate bottom stud bosses into locating holes, 

then locate top bosses.

4. Fit heater matrix and secure with saddle clamp.
5. Fit matrix cover and secure with screws.
6. Fit heater assembly


 + 

 HEATING AND VENTILATION, 

REPAIRS, Heater unit.

Harness - positive temperature co-
efficient (PTC) heater - Td4 models

$% 80.20.06

Remove

1. Disconnect battery earth lead.

2. Remove bolt securing PTC cable from positive 

side of battery.

3. Remove ECM from 'E' box.


 + 

 ENGINE MANAGEMENT SYSTEM - 

EDC, REPAIRS, Engine control module 
(ECM).

4. Disconnect multiplugs from gearbox ECU and 

cooling fan sensor


Content   ..  262  263  264  265   ..