Discovery 2. Manual - part 648


  Index      Land Rover     Land Rover Discovery 2 - service manual 1999 year


Search            


Content   ..  646  647  648  649   ..


Discovery 2. Manual - part 648


DOORS

REPAIRS

76-1-5

Refit

1. Fit glass to frame. 
2. Position frame to door and tighten bolts 

securing front door frame to 10 Nm (7 lbf.ft) and 
bolts securing rear door frame to 22 Nm  (16 
lbf.ft).

3. Secure regulator to glass with  bolts and tighten 

to 6 Nm (4.4 lbf.ft). 

4. Fit inner and outer waist seal and  secure with 

clips. 

5. Front door glass only: Fit exterior door mirror.  


 + 

 EXTERIOR FITTINGS, REPAIRS, 

Mirror - exterior - electric.

6. Fit water shedder to door.
7. Fit door trim casing.


 + 

 DOORS, REPAIRS, Trim casing - 

front door.
 

 + 

 DOORS, REPAIRS, Trim casing - 

rear door.

Quarter light 

$% 76.31.31 

Remove

1. Remove rear door glass. 


 DOORS, REPAIRS, Glass - front or 

rear door.

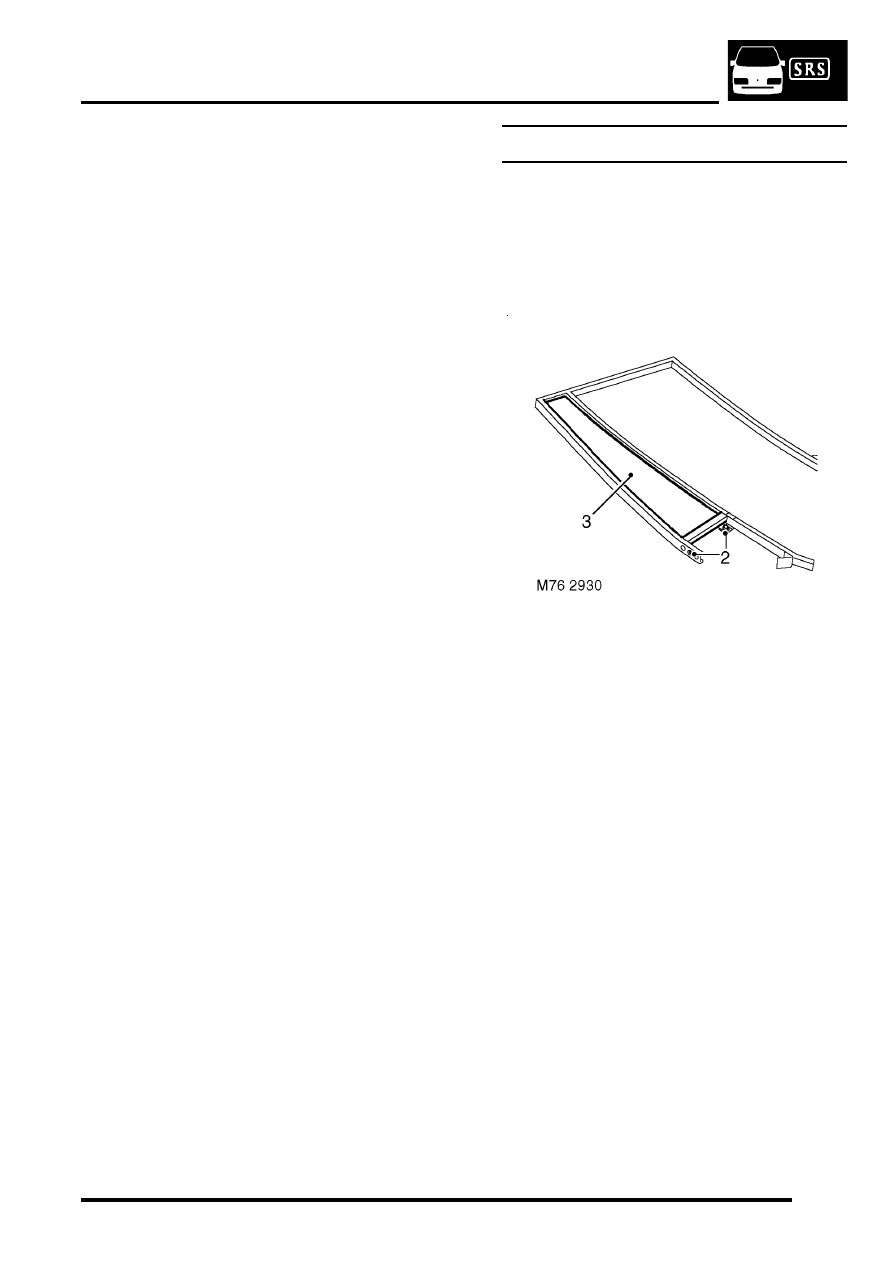
2. Remove 2 bolts securing quarter light glass to 

frame. 

3. Remove quarter light glass from frame. 

Refit

1. Fit quarter light glass to frame. 
2. Fit bolts securing quarter light  glass to frame 

and tighten to 10 Nm  (7 lbf.ft). 

3. Fit rear door glass. 


 + 

 DOORS, REPAIRS, Glass - front or 

rear door.

DOORS

76-1-6

REPAIRS

Regulator and motor - front and rear 
door  glass  

$% 76.31.45 

Remove

1. Remove door trim casing.  


 + 

 DOORS, REPAIRS, Trim casing - 

front door.
 

 + 

 DOORS, REPAIRS, Trim casing - 

rear door.

2. Carefully release water shedder from  door. 

3. Lower glass and remove 2 bolts securing door 

glass to regulator. 

4. Raise glass and secure with a suitable  wedge. 
5. Disconnect multiplug from glass lift  motor. 
6. Front door: Remove 6 bolts securing glass 

regulator  assembly to door. 

7. Rear door: Remove 4 bolts securing glass 

regulator assembly to door.

8. Manoeuvre regulator through access hole  at 

bottom of the door. 

9. Remove 3 Torx screws securing glass lift  

motor to regulator and remove motor. 

Refit

1. Clean mating faces of regulator and  motor. 
2. Fit glass lift motor to regulator  and tighten 3 

Torx screws to 5 Nm  (3.7 lbf.ft). 

3. Position regulator in door. Fit bolts securing 

regulator to  door and tighten to 6 Nm (4.4 
lbf.ft).  

4. Connect multiplug to glass lift motor. 
5. Remove wedge holding glass and position  

glass to regulator. 

6. Secure glass to regulator with  bolts and tighten 

to 6 Nm (4.4 lbf.ft).  

7. Fit water shedder to door. 
8. Fit door trim casing.  


 + 

 DOORS, REPAIRS, Trim casing - 

front door.
 

 DOORS, REPAIRS, Trim casing - 

rear door.

DOORS

REPAIRS

76-1-7

Trim casing - front door 

$% 76.34.01.99 

Remove

1. Remove 2 screws securing hand rail to  door. 
2. Remove screw securing door handle 

escutcheon to door. 

3. Remove escutcheon. 
4. Remove 4 screws securing pocket to door. 
5. Carefully release 10 clips securing trim  casing 

to door. 

6. If fitted, disconnect multiplug from upper door 

speaker. 

7. Disconnect multiplug from lower door speaker. 
8. Remove trim casing from door. 

Refit

1. Position trim casing to door and connect door 

speaker multiplug(s). 

2. Secure trim casing to door with clips. 
3. Fit escutcheon to door handle and secure  with 

screw. 

4. Fit hand rail to door and secure with screws. 
5. Fit pocket to door and secure with screws. 

DOORS

76-1-8

REPAIRS

Trim casing - rear door 

$% 76.34.04.99 

Remove

1. Remove screw securing door handle 

escutcheon to door.

2. Disconnect multiplug from window switch.
3. Remove door handle escutcheon.
4. Remove 2 screws securing hand rail to  door. 

5. Carefully release 11 clips securing trim casing 

to door.

6. If fitted, disconnect multiplug from upper door 

speaker.

7. Disconnect multiplug from lower door speaker.
8. Remove trim casing from door. 

Refit

1. Position trim casing to door and connect door 

speaker multiplug(s). 

2. Secure trim casing to door with clips. 
3. Fit hand rail to door and secure with screws. 
4. Connect multiplug to window switch. 
5. Fit escutcheon to door handle and secure  with 

screw. 


Content   ..  646  647  648  649   ..