Discovery 2. Manual - part 580
PROPELLER SHAFTS
REPAIRS
47-5
REPAIRS
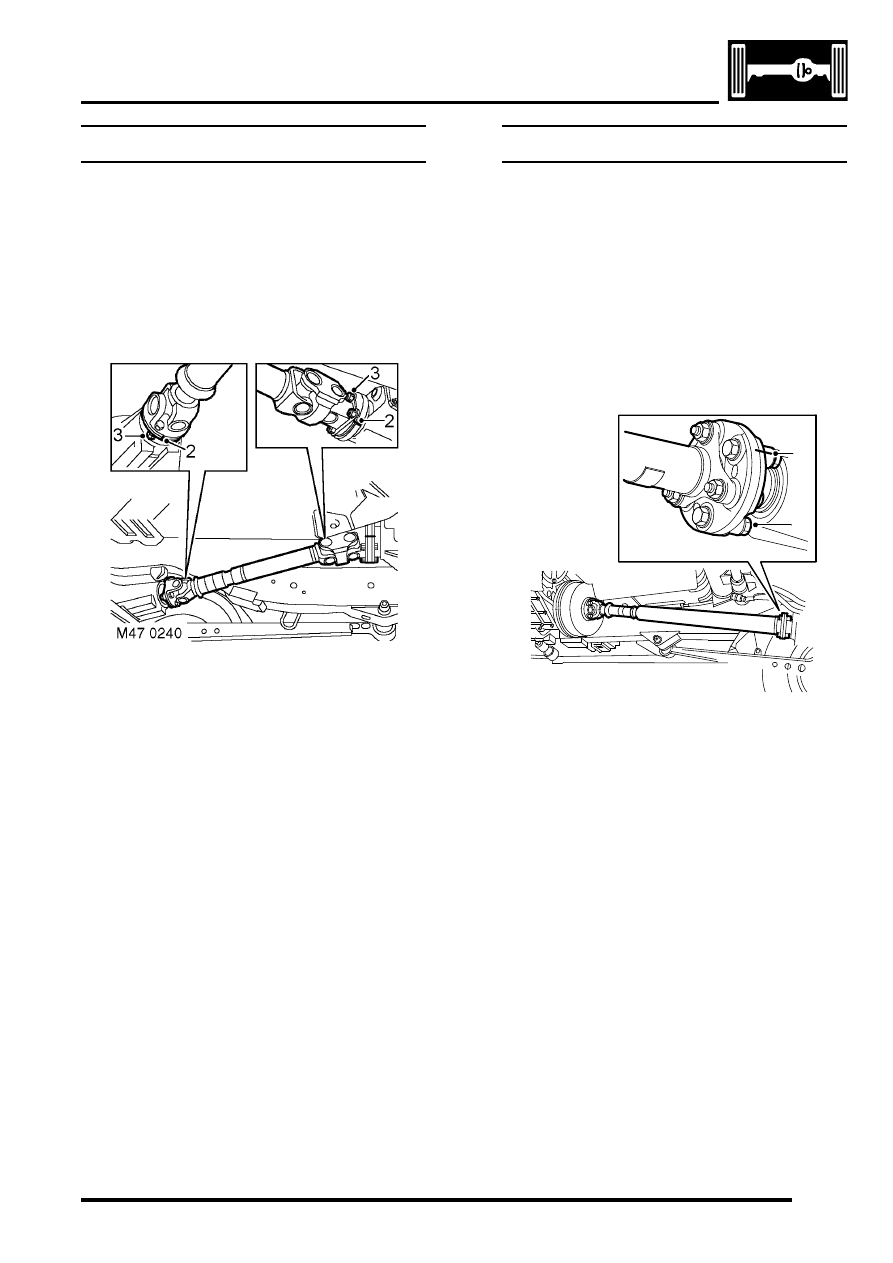
Propeller shaft - front
$% 47.15.02
Remove
1. Raise front of vehicle.
WARNING: Do not work on or under a
vehicle supported only by a jack. Always
support the vehicle on safety stands.
2. If same components to be refitted, reference
mark propeller shaft and mating components.
3. Remove 8 nuts and bolts securing propeller
shaft to differential and transfer gearbox
flanges.
4. Remove propeller shaft.
Refit
1. Clean propeller shaft flanges and mating
faces.
2. Position propeller shaft to transfer gearbox
and differential and tighten nuts and bolts to 47
Nm (35 lbf. ft).
3. Remove stand(s) and lower vehicle.
Propeller shaft - rear
$% 47.15.03
Remove
1. Raise rear of vehicle.
WARNING: Do not work on or under a
vehicle supported only by a jack. Always
support the vehicle on safety stands.
2. If same components are to be refitted,
reference mark propeller shaft and mating
components.
3. Remove 4 nuts and bolts securing propellor
shaft to transfer gearbox flange.
4. Remove 3 nuts and bolts securing propeller
shaft to flexible coupling.
5. Remove propeller shaft.
Refit
1. Clean propeller shaft flanges and mating
faces.
2. Position propeller shaft to transfer gearbox and
flexible coupling.
3. Fit nuts and bolts securing propeller shaft to
transfer gearbox and tighten to 47 Nm (35
lbf.ft).
4. Fit nuts and bolts securing propeller shaft to
flexible coupling and tighten to 76 Nm (56 lbf.ft).
5. Lower vehicle.
M51 0043A
2
3