Discovery 2. Manual - part 433
ENGINE - V8
REPAIRS 12-2-25
Mounting - rear - RH
$% 12.45.09
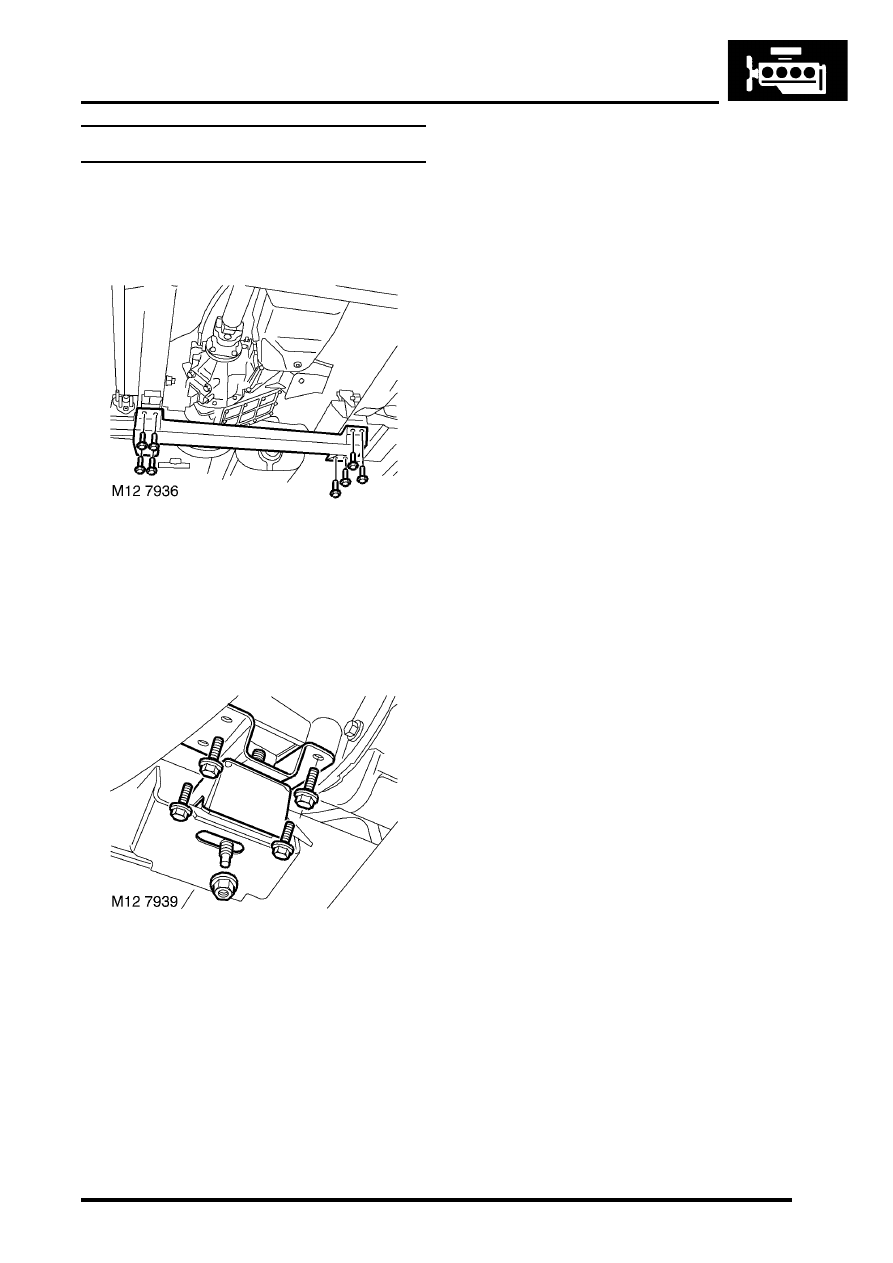
Remove
1. Raise vehicle on lift.
2. Remove 8 bolts securing rear cross member
and remove cross member.
3. Support transfer gearbox on jack.
CAUTION: To prevent damage to
components, cushion the jack pad with a
block of wood or hard rubber.
4. Remove nut securing mounting to body
bracket.
5. Remove nut securing mounting to mounting
bracket.
6. Remove 4 bolts securing mounting bracket to
gearbox.
7. Remove mounting and mounting bracket
assembly.
8. Remove mounting rubber.
9. Remove heat shield, if fitted.
Refit
1. If fitted, position heatshield, fit mounting rubber
to mounting bracket, fit nut but do not tighten.
2. Position mounting bracket assembly, fit bolts
securing mounting bracket to gearbox and
tighten to 85 Nm (63 lbf.ft).
3. Fit nut securing mounting to body bracket and
tighten to 48 Nm (35 lbf.ft).
4. Tighten nut securing mounting to gearbox
bracket to 48 Nm (35 lbf.ft).
5. Position rear cross member, fit bolts and
tighten to 26 Nm (19 lbf.ft).
6. Lower vehicle.