Discovery 2. Manual - part 234
EXTERIOR FITTINGS
REPAIRS 76-2-17
Grille - front - from 03MY
$% 76.55.03
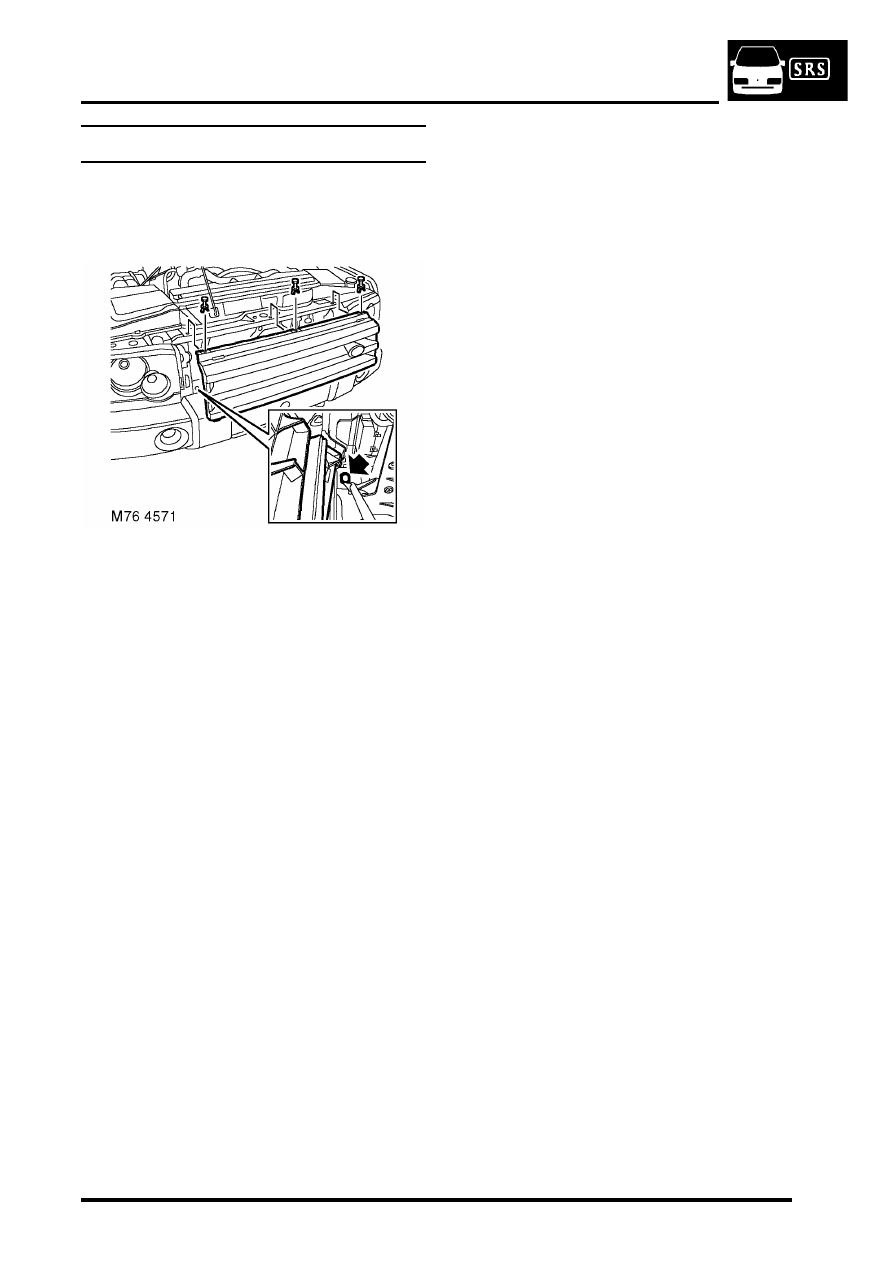
Remove
1. Remove 3 scrivets securing front grille to
bonnet locking platform.
2. Remove front grille.
NOTE: Do not carry out further dismantling if
component is removed for access only.
3. Remove motif from front grille.
Refit
1. Clean front grille to motif mating face.
2. Fit and secure motif to front grille.
3. Fit front grille and secure with scrivets.