Discovery (1995+): Body Repair Manual - part 43
77
PANEL REPAIRS
6
REPAIR
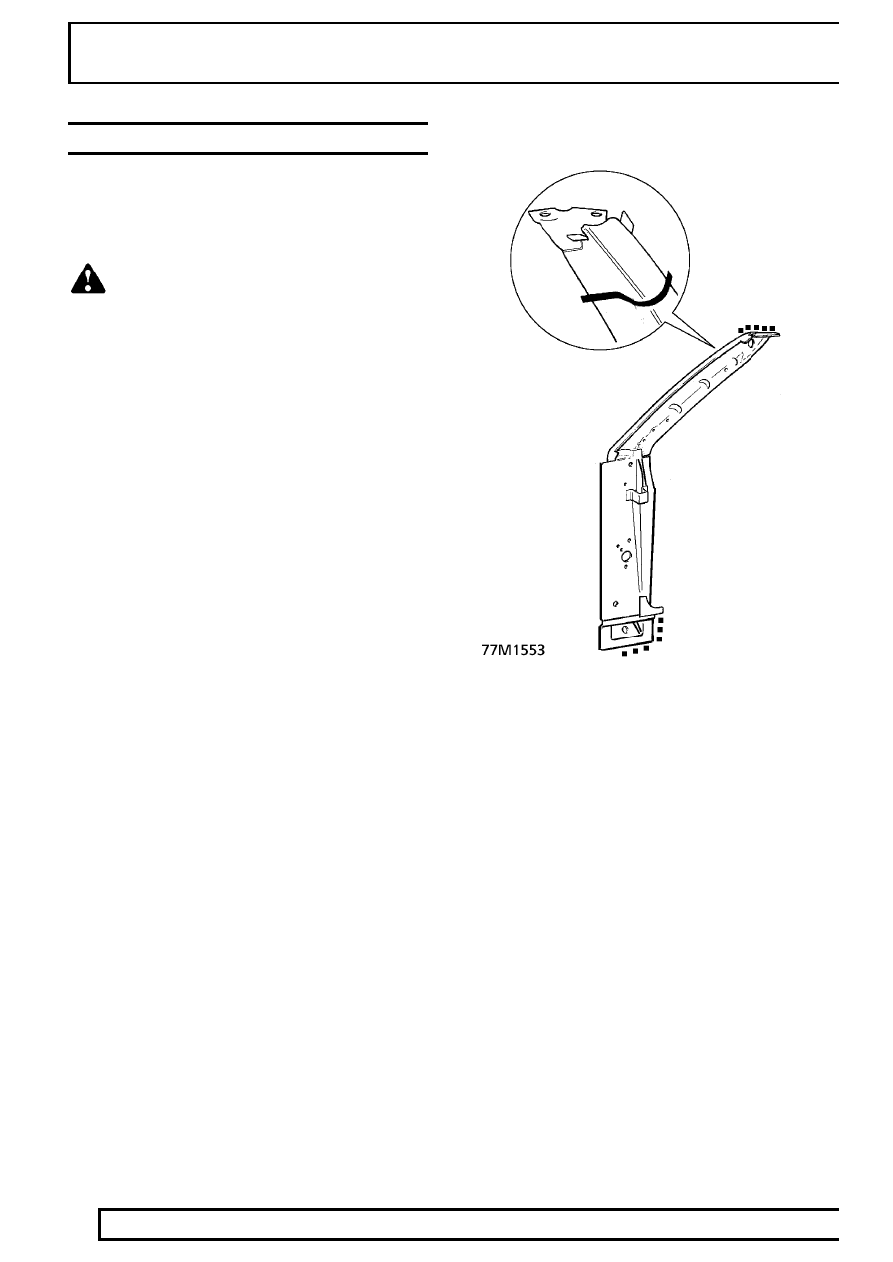
’A’ POST
Remove
1. Disconnect battery earth lead.
2. Raise side of vehicle.
WARNING: Support on safety stands.
3. Disconnect all ECUs.
4. Disconnect airbags and sensor system.
See
SUPPLEMENTARY RESTRAINT SYSTEM,
Repair.
5. Disconnect alternator.
6. Remove wing [fender].
See CHASSIS AND
BODY, Repair.
7. Remove bonnet [hood].
See CHASSIS AND
BODY, Repair.
8. Remove weatherstrips at upper edge of
bulkhead and inner wing.
9. Remove bonnet hinge.
10. Remove air intake plenum cowl.
See CHASSIS
AND BODY, Repair.
11. Remove dash panel assembly.
See CHASSIS
AND BODY, Repair.
12. Remove windscreen glass.
See CHASSIS AND
BODY, Repair.
13. Remove front door.
See CHASSIS AND BODY,
Repair.
14. Remove footwell trim.
15. Remove ’A’ post upper trim.
16. Remove sill finisher.
See CHASSIS AND
BODY, Repair.
17. Remove headlining.
See CHASSIS AND
BODY, Repair.
18. Remove front treadplate.
19. Remove front door aperture weatherstrip.
20. Remove front mud flap.
21. Remove wheel arch liner - front.
See CHASSIS
AND BODY, Repair.
Refit
22. Prepare and clean panel joint faces. Punch or
drill holes in new ’A’ post for plug welding as
shown. Cut upper section of outer panel to form
seam welded joint with existing panel.
23. Reverse removal procedure.
24. Remove stands and lower vehicle.