Discovery (1995+): Body Repair Manual - part 26


  Index      Land Rover     Discovery Body Repair Manual - 1995 year


Search            


Content   ..  24  25  26  27   ..


Discovery (1995+): Body Repair Manual - part 26


76

CHASSIS AND BODY

42

REPAIR

SUNROOF REGULATOR MANUAL

Service repair no - 76.83.03/04

FRONT

Remove

1. Ensure sunroof is in normally closed position.
2. Remove retaining screw and regulator handle.
3. Remove switch panel from stowage pocket

panel

4. Remove interior lamp from stowage pocket

panel

5. Remove alarm ultra sonic unit.
6. Unscrew ten fixings and remove stowage pocket

from headlining.

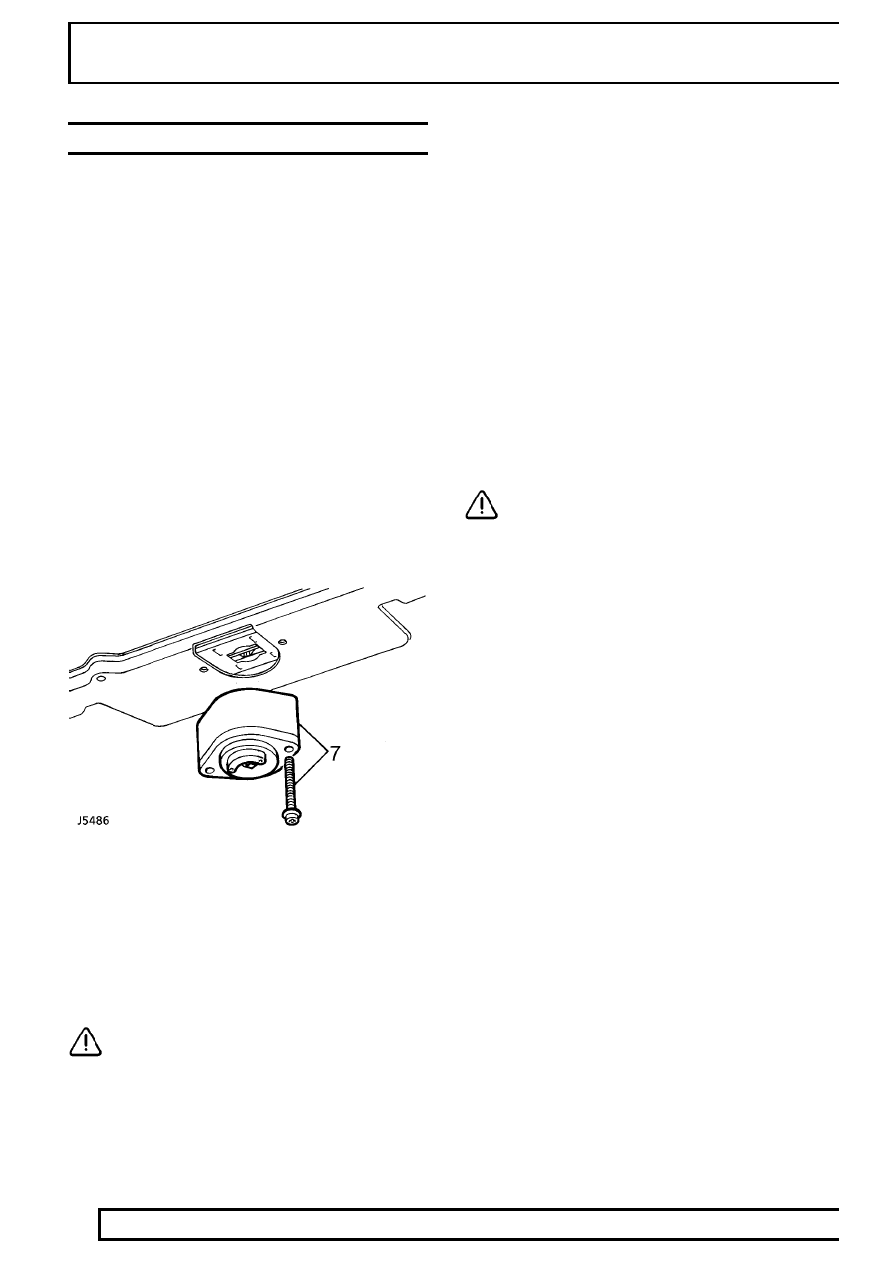
7. Remove two retaining screws and regulator from

clamping frame.

Refit

8. Reverse removal procedure.

CAUTION: Ensure the regulator is aligned
with fixing holes and the sunroof is in the
normally closed position. DO NOT rotate

the regulator spindle in the rack - this may result
in incorrect operation of the sunroof.

REAR

Remove

1. Ensure sunroof is in normally closed position.
2. Remove retaining screw and regulator handle.
3. Remove headlining.

See this section.

4. Remove two retaining screws and regulator from

clamping frame.

Refit

5. Reverse removal procedure.

CAUTION: Ensure the regulator is aligned
with fixing holes and the sunroof is in the
normally closed position. DO NOT rotate

the regulator spindle in the rack - this may result
in incorrect operation of the sunroof.

CHASSIS AND BODY

43

REPAIR

SUN BLIND ASSEMBLY

Service repair no - 76.82.78

Remove

1. Open sunroof to the tilt position.
2. Remove the trim finisher from the sunroof

surround.

3. Release the headlining locally to access under

clamping frame of the sunroof.

4. Lever forward and upward the rear leg of 3

retaining clips to release sun blind roll assembly.

Refit

5. Ensure front leg of retaining clips are located.
6. Push in rear leg of retaining clip.
7. Reverse removal procedure.

CENTRE CONSOLE

Service repair no - 76.52.02

Remove

1. Disconnect battery earth lead.

2. Release tranfer gear lever gaiter from console.
3. Remove transfer gear lever gaiter and knob

assembly.

4. Release gear selector lever gaiter from centre

console.

5. Remove gear selector lever gaiter and knob

assembly.

6. Remove centre console rubber mat.

76

CHASSIS AND BODY

44

REPAIR

7. Remove centre console switch pack cover.
8. Remove 4 screws securing switch pack to

console.

9. Release switch pack from console and

disconnect 7 multiplugs.

NOTE: If the ’Cold Pack’ option is not fitted
there will only be 5 switches in pack.

10. Remove switch pack.

Models fitted with electric front seats

11. Release electric front seat switches from centre

console.

12. Disconnect 2 multiplugs from each switch.
13. Remove switches.

All models

14. Release hand brake lever gaiter from centre

console.

15. Remove clip and clevis pin securing cable to

hand brake lever.

16. Remove 4 screws securing centre console to

body.

17. Raise hand brake lever, pull centre console

rearwards to gain access to cigar lighter
multiplug and illumination bulb Lucar.

18. Disconnect cigar lighter multiplug and

illumination bulb Lucar.

19. Remove centre console assembly.

CHASSIS AND BODY

45

REPAIR

Refit

20. Position centre console assembly, ensuring

harnesses and connectors are not trapped and
are routed to their correct locations.

21. Connect cigar lighter multiplug and illumination

bulb Lucar.

22. Align centre console to body fixings and fascia.
23. Fit and tighten screws securing centre console to

body.

24. Lubricate hand brake lever to cable clevis pin.
25. Align hand brake cable to lever, fit clevis pin and

secure with clip.

26. Secure hand brake lever gaiter to centre

console.

Models fitted with electric front seats

27. Position electric front seat switches,connect

multiplugs and secure to centre console.

All models

28. Position centre console switch pack and connect

multiplugs to switches.

29. Align switch pack to centre console and secure

with screws.

30. Fit centre console switch pack cover.
31. Fit centre console rubber mat.
32. Fit gear selector lever knob and secure gaiter.
33. Fit transfer gear lever knob and secure gaiter.
34. Reconnect battery earth lead.

DRINKS TRAY

Service repair no - 76.46.41

Remove

1. Disconnect battery negative lead.
2. Remove ash tray.

See this section.

3. Remove switch pack.

See this section.

4. Remove 6 screws securing drinks tray to dash

panel central louvre panel.

5. Remove drinks tray.

Refit

6. Position drinks tray to dash panel central louvre

panel and secure with screws.

7. Fit switch pack.

See this section.

8. Fit ash tray.

See this section.

9. Connect battery negative lead.


Content   ..  24  25  26  27   ..