Land Rover Discovery. Manual - part 215


  Index      Land Rover     Land Rover Discovery - service 1995-1996 year


Search            


Content   ..  213  214  215  216   ..


Land Rover Discovery. Manual - part 215


ELECTRICAL

39

REPAIR

CIGAR LIGHTER AND BULB

Service repair no - 86.65.60
Service repair no - 86.45.55
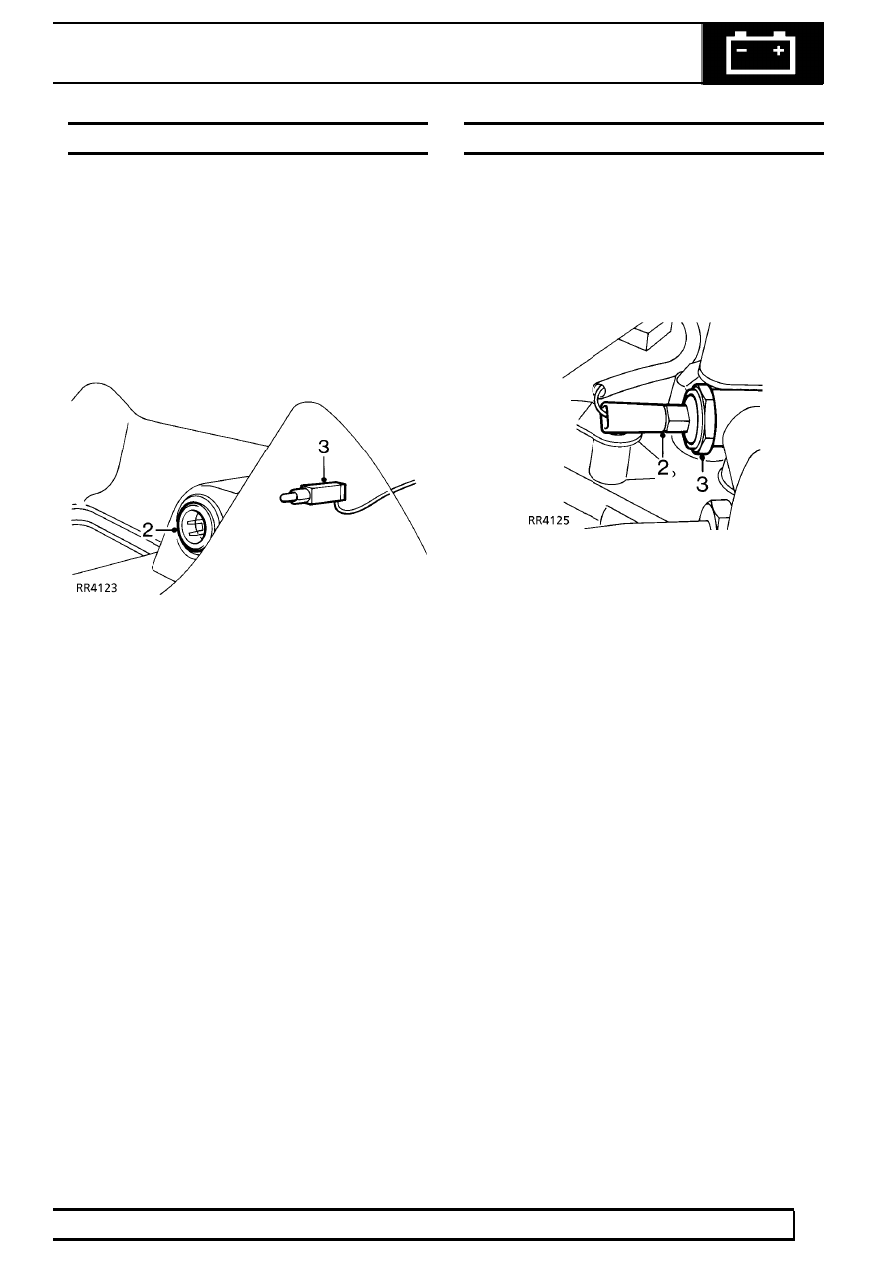
Cigar Lighter

Remove

1. Remove centre console.

See CHASSIS AND

BODY, Repair, Centre Console

2. Depress lugs securing cigar lighter, withdraw

lighter from centre console.

Bulb replacement

3. Remove bulb from holder.

Refit

4. Reverse removal procedure.

OIL PRESSURE WARNING SWITCH - V8i

Service repair no - 86.65.30

Remove

1. Disconnect the battery negative lead.
2. Disconnect electrical lead.
3. Unscrew switch unit.
4. Remove switch and sealing washer.

Refit

5. Reverse removal procedure. Using a NEW

sealing washer.

86

ELECTRICAL

40

REPAIR

INSTRUMENT ILLUMINATION ELECTRONIC
DIMMER/RHEOSTAT

Service repair no - 86.65.07

Electronic dimming control switch is located in
instrument panel finisher. Rotate control to vary
intensity of illumination.

Remove

1. Disconnect the battery negative lead.
2. Remove instrument panel finisher.

See

CHASSIS AND BODY, Repair, Instrument
Panel Finisher

3. Remove 2 screws securing rheostat, remove

rheostat.

Refit

4. Reverse removal procedure.

WINDOW LIFT/HEATED SEAT CUSHION
SWITCHES AND BULBS

Service repair no - 86.25.16 - Switches
Service repair no - 86.45.29 - Bulb

Switch Replacement

1. Disconnect the battery negative lead.

2. Carefully release rear of surround from centre

console.

3. Remove screws, pry window lift switch surround

from glove box.

4. Disconnect multi-plug(s) at rear of switch(es).
5. Apply pressure to rear of switch, push it through

surround.

Bulb replacement

6. Identify bulb to be replaced and remove

appropriate switch.

7. Rotate bulb holder 90

°

and withdraw it from

switch; discard bulb and holder.

Refit

8. Reverse removal procedure.

ELECTRICAL

41

REPAIR

COOLANT TEMPERATURE TRANSMITTER - V8i

Service repair no - 26.10.02

Remove

1. Disconnect battery negative lead.

2. Disconnect lead from transmitter.
3. Remove transmitter, discard sealing washer if

fitted.

Refit

4. Coat threads of replacement transmitter with

Loctite 572.

5. Fit a new sealing washer to transmitter.
6. Fit transmitter, connect lead.
7. Top-up cooling system.

HEATED FRONT SCREEN

Heated front screen will operate when switch is
operated, with engine running. Timer unit will provide
a preset time cycle of 7« minutes

±

20%.

To identify timer unit.

See Electrical Trouble

Shooting Manual.Electrical Troubleshooting
Manual

Switching OFF ignition, or further operation of heated
front screen switch during cycle will switch off screen
and cancel, reset and switch off timer unit.

86

ELECTRICAL

42

REPAIR

FOG LAMP - FRONT

Service repair no - 86.40.96

Remove

1. Locate and release lamp harness multiplug from

clip behind headlamp.

2. Disconnect multiplug.
3. Attach a draw string to harness.

4. Remove 2 nuts securing lamp bracket to bumper

studs.

5. Remove 2 screws securing lamp bracket to

spoiler.

6. Release lamp assembly and pull lamp harness

through front panel.

7. Detach draw string from harness.
8. Remove lamp/bracket assembly.
9. Remove 2 spire nuts from lamp bracket.

Refit

10. Reverse removal procedure.


Content   ..  213  214  215  216   ..