Land Rover Discovery. Manual - part 197
82
AIR CONDITIONING
22
REPAIR
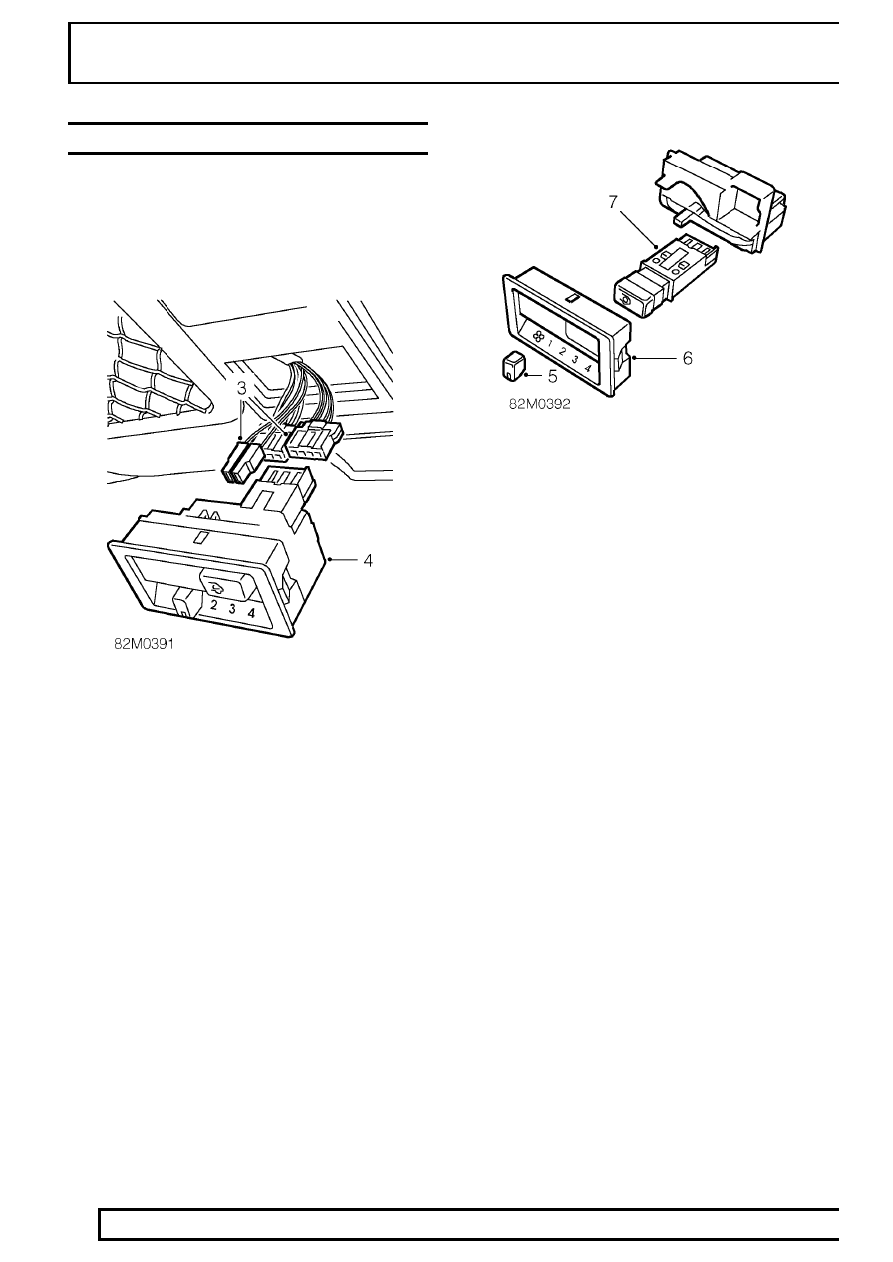
REAR AIR CONDITIONING SWITCH
Service repair no - 82.26.14
Remove
1. Open rear door.
2. Release switch pack from headlining panel.
3. Disconnect 2 multiplugs and 2 Lucars from
switch pack.
4. Remove switch pack assembly.
5. Remove blower motor control knob.
6. Release 3 tags securing switch pack display
panel and remove panel.
7. Remove switch from switch pack.
Refit
8. Fit switch to switch pack.
9. Fit display panel and secure to tags.
10. Fit blower motor control knob.
11. Position switch pack assembly, connect
multiplugs and Lucars and secure to headlining
panel.
12. Close rear door.