Defender 90 / 110 / 130. Manual - part 183
MANUAL GEARBOX
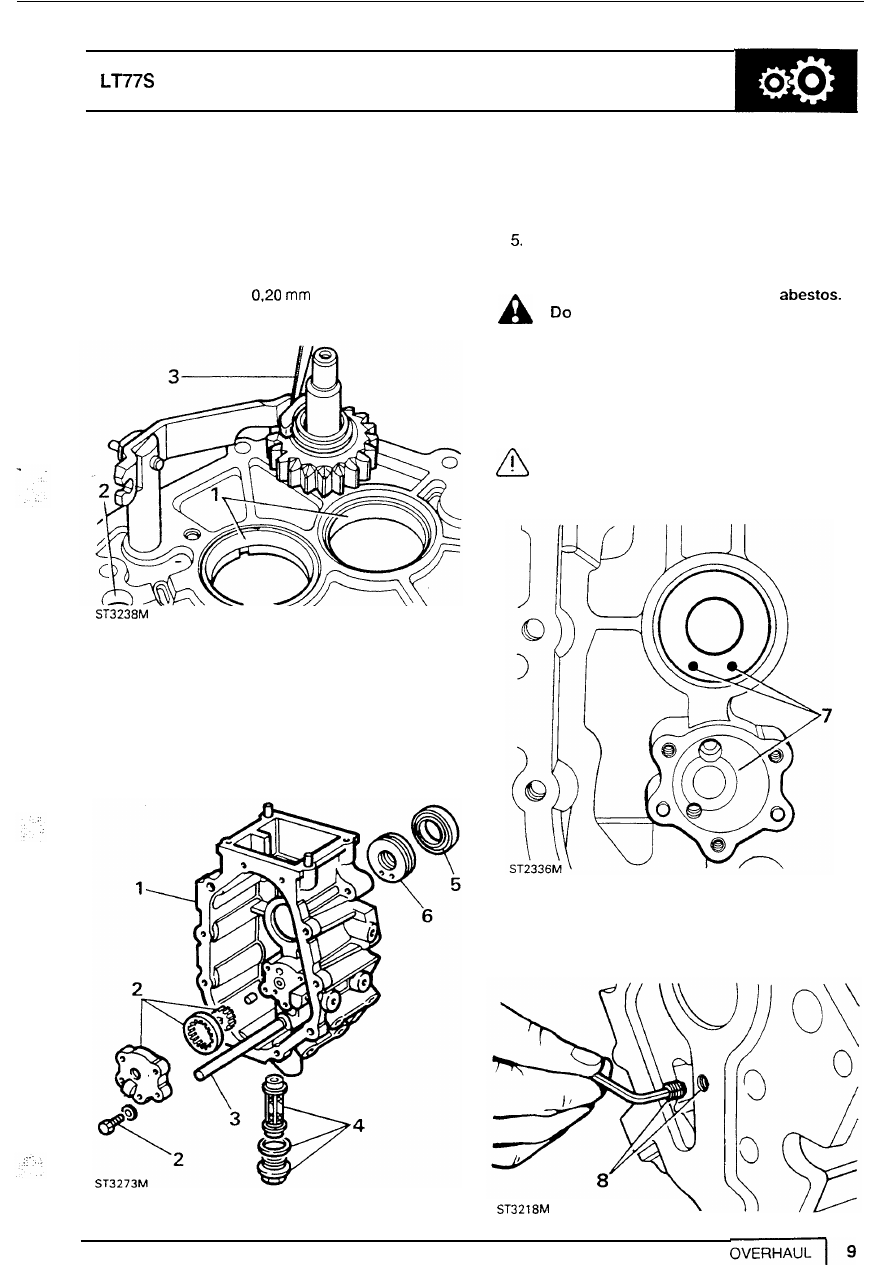
Centre plate
1.
Remove bearing tracks.
2.
Inspect for damage and selector rail bore for
wear.
3. Temporally fit reverse shaft gear and lever and
check clearance between slipper and lever
does not exceed
(0.008
in).
3. Check oil pick up pipe for obstruction but do
not remove.
4.
Remove drain plug assembly. Clean and renew
filter and washers if necessary.
Renew oil seal.
6. Renew Ferrobestos bush.
WARNING: This bush contains
INTRODUCTION,
Information, Poisonous
not attempt
to
clean it. see
substances.
7.
Fit
new bush with drain holes towards bottom of
casing.
CAUTION: If drain holes are not
positioned correctly oil may build up
behind oil seal and cause a leak.
Extension case
1.
Examine for damage to threads and machined
faces.
2.
Remove oil pump cover, inspect gears and
housing and renew if required.
8.
If extension housing is being renewed transfer
grub screw to new housing. Apply Loctite to
threads.