Defender. Manual - part 296


  Index      Land Rover     Land Rover Defender - service manual 2007 year


Search            


Content   ..  294  295  296  297   ..


Defender. Manual - part 296


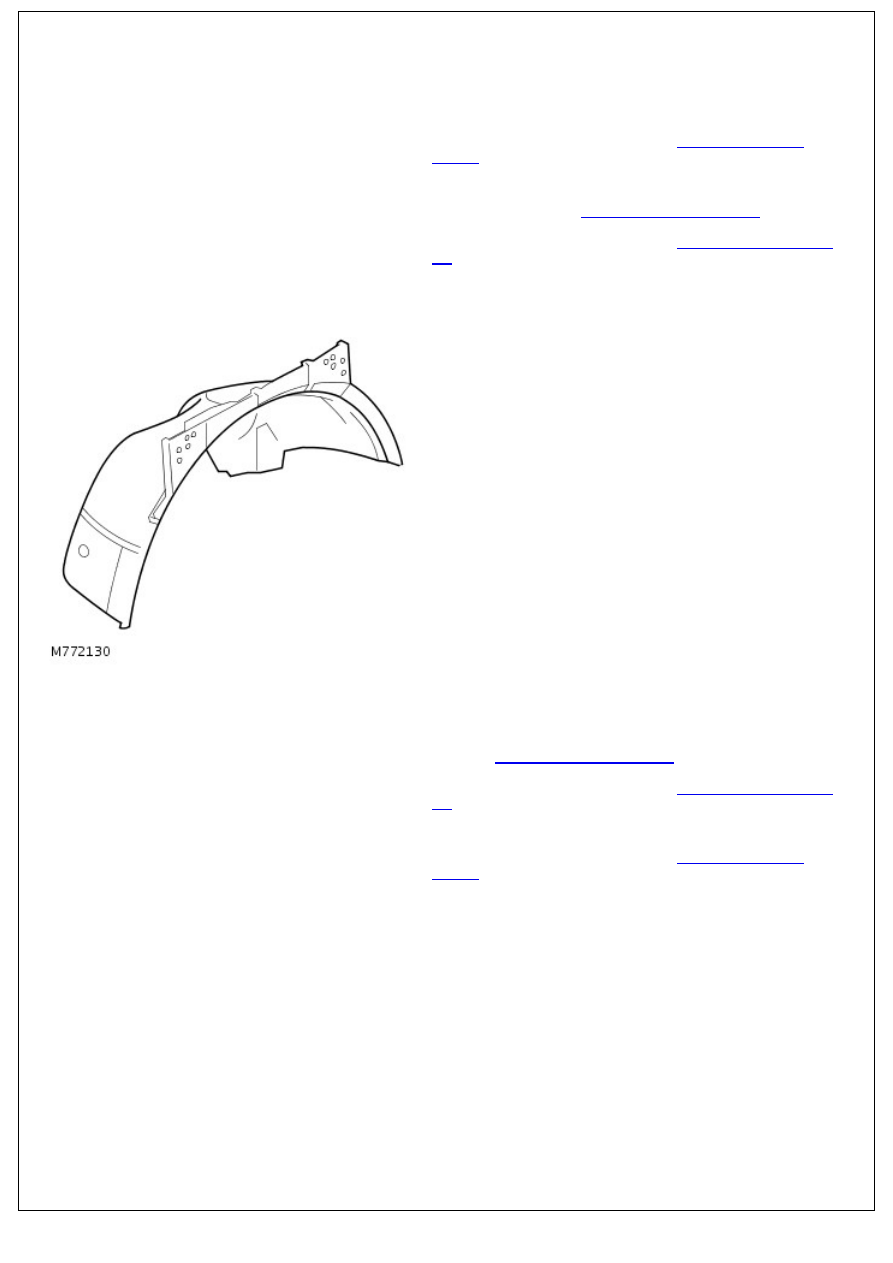
Front End Sheet Metal Repairs - Front Wheelhouse

Removal and Installation

Removal

1. Remove the front wheel speed sensor and shield, if fitted. 

For additional information, refer to: 

Front Wheel Speed

Sensor

 (206-09 Anti-Lock Control - Traction Control, Removal

and Installation).

2. Remove the front fender top panel. For additional

information, refer to: 

Front Fender Top Panel LH

 (501-27

Front End Sheet Metal Repairs, Removal and Installation).or 

For additional information, refer to: 

Front Fender Top Panel

RH

 (501-27 Front End Sheet Metal Repairs, Removal and

Installation).

3. Collect the wheelhouse.

Installation

1. Fit the wheelhouse.
2. Fit the front fender top panel. For additional information,

refer to: 

Front Fender Top Panel LH

 (501-27 Front End Sheet

Metal Repairs, Removal and Installation).or 

For additional information, refer to: 

Front Fender Top Panel

RH

 (501-27 Front End Sheet Metal Repairs, Removal and

Installation).

3. Fit the front wheel speed sensor and shield, if fitted. 

For additional information, refer to: 

Front Wheel Speed

Sensor

 (206-09 Anti-Lock Control - Traction Control, Removal

and Installation).

Front End Sheet Metal Repairs - Hood Latch Panel

Removal and Installation

Removal

1. Disconnect the battery ground cable. 

For additional information, refer to: 

Battery Disconnect and

Connect

 (414-01 Battery, Mounting and Cables, General

Procedures).

2. Remove the radiator grille. 

For additional information, refer to: 

Radiator Grille

 (501-08

Exterior Trim and Ornamentation, Removal and Installation).

3. Remove the cooling fan upper shroud.

Release the 6 clips.

4. Loosen the hood release cable.

5. Remove the hood latch panel.

Remove the 4 nuts and studs.

Installation

1. To install, reverse the removal procedure.

1. To install, reverse the removal procedure.

Tighten the nuts to 23 Nm (17 lb.ft).

2. Connect the battery ground cable. 

For additional information, refer to: 

Battery Connect

 (414-01

Battery, Mounting and Cables, General Procedures).

Front End Sheet Metal Repairs - Windshield Frame

Removal and Installation

Removal

1. Disconnect both battery leads, negative lead first.
2. Raise side of vehicle.
3. Remove front and centre headlining sections.
4. Remove both A-pillart trims.
5. Remove front door aperture seals.
6. Release upper front corner of rear door aperture seal.
7. Remove both wiper pivot arms. 

For additional information, refer to: 

Front Wiper Pivot Arm

(501-16 Wipers and Washers, Removal and Installation).

8. Remove windshield.
9. Remove all roof fixings, back to the B-pillar.
10. Release sealant securing front edge of roof.

11. Insert wedges into top of both B-pillars. This will allow

access for removal of screen aperture.

12. With assistance remove windshield frame.

Installation

1. Prepare and clean panel joint faces.

2. NOTE: When refitting, ensure windshield frame is correctly

fitted onto location pins in bulkhead.

Reverse removal procedure. Fit new foam seal to top edge of

windshield frame.

3. NOTE: White roof vehicles use a white sealant. Coloured roof

vehicles use a black sealant.

When applying sealant to top edge of windshield frame, the

correct colour sealant must be used, see note below.


Content   ..  294  295  296  297   ..