Jeep XJ. Manual - part 433


  Index      Jeep     Jeep XJ - service repair manual 2001 year


Search            


Content   ..  431  432  433  434   ..


Jeep XJ. Manual - part 433


INSTALLATION

(1) Lubricate and install new seal on cable.
(2) Insert cable in transmission case.
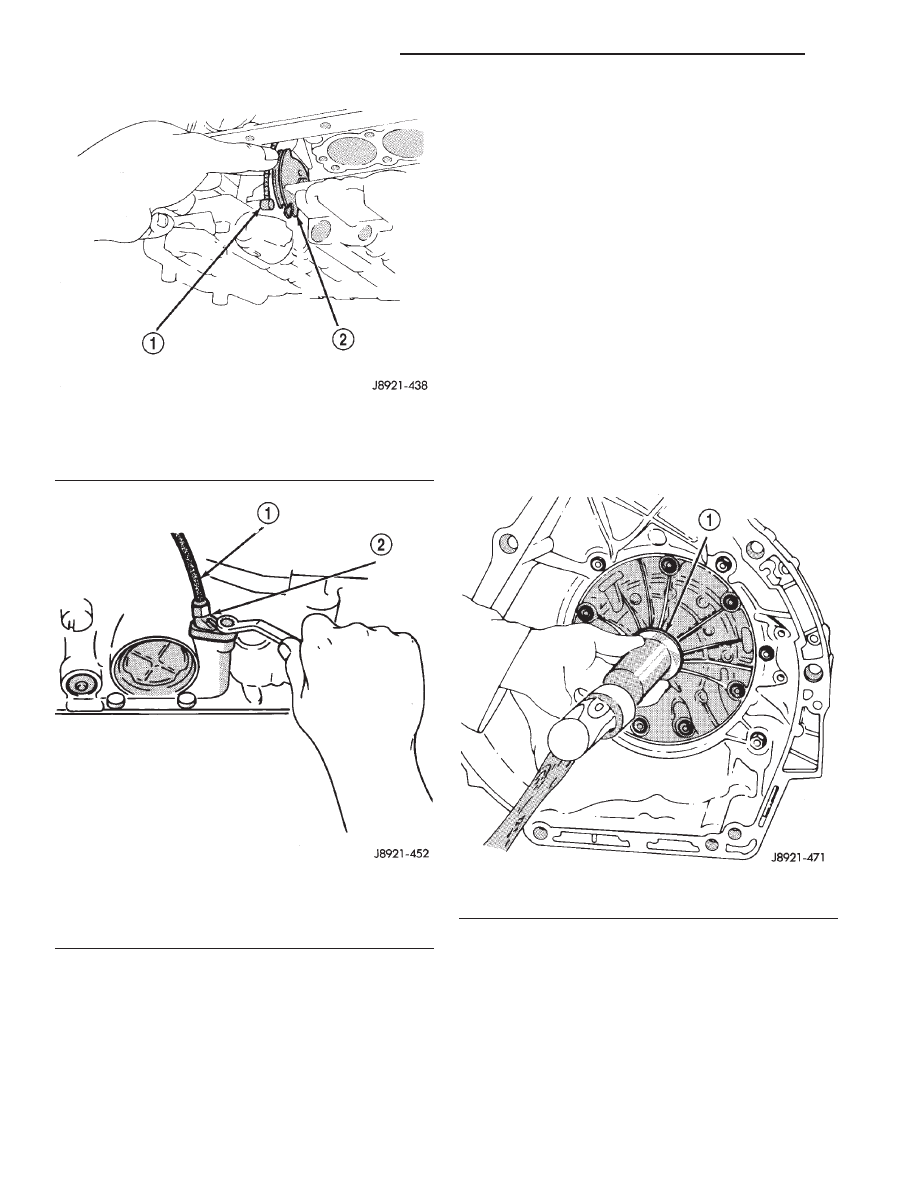
(3) Attach cable to throttle cam (Fig. 92).
(4) Install cable bracket on case and tighten

attaching bolt to 10 N·m (7 ft. lbs.) torque (Fig. 93).

(5) Install pan and tighten pan bolts to 7 N·m (65

in. lbs.) torque.

(6) Install new gasket on oil pan drain plug.

Install and tighten plug to 20 N·m (15 ft. lbs.) torque.

(7) Connect cable to engine bracket and throttle

linkage.

(8) Fill transmission with Mopar

t Dexron/Mercon

IIE.

(9) Adjust the cable as described in cable adjust-

ment procedure.

OIL PUMP SEAL

REMOVAL

(1) Remove converter.
(2) Remove old seal. Use blunt punch to collapse

seal and pry seal out of pump housing. Do not
scratch or damage seal bore.

INSTALLATION

(1) Lubricate lip of new seal with transmission

fluid and install seal in pump with tool 7549 (Fig.
94).

(2) Lubricate converter drive hub with transmis-

sion fluid.

(3) Align and install converter in oil pump.

Fig. 92 Removing/Installing Transmission Throttle

Cable

1 – THROTTLE CABLE
2 – CABLE BRACKET

Fig. 93 Removing/Installing Transmission Throttle

Cable And Bracket

1 – THROTTLE CABLE
2 – CABLE BRACKET

Fig. 94 Installing Oil Pump Seal

1 – PUMP SEALER INSTALLER

21 - 268

AW–4 AUTOMATIC TRANSMISSION

XJ

REMOVAL AND INSTALLATION (Continued)

DISASSEMBLY AND ASSEMBLY

TRANSMISSION

DISASSEMBLY

(1) Remove torque converter.
(2) Remove clamps attaching wire harness and

throttle cable (Fig. 95) to transmission.

(3) Remove shift lever from manual valve shaft at

left side of transmission.

(4) Remove park/neutral position switch.
(5) Remove speed sensor.
(6) Remove converter housing bolts and remove

housing (Fig. 96) from case.

(7) Remove adapter housing, speedometer drive

gear, and speed sensor rotor.

(8) Remove transmission oil pan, oil screen and

screen gaskets (Fig. 97).

Fig. 95 Typical Harness And Cable Clamp

Attachment

1 – CLAMP
2 – THROTTLE CABLE
3 – TRANSMISSION HARNESS

Fig. 96 Converter Housing Removal

1 – CONVERTER HOUSING

Fig. 97 Removing Oil Screen

1 – OIL SCREEN BOLTS
2 – OIL SCREEN

XJ

AW–4 AUTOMATIC TRANSMISSION

21 - 269

(9) Remove valve body oil feed tubes (Fig. 98).

(10) Disconnect valve body solenoid wires (Fig. 99).

(11) Remove harness bracket bolt and remove har-

ness and bracket (Fig. 100).

(12) Remove valve body bolts (Fig. 101).

(13) Disconnect throttle cable from throttle cam

(Fig. 102).

(14) Remove valve body from case. Then remove

accumulator springs, check ball, and spring (Fig. 103).

Fig. 98 Valve Body Oil Tube Removal

1 – OIL TUBES

Fig. 99 Solenoid Wire Location

1 – SOLENOID WIRE CONNECTORS

Fig. 100 Removing Bracket And Harness

1 – HARNESS ADAPTER
2 – BRACKET

Fig. 101 Valve Body Bolt Locations

21 - 270

AW–4 AUTOMATIC TRANSMISSION

XJ

DISASSEMBLY AND ASSEMBLY (Continued)

(15) Remove second brake and clutch accumulator

pistons with compressed air (Fig. 104). Apply air
pressure through feed port and ease the pistons and
springs out of the bore. Note and identify the original
location of all springs.

(16) Remove overdrive brake accumulator piston

with compressed air (Fig. 104). Note and identify the
original location of all springs.

(17) Remove overdrive clutch accumulator piston

with compressed air (Fig. 104).

(18) Remove throttle cable.

Fig. 102 Disconnecting Throttle Cable

1 – THROTTLE CABLE
2 – THROTTLE CAM

Fig. 103 Removing Accumulator Springs, Spacers

And Check Ball

1 – CHECK BALL AND SPRING
2 – ACCUMULATOR SPRINGS

Fig. 104 Accumulator Piston Removal

XJ

AW–4 AUTOMATIC TRANSMISSION

21 - 271

DISASSEMBLY AND ASSEMBLY (Continued)


Content   ..  431  432  433  434   ..