Jeep Liberty KJ. Manual - part 890


  Index      Jeep     Jeep Liberty KJ - service repair manual 2006 year


Search            


Content   ..  888  889  890  891   ..


Jeep Liberty KJ. Manual - part 890


INSPECTION

NOTE: Thoroughly inspect the connecting rod bearing bores and main bearing bores for scoring, blueing or
severe scratches. Further disassembly may be required.

If connecting rod bearing bores show damage, the cylinder heads must be removed to service the piston and rod
assemblies. If the bedplate or the cylinder block main bearing bores show damage the engine must be replaced.

1. If required, remove the main bearing halves from the cylinder block and bedplate.

2. Thoroughly clean the bedplate to cylinder block sealing surfaces and main bearing bores. Remove all oil and

sealant residue.

3. Inspect the bedplate main bearing bores for cracks, scoring or severe blueing. If either condition exists the

engine must be replaced.

4. Inspect the crankshaft thrust washers for scoring, scratches, wear or blueing. If either condition exist replace the

thrust washers.

5. Inspect the oil pan gasket/windage tray for splits, tears or cracks in the gasket sealing surfaces. Replace gasket

as necessary.

INSTALLATION

CAUTION: Main bearings are select fit. Refer to
Crankshaft Main Bearings in this section for
proper bearing selections.

CAUTION: When installing crankshaft, use care
not to damage bearing surfaces on the crankshaft.

NOTE: Apply sealant to the tone wheel retaining
screws prior to installation.

1. Lubricate upper main bearing halves with clean

engine oil.

2. Install the crankshaft tone wheel. Torque the

mounting screws to 15 N·m (11 ft. lbs.).

3.

Position crankshaft in cylinder block.

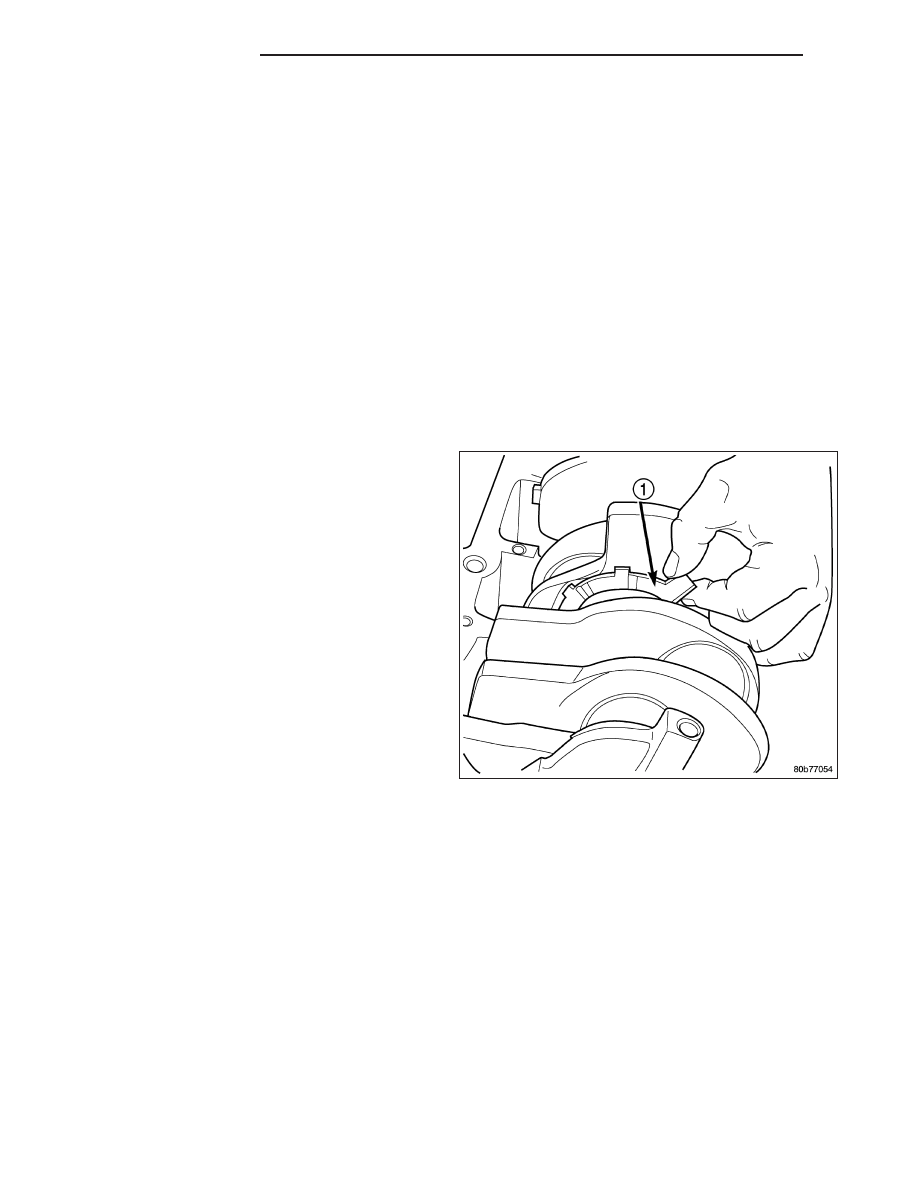
4. Install the thrust washers (1).

9 - 1518

ENGINE - 3.7L

KJ

CAUTION: The bedplate to cylinder block mating
surface must be coated with Mopar

T

Engine RTV

sealant prior to installation. Failure to do so will
cause severe oil leaks.

NOTE: Make sure that the bedplate and cylinder
block sealing surfaces are clean and free of oil or
other contaminants. Contaminants on the sealing
surfaces may cause main bearing distortion and/or
oil leaks.

5. Apply a 2.5mm (0.100 inch) bead of Mopar

T

Engine RTV sealant to the cylinder block-to-bed-
plate mating surface (2,3) as shown.

6. Coat the crankshaft main bearing journals with clean engine oil and position the bedplate onto the cylinder block.

NOTE: Lubricate the bedplate retaining bolts with clean engine oil prior to installation.

7. Install the bedplate retaining bolts, making sure to place the stud bolts in the correct location, Torque the bolts in

the sequence shown.

Hand tighten bolts 1D,1G and 1F until the bedplate contacts the block.

Tighten bolts 1A - 1J to 54 N·m (40 ft. lbs.)

Tighten bolts 1 - 8 to 7 N·m (5 ft. lbs.)

KJ

ENGINE - 3.7L

9 - 1519

Turn bolts 1 - 8 an additional 90°.

Tighten bolts A - E 27 N·m ( 20 ft. lbs.).

8. Measure crankshaft end play.

9. Install the connecting rods and measure side clearance (Refer to 9 - ENGINE/ENGINE BLOCK/PISTON & CON-

NECTING ROD - STANDARD PROCEDURE).

10. Install oil pump (Refer to 9 - ENGINE/LUBRICATION/OIL PUMP - INSTALLATION).

11. Install the engine (Refer to 9 - ENGINE - INSTALLATION).

9 - 1520

ENGINE - 3.7L

KJ

BEARINGS-CRANKSHAFT MAIN

STANDARD PROCEDURE

MAIN BEARING FITTING

SELECT FIT IDENTIFICATION

The main bearings are “select fit” to achieve proper oil
clearances. For main bearing selection, the crankshaft
position sensor target wheel (2) has grade identifica-
tion marks stamped into it. These marks are read from
left to right, corresponding with journal number 1, 2, 3,
4. The crankshaft position sensor target wheel is
mounted to the number 6 counter weight (1) on the
crankshaft.

INSPECTION

Wipe the inserts clean and inspect for abnormal wear patterns and for metal or other foreign material imbedded in
the lining. Normal main bearing insert wear patterns are illustrated.

Inspect the back of the inserts for fractures, scrapings or irregular wear patterns.

Inspect the upper insert locking tabs for damage.

Replace all damaged or worn bearing inserts.

MAIN BEARING JOURNAL DIAMETER (CRANKSHAFT REMOVED)

Remove the crankshaft from the cylinder block (Refer to 9 - ENGINE/ENGINE BLOCK/CRANKSHAFT - REMOVAL).

Clean the oil off the main bearing journal.

Determine the maximum diameter of the journal with a micrometer. Measure at two locations 90° apart at each end
of the journal.

The maximum allowable taper is 0.008mm (0.0004 inch.) and maximum out of round is 0.005mm (0.002 inch). Com-
pare the measured diameter with the journal diameter specification (Main Bearing Fitting Chart). Select inserts
required to obtain the specified bearing-to-journal clearance.

Install the crankshaft into the cylinder block (Refer to 9 - ENGINE/ENGINE BLOCK/CRANKSHAFT - INSPECTION).

Check crankshaft end play.

CRANKSHAFT MAIN BEARING SELECTION

KJ

ENGINE - 3.7L

9 - 1521


Content   ..  888  889  890  891   ..