Jeep Liberty KJ. Manual - part 1426


  Index      Jeep     Jeep Liberty KJ - service repair manual 2006 year


Search            


Content   ..  1424  1425  1426  1427   ..


Jeep Liberty KJ. Manual - part 1426


3.

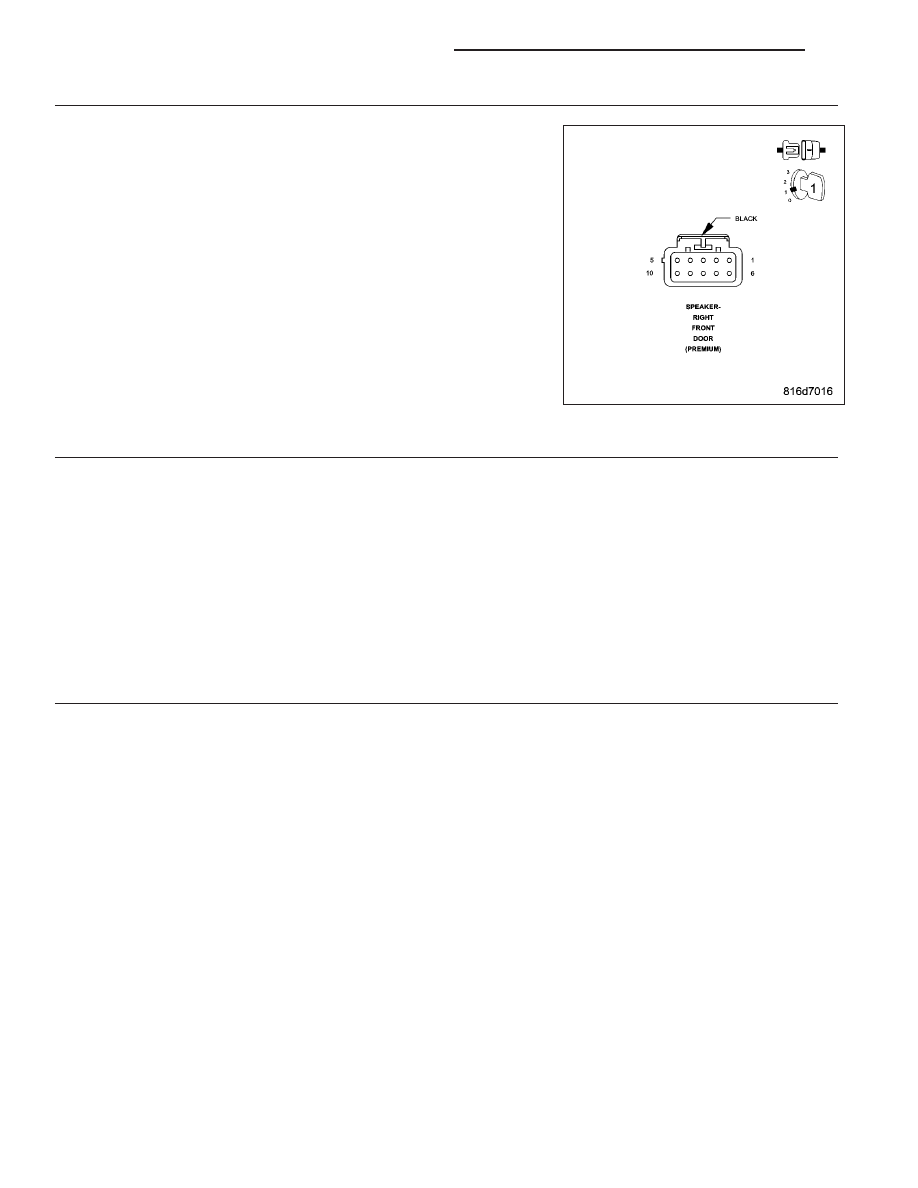
RIGHT FRONT DOOR SPEAKER

Turn the ignition off.

Disconnect the Right Front Door Speaker harness connector.

Turn the ignition on.

Turn the radio on.

With the Scan Tool , erase the audio DTCs.

Cycle the ignition switch from off to on and wait 10 seconds.

With the Scan Tool , read DTC’s.

Does the Scan Tool display ALL OUTPUTS SHORT?

Yes

>> Go To 4

No

>> Replace the Right Front Door Speaker.

Perform BODY VERIFICATION TEST - VER 1.

4.

(+) CIRCUIT SHORTED TO GROUND

Turn the ignition off.

Disconnect the Left Front Door Speaker harness connector.

Disconnect the Right Front Door Speaker harness connector.

Disconnect the Radio C1 harness connector.

Measure the resistance between ground and each speaker (+) circuit.

Is the resistance below 1000.0 (1K) ohms?

Yes

>> Repair the speaker (+) circuit for a short to ground.

Perform BODY VERIFICATION TEST - VER 1.

No

>> Go To 5

5.

(-) CIRCUIT SHORTED TO GROUND

Turn the ignition off.

Disconnect the Left Front Door Speaker harness connector.

Disconnect the Right Front Door Speaker harness connector.

Disconnect the Radio C1 harness connector.

Measure the resistance between ground and each speaker (-) circuit.

Is the resistance below 1000.0 (1K) ohms?

Yes

>> Repair the speaker (-) circuit for a short to ground.

Perform BODY VERIFICATION TEST - VER 1.

No

>> Go To 6

8A - 8

AUDIO/VIDEO - ELECTRICAL DIAGNOSTICS

KJ

6.

SPEAKER (+) & (-) CIRCUITS SHORTED TOGETHER

Turn the ignition off.

Disconnect the Left Front Door Speaker harness connector.

Disconnect the Right Front Door Speaker harness connector.

Disconnect the Radio C1 harness connector.

Measure the resistance between each speaker (+) circuit and each speaker (-) circuit.

Is the resistance below 1000.0 (1K) ohms for any of the measurements?

Yes

>> Repair the shorted together speaker circuits.

Perform BODY VERIFICATION TEST - VER 1.

No

>> Go To 7

7.

SPEAKER SECTION OF RADIO

If there are no possible causes remaining, view repair.

Repair

Replace the Radio.

Perform BODY VERIFICATION TEST - VER 1.

KJ

AUDIO/VIDEO - ELECTRICAL DIAGNOSTICS

8A - 9

CASSETTE PLAYER INOP

For a complete wiring diagram Refer to Section 8W

When Monitored:
Continuously with the ignition and radio turned on.

Set Condition:
The code will set if the radio detects a internal cassette failure.

Possible Causes

INTERNAL FAILURE

Diagnostic Test

1.

INTERNAL FAILURE

NOTE: If a DTC is set, erase the DTC and attempt to reset the DTC. If DTC resets, follow this test.
This is an internal radio failure.

View repair

Repair

Replace the Radio.

Perform BODY VERIFICATION TEST - VER 1.

8A - 10

AUDIO/VIDEO - ELECTRICAL DIAGNOSTICS

KJ

CD CHANGER MECHANICAL FAILURE

For a complete wiring diagram Refer to Section 8W

When Monitored:
Continuously with the ignition and CD Changer turned on.

Set Condition:
The code will set if the CD Changer detects a mechanical failure.

Possible Causes

INTERNAL FAILURE

Diagnostic Test

1.

INTERNAL FAILURE

NOTE: Erase DTC and attempt to reset. If DTC resets, follow this test.
This is an internal CD Changer failure.

View repair

Repair

Replace the CD Changer.

Perform BODY VERIFICATION TEST - VER 1.

KJ

AUDIO/VIDEO - ELECTRICAL DIAGNOSTICS

8A - 11


Content   ..  1424  1425  1426  1427   ..