Jeep Liberty KJ. Manual - part 1226


  Index      Jeep     Jeep Liberty KJ - service repair manual 2006 year


Search            


Content   ..  1224  1225  1226  1227   ..


Jeep Liberty KJ. Manual - part 1226


4. Insert oil pickup tube (2) in oil pump (1) inlet.

5. Position assembled oil pump and pickup tube in

rear case. Be sure pickup screen is securely
seated in case slot. Also be sure oil pump locating
tabs are outside rear case.

6. Apply 3 mm (1/8 in.) wide bead of Mopar

T

gasket

maker or silicone adhesive sealer to mounting
flange of front case. Work sealer bead around bolt
holes.

7. Lift rear case and oil pump and carefully position

assembly on front case. Be sure case dowels are
aligned and that mode fork rail extends through
rear case before seating rear case on front case.

8. Install case attaching bolts. Alignment bolts at each

end of case are only ones requiring washers (1).

9. Tighten case bolts to 27-34 N·m (20-25 ft. lbs.) torque.

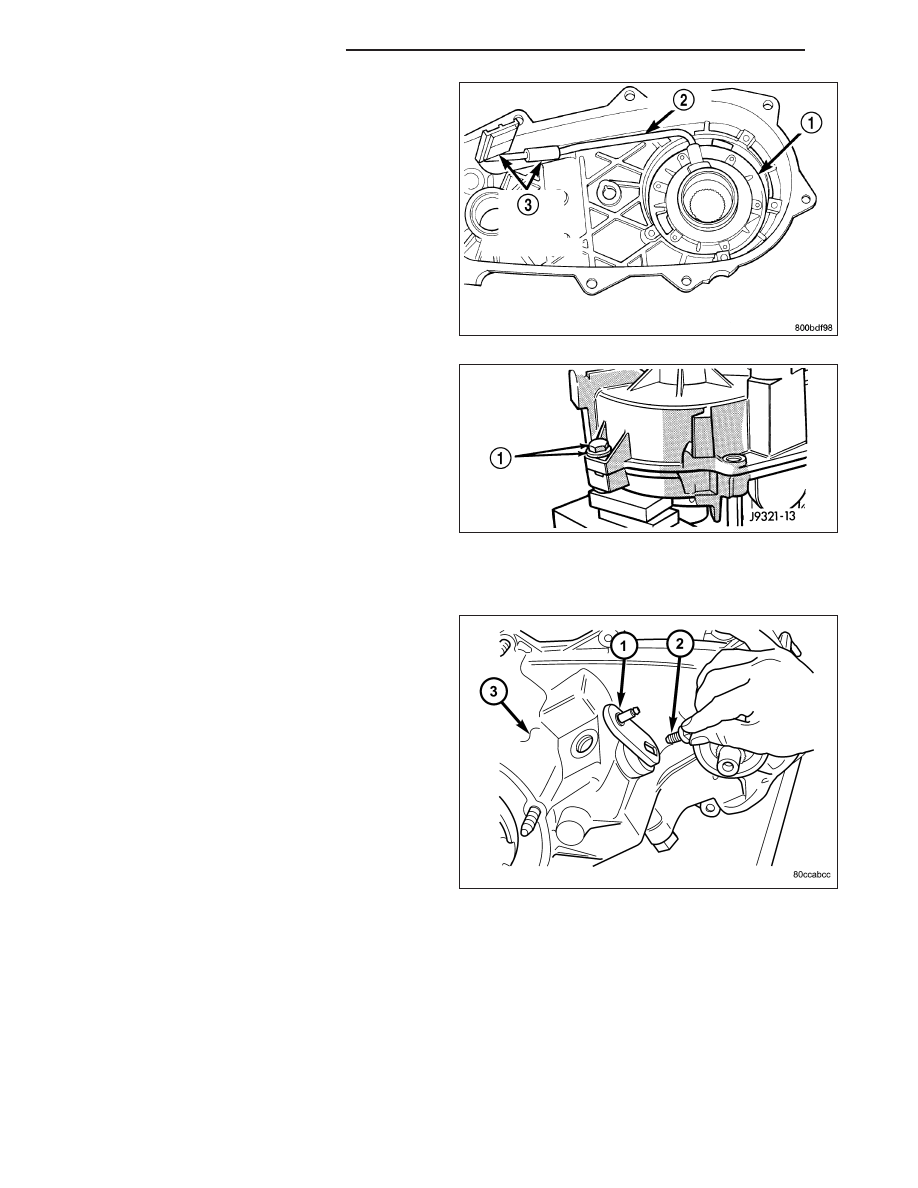
COMPANION FLANGE AND RANGE LEVER

1. Install range lever (1) and bolt (2) on sector shaft.

Tighten bolt to 27-34 N·m (20-25 ft. lbs.) torque.

21 - 848

TRANSFER CASE - NV231

KJ

2. Inspect the o-ring on the transfer case position

sensor. Replace the o-ring if necessary.

3. Install the transfer case position sensor (1) in the

front case. Tighten sensor to 20-34 N·m (15-25 ft.
lbs.) torque.

4. Install new seal washer (1) on front output shaft.

5. Lubricate companion flange hub with transmission

fluid and install flange onto the front output shaft.

6. Install new seal washer on front shaft.

7. Install new flange nut onto front output shaft.

8. Tighten flange nut to 122-176 N·m (90-130 ft. lbs.)

torque.

REAR RETAINER

1. Apply bead of Mopar

T

Sealer P/N 82300234, or

Loctite™ Ultra Gray, to mating surface of rear
retainer. Sealer bead should be a maximum of 3/16
inch.

2. Install the forward rear output shaft bearing locating

snap-ring.

3. Install rear retainer on rear case. Tighten retainer

bolts to 20-27 N·m (15-20 ft. lbs.) torque.

4. Install rear bearing I.D. retaining ring onto output

shaft.

5. Apply liberal quantity of petroleum jelly to new rear

seal and to output shaft. Petroleum jelly is needed
to protect seal lips during installation.

6. Slide seal onto Seal Protector 8824 (2). Slide seal

protector and seal onto output shaft.

KJ

TRANSFER CASE - NV231

21 - 849

7. Slide Installer 8691 (1) onto seal and mainshaft.

Drive seal into rear bearing retainer.

8. Install a new output shaft rear slinger with Installer

9023.

9. Install boot on output shaft slinger and crimp retain-

ing clamp with tool C-4975-A (1).

INSTALLATION

1. Mount transfer case on a transmission jack.

2. Secure transfer case to jack with chains.

3. Position transfer case under vehicle.

4. Align transfer case and transmission shafts and install transfer case on transmission.

5. Install and tighten transfer case attaching nuts to 35 N·m (26 ft. lbs.) torque.

6. Connect vent hose.

7. Connect transfer case position sensor connector to sensor.

8. Align and connect propeller shafts. (Refer to 3 - DIFFERENTIAL & DRIVELINE/PROPELLER SHAFT/PROPEL-

LER SHAFT - INSTALLATION).

9. Fill transfer case with correct fluid. Check transmission fluid level. Correct as necessary.

10. Install skid plate. (Refer to 13 - FRAME & BUMPERS/FRAME/TRANSFER CASE SKID PLATE - INSTALLA-

TION)

11. Remove transmission jack and support stand.

12. Connect shift cable to transfer case range lever.

13. Lower vehicle and verify transfer case shift operation.

21 - 850

TRANSFER CASE - NV231

KJ

SPECIFICATIONS

TRANSFER CASE - NV231

TORQUE

DESCRIPTION

N·m

Ft. Lbs.

In. Lbs.

Plug, Detent

16-24

12-18

-

Plug, Drain/Fill

20-34

15-25

-

Bolt, Front Brg. Retainer

21

16

-

Bolt, Case Half

27-34

20-25

-

Nut, Front Companion

Flange

122-176

90-130

-

Bolt, Range Lever

27-34

20-25

-

Bolt, Rear Retainer

35-46

26-34

-

Nuts, Mounting

35-47

26-35

-

Sensor, Transfer Case

Position

20-34

15-25

-

KJ

TRANSFER CASE - NV231

21 - 851


Content   ..  1224  1225  1226  1227   ..