Jeep Grand Cherokee WK. Manual - part 472


  Index      Jeep     Jeep Grand Cherokee WK - service repair manual 2005 year


Search            


Content   ..  470  471  472  473   ..


Jeep Grand Cherokee WK. Manual - part 472


B1851–FLIPPER GLASS SWITCH STUCK– CLUSTER (CONTINUED)

3.

FLIP-UP GLASS SWITCH SENSE CIRCUIT SHORT TO GROUND

Turn the ignition off.

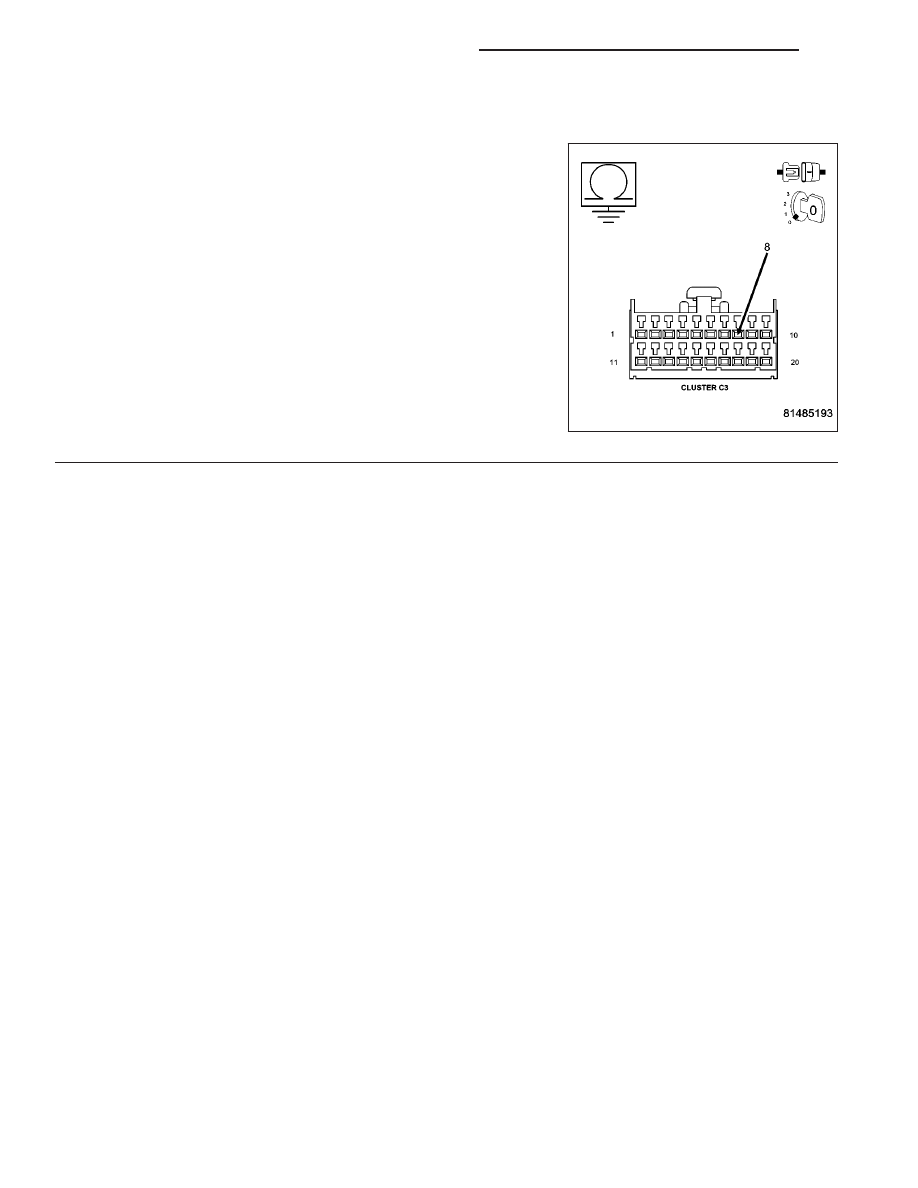
Disconnect the Cluster C3 connector.

Measure the resistance between ground and the Flip-Up Glass Switch
Sense circuit.

Is the resistance below 1000.0 ohms?

Yes

>> Repair the Flip-Up Glass Switch Sense circuit for a short

to ground.

Perform BODY VERIFICATION TEST - VER 1. (Refer to 8
- ELECTRICAL/ELECTRONIC CONTROL MODULES -
STANDARD PROCEDURE)

No

>> Replace the Instrument Cluster.

Perform BODY VERIFICATION TEST - VER 1. (Refer to 8
- ELECTRICAL/ELECTRONIC CONTROL MODULES -
STANDARD PROCEDURE)

8N - 48

POWER LOCKS - ELECTRICAL DIAGNOSTICS

WK

B184E–FLIPPER GLASS CONTROL CIRCUIT LOW– CLUSTER

WK

POWER LOCKS - ELECTRICAL DIAGNOSTICS

8N - 49

B184E–FLIPPER GLASS CONTROL CIRCUIT LOW– CLUSTER (CONTINUED)

For the Power Door Lock circuit diagram (Refer to 8 - ELECTRICAL/POWER LOCKS - SCHEMATICS AND DIA-
GRAMS)

For a complete wiring diagram Refer to Section 8W.

When Monitored:
Continuously

Set Condition:
When the Cluster senses a low condition on the Flip-UP (Flipper) Glass Relay Control circuit for over 10 sec-
onds, this code will set.

Possible Causes

(Q82) FLIP-UP GLASS RELAY CONTROL CIRCUIT SHORT TO GROUND

FLIP-UP GLASS RELAY

INSTRUMENT CLUSTER

Diagnostic Test

1.

TEST FOR INTERMITTENT CONDITION

With the scan tool, record and erase DTC’s

Operate the Flip-Up Glass Switch several times.

Cycle the ignition from on to off 3 times.

Turn the ignition on.

With the scan tool, read DTC’s.

Does the scan tool display FLIPPER GLASS RELAY CONTROL CIRCUIT LOW?

Yes

>> Go To 2

No

>> The conditions that caused this code to set are not present at this time. Using the wiring diagram/sche-

matic as a guide, inspect the wiring and connectors.

Perform BODY VERIFICATION TEST - VER 1. (Refer to 8 - ELECTRICAL/ELECTRONIC CONTROL
MODULES - STANDARD PROCEDURE)

2.

FLIP-UP GLASS RELAY SHORTED

With the scan tool, erase DTC’s.

Install a substitute relay in place of the Flip-Up Glass relay (in Junction
Block).

With the scan tool actuate the Flip-Up Glass.

With the scan tool, read DTC’s.

Does the scan tool display FLIPPER GLASS RELAY CONTROL
CIRCUIT LOW?

No

>> Replace the Flip-Up Glass relay.

Perform BODY VERIFICATION TEST - VER 1. (Refer to 8
- ELECTRICAL/ELECTRONIC CONTROL MODULES -
STANDARD PROCEDURE)

Yes

>> Go To 3

8N - 50

POWER LOCKS - ELECTRICAL DIAGNOSTICS

WK

B184E–FLIPPER GLASS CONTROL CIRCUIT LOW– CLUSTER (CONTINUED)

3.

(Q82) FLIP-UP GLASS RELAY CONTROL CIRCUIT SHORT TO GROUND

Turn the ignition off.

Remove the Flip-Up Glass relay.

Disconnect the Cluster C2 connector.

Measure the resistance between ground and the (Q82) Flip-Up Glass
Relay Control circuit.

Is the resistance below 10000.0 ohms?

Yes

>> Repair the (Q82) Flip-Up Glass Relay Control circuit for a

short to ground.

Perform BODY VERIFICATION TEST - VER 1. (Refer to 8
- ELECTRICAL/ELECTRONIC CONTROL MODULES -
STANDARD PROCEDURE)

No

>> Replace the Instrument Cluster in accordance with service

information.

Perform BODY VERIFICATION TEST - VER 1. (Refer to 8
- ELECTRICAL/ELECTRONIC CONTROL MODULES -
STANDARD PROCEDURE)

WK

POWER LOCKS - ELECTRICAL DIAGNOSTICS

8N - 51


Content   ..  470  471  472  473   ..