Content .. 1600 1601 1602 1603 ..
Jeep Grand Cherokee WK. Manual - part 1602
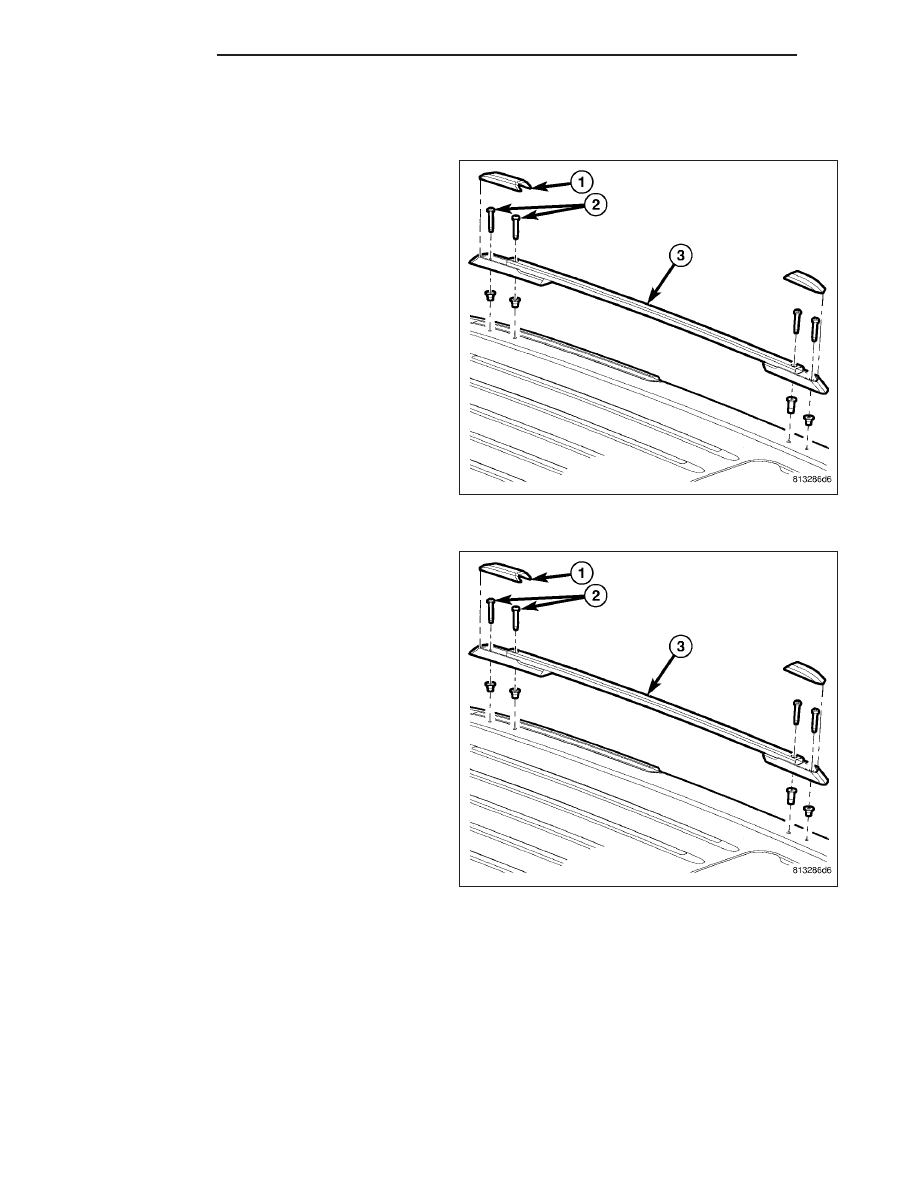
RACK-LUGGAGE
REMOVAL
1. Remove luggage rack end covers, pull straight up.
2. Remove the mounting bolts.
3. Remove luggage rack bars.
INSTALLATION
1. Locate luggage rack bar.
2. Install mounting bolts.
3. Tighten mounting bolts.
4. Install luggage rack bar covers.
23 - 66
EXTERIOR
WK