Content .. 1590 1591 1592 1593 ..
Jeep Grand Cherokee WK. Manual - part 1592
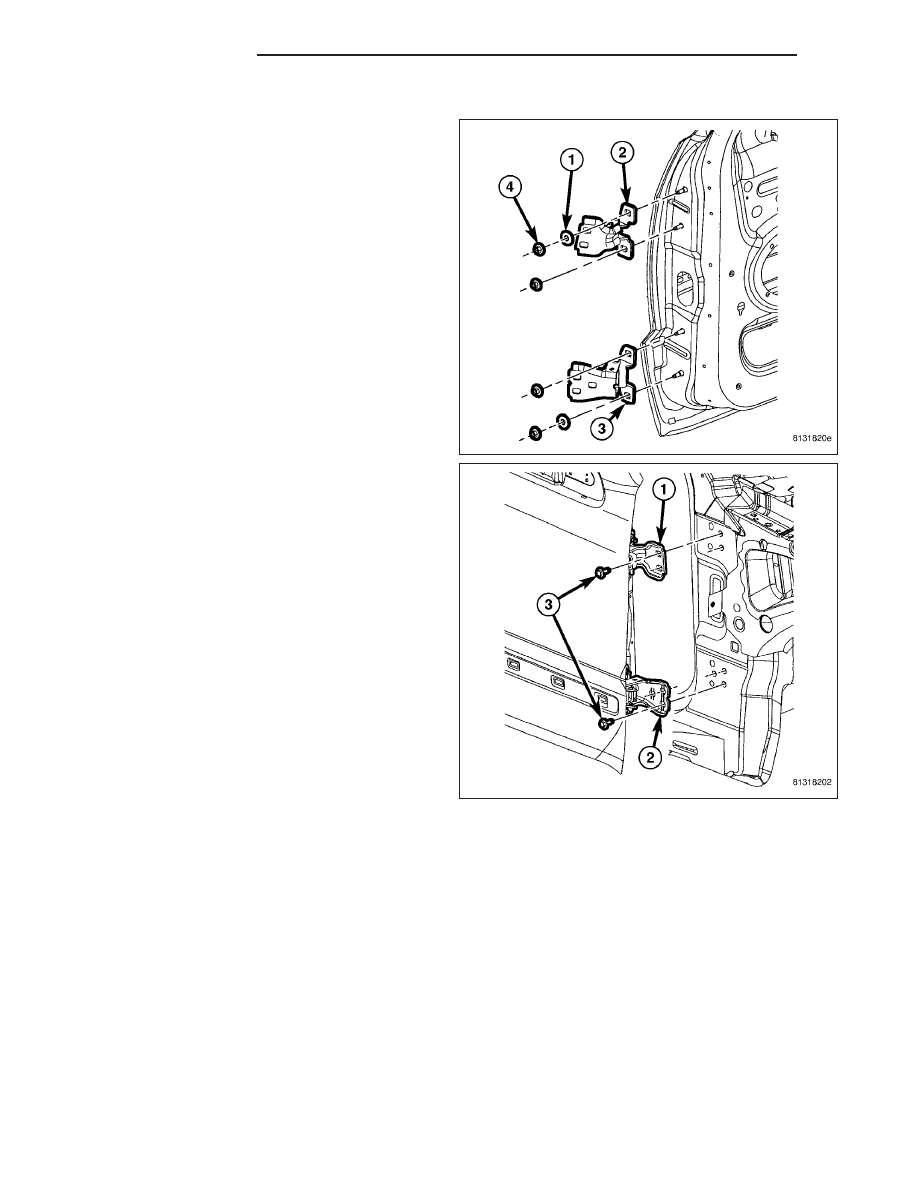
INSTALLATION
1. Position the front door hinges onto the door.
NOTE: If the epoxy bonded washers are separated
from the door hinges, the door may need to be
adjusted.
2. If removed, install the epoxy bonded washers (1).
3. Loosely install the nuts (4) that secure the hinges
to the front door.
4. Align the hinges to the door using the reference
marks made during the removal procedure and
tighten the nuts to 28 N·m (21 ft. lbs.).
5. Carefully position the front door to the body and
support the door with a suitable lifting device.
6. Loosely install the four bolts (3) that secure the
front door hinges (1 and 2) to the A-pillar.
7. Align the front door to the body using the reference
marks made during the removal procedure and
tighten the bolts to 28 N·m (21 ft. lbs.).
8. Connect the front door wire harness to the body
wire harness.
9. Reconnect the negative battery cable.
10. If necessary, adjust the front door (Refer to 23 -
BODY/DOOR-FRONT - ADJUSTMENTS).
23 - 26
DOOR - FRONT
WK