Jeep Grand Cherokee WJ. Manual - part 538
(2) Grasp the edge of the trim and pull up gently
to release the snap retainers.
INSTALLATION
(1) Position the sill molding on the door sill.
(2) Press the snap retainers into place.
A-PILLAR TRIM
REMOVAL
The A-pillar trim is attached to the A-pillar with
spring clips.
(1) Grasp A-pillar trim and pull trim outward from
A-pillar (Fig. 57).
(2) Separate A-pillar trim from A-pillar.
INSTALLATION
(1) Position A-pillar trim on A-pillar and, starting
at the bottom, press into place.
(2) Using a trim stick or other suitable tool, care-
fully cover the edge of the trim with weatherstrip.
COWL LOWER TRIM
REMOVAL
(1) Remove front door sill trim.
(2) Remove screws attaching cowl trim to floor.
(3) Remove plastic nut.
(4) Grasp cowl trim and pull outward to separate
from clip.
(5) Separate cowl trim from vehicle.
Fig. 56 Sill Trim Molding
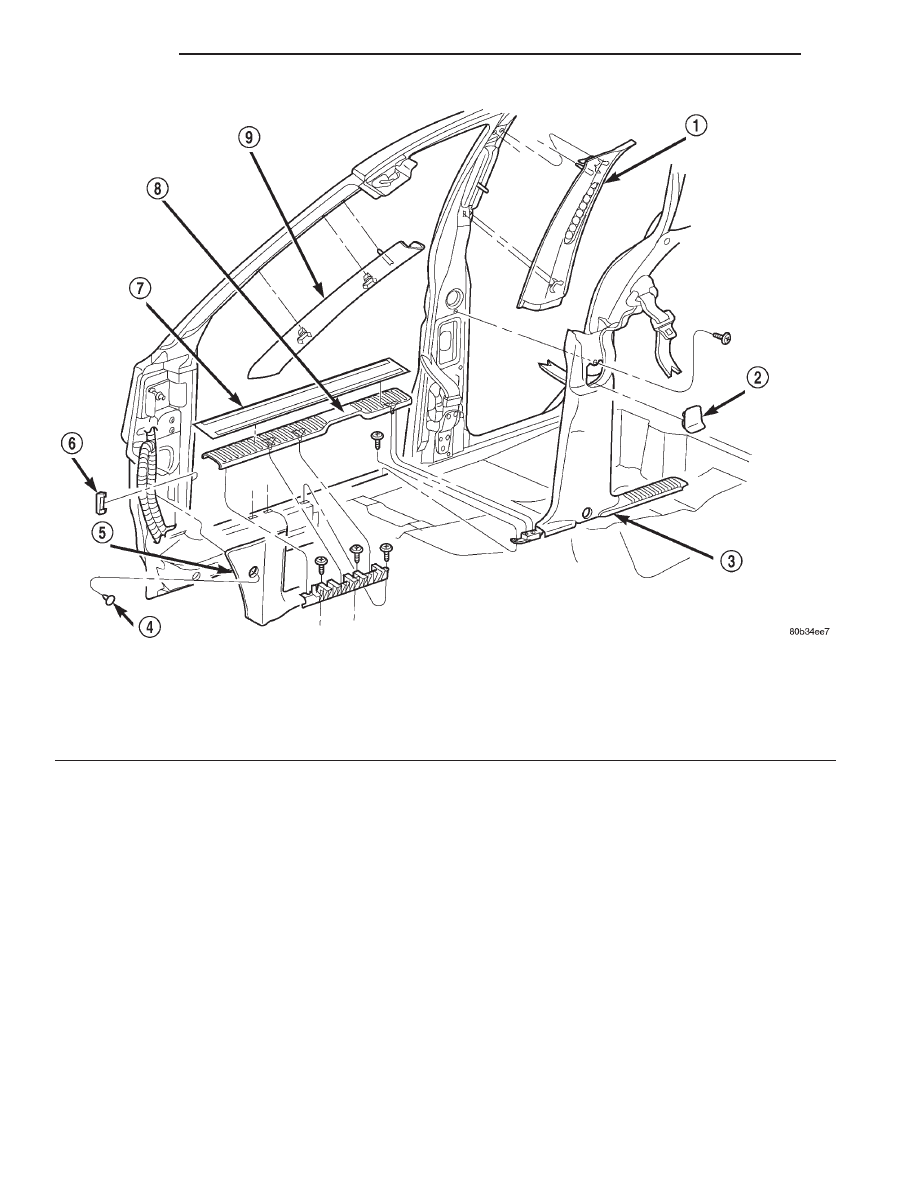
1 – B-PILLAR UPPER TRIM
2 – ACCESS COVER
3 – B-PILLAR LOWER TRIM
4 – PLASTIC NUT
5 – COWL LOWER TRIM
6 – CLIP
7 – SCUFF PLATE
8 – SILL TRIM
9 – A-PILLAR TRIM
23 - 50
BODY
WJ
REMOVAL AND INSTALLATION (Continued)