Infiniti QX56 (JA60). Manual - part 537
EXT-18
< SERVICE INFORMATION >
COWL TOP
COWL TOP
Removal and Installation
INFOID:0000000005147321
REMOVAL
1. Remove the right and left wiper arms. Refer to
.
2. Remove the cowl top seal.
• Release the plastics clips on the cowl top seal which go through the cowl tops LH and RH and the cowl
top extension.
3. Remove the cowl top covers LH and RH.
• Release the plastic clips under the cowl top covers attaching to grommets on hoodledge.
• Disconnect the washer tubes from the washer nozzles under the cowl top covers.
4. Remove the cowl top extension brackets LH and RH.
• Disconnect the wiper motor harness from the cowl top extension bracket LH.
• The cowl top extension bracket LH must be removed prior to the removal of the wiper motor and con-
necting rod assembly.
5. Remove the wiper motor and connecting rod linkage. Refer to
WW-80, "Wiper Motor and Linkage"
.
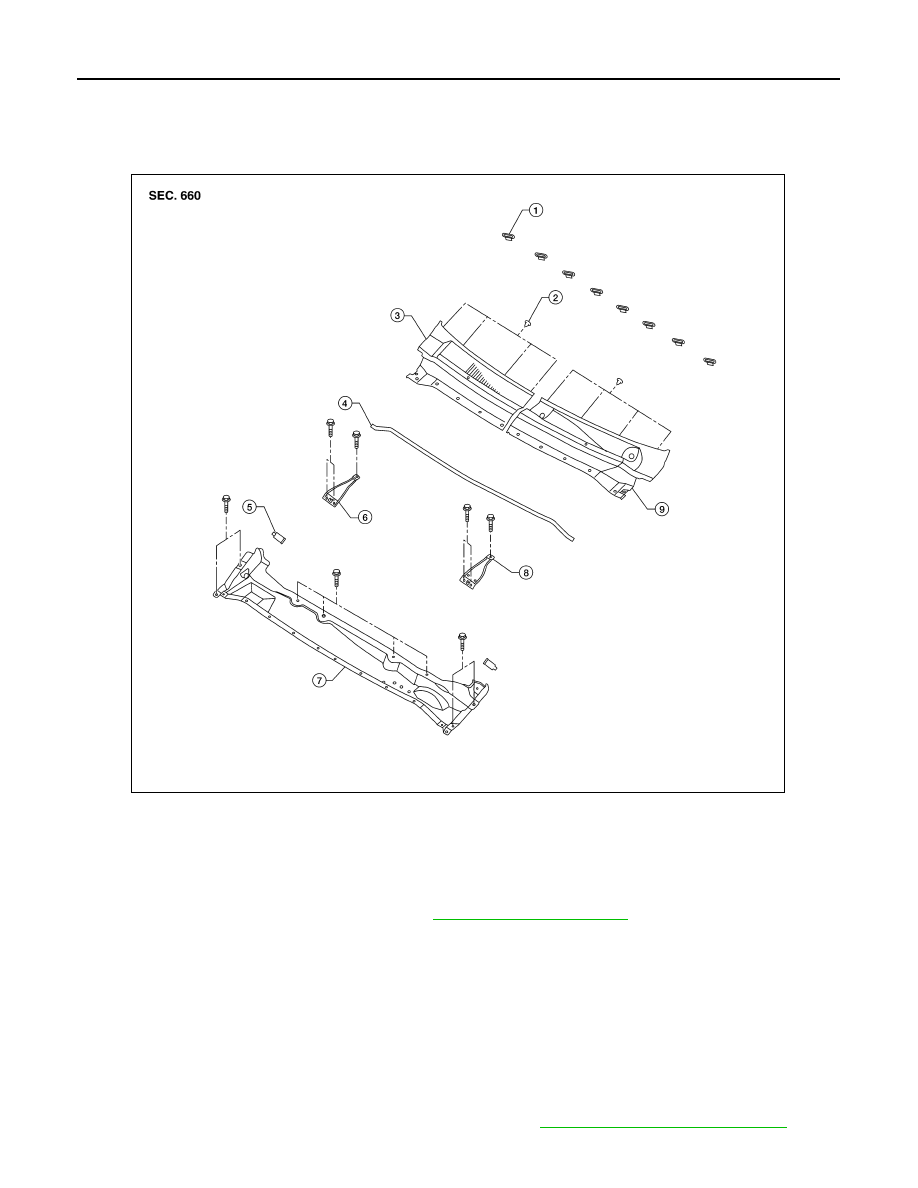
1.
Clip CG104
2.
Clip C103
3.
Cowl top cover RH
4.
Cowl top seal
5.
Drain tube
6.
Cowl top extension bracket RH
7.
Cowl top extension
8.
Cowl top extension bracket LH
9.
Cowl top cover LH
WIIA0955E