Infiniti QX4 (R50). Manual - part 591
SMT905C
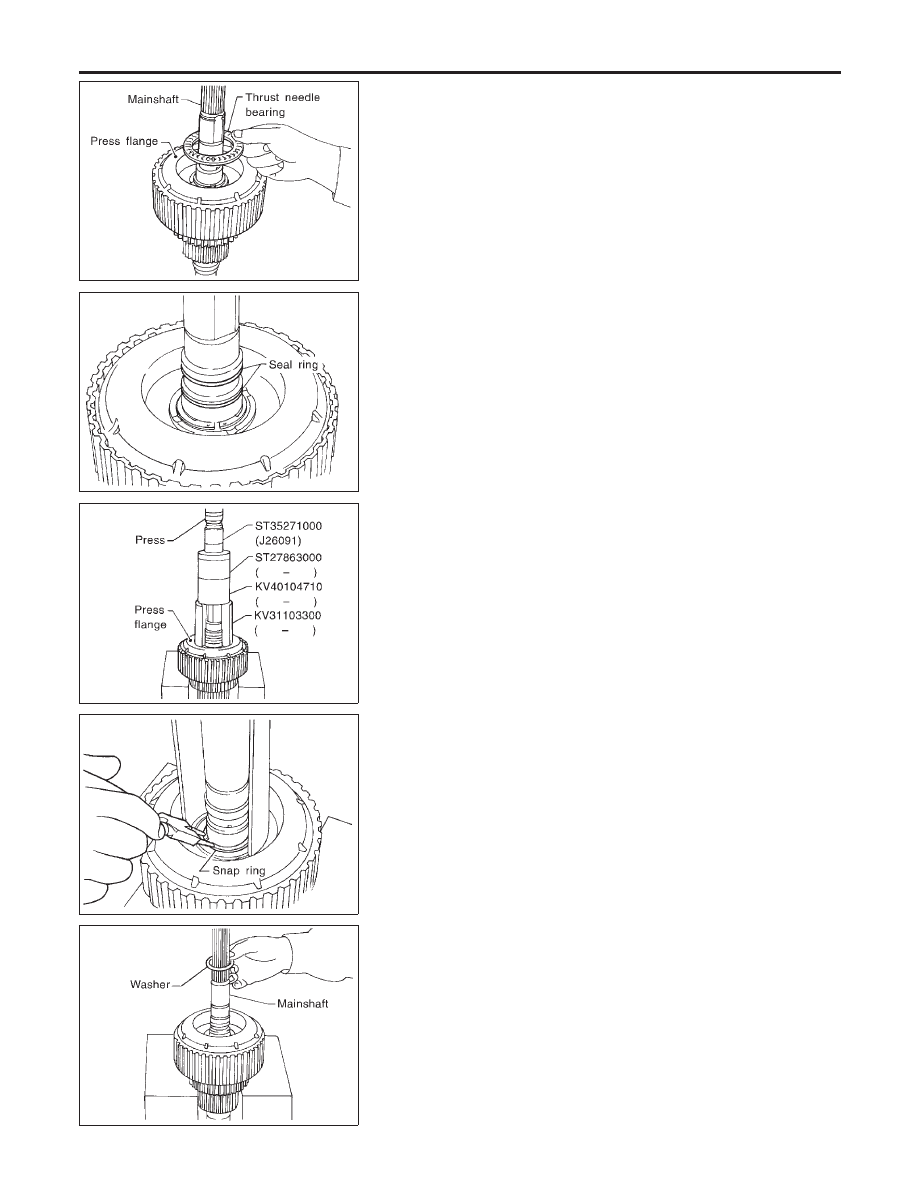
3.
Remove thrust needle bearing from press flange.
SMT906C
4.
Remove seal ring from mainshaft.
I
Do not reuse seal ring.
SMT907C
5.
Set a drift (KV31103300), a support ring (KV40104710), a sup-
port ring (ST27863000) and a drift (ST35271000) to press
flange as shown in the figure. Press drift until snap ring is out
of place.
SMT908C
6.
Remove snap ring from mainshaft.
I
Do not reuse snap ring.
SMT909C
7.
Remove washer.
DISASSEMBLY
Center Case (Cont’d)
TF-126