Infiniti QX4 (R50). Manual - part 305
 

  Index      Infiniti     Infiniti QX4 (R50) - service repair manual 2001 year


Search            copyright infringement  


Content   ..  303  304  305  306   ..


Infiniti QX4 (R50). Manual - part 305


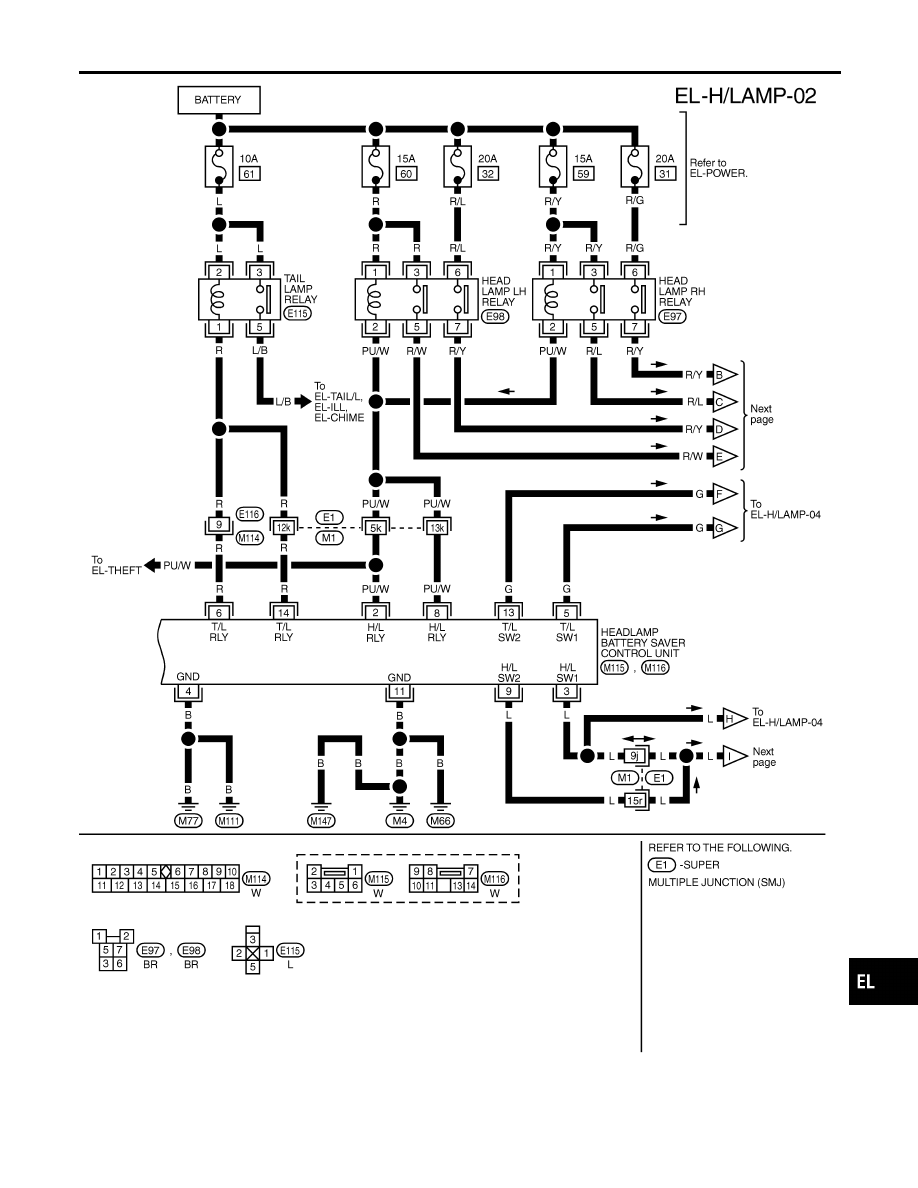
MEL763L

GI

MA

EM

LC

EC

FE

AT

TF

PD

AX

SU

BR

ST

RS

BT

HA

SC

IDX

HEADLAMP (FOR USA) — XENON TYPE —

Wiring Diagram — H/LAMP — (Cont’d)

EL-37

MEL764L

HEADLAMP (FOR USA) — XENON TYPE —

Wiring Diagram — H/LAMP — (Cont’d)

EL-38

MEL765L

GI

MA

EM

LC

EC

FE

AT

TF

PD

AX

SU

BR

ST

RS

BT

HA

SC

IDX

HEADLAMP (FOR USA) — XENON TYPE —

Wiring Diagram — H/LAMP — (Cont’d)

EL-39

Trouble Diagnoses

NBEL0189

WARNING:

I

The xenon headlamp has a high-tension current generating area. Be extremely careful when remov-
ing and installing. Be certain to disconnect the battery negative cable prior to removing or install-
ing.

I

When the xenon headlamp is lit, do not touch the harness (covered with red or amber insulation),
bulb itself or the bulb socket with your bare hands.

I

Never service a xenon headlamp with wet hands.

I

When checking body side harness with a circuit tester, be certain to disconnect the harness con-
nector from the xenon headlamp.

I

When the xenon headlamp is lit, the xenon bulb must be installed in the headlamp housing. (Never
turn on xenon headlamp, if the bulb is out of the headlamp housing.)

CAUTION:

Make sure to install the bulb securely; if the xenon bulb is improperly installed in its socket, high-ten-
sion current leaks occur. This may lead to a melted bulb and/or bulb socket.

Symptom

Possible cause

Repair order

Neither headlamp operates.

1. 7.5A fuse
2. Headlamp relay circuit
3. Lighting switch
4. Lighting switch ground circuit
5. Headlamp battery saver control

unit

1. Check 7.5A fuse [No. 24, located in fuse block

(J/B)].
Verify battery positive voltage is present at terminal
7 of headlamp battery saver control unit.

2. Check between battery saver control unit and head-

lamp relays (LH and RH).

3. Check Lighting switch.
4. Check harness between lighting switch terminal 8

and ground.

5. Check headlamp battery saver control unit.

Headlamp LH (low and high beam)
does not operate, but headlamp
RH (low and high beam) does
operate.

1. 15A fuse
2. Headlamp LH relay
3. Headlamp LH relay circuit

1. Check 15A fuse (No. 60, located in fusible link and

fuse box). Verify battery positive voltage is present
at terminals 1 and 3 of headlamp LH relay.

2. Check headlamp LH relay.
3. Check harness between headlamp LH relay and

headlamp battery saver control unit.

Headlamp RH (low and high beam)
does not operate, but headlamp LH
(low and high beam) does operate.

1. 15A fuse
2. Headlamp RH relay
3. Headlamp RH relay circuit

1. Check 15A fuse (No. 59, located in fusible link and

fuse box). Verify battery positive voltage is present
at terminals 1 and 3 of headlamp RH relay.

2. Check headlamp RH relay.
3. Check harness between headlamp RH relay and

headlamp battery saver control unit.

LH high beam does not operate,
but LH low beam operates.

1. Bulb
2. Headlamp LH relay
3. Open in the LH high beams cir-

cuit

4. Lighting switch
5. Lighting switch ground circuit

1. Check bulb.
2. Check headlamp LH relay.
3. Check the following.
a. Harness between headlamp LH relay terminal 5 and

headlamp LH for open circuit.

b. Harness between headlamp LH and lighting switch

for open circuit.

4. Check lighting switch.
5. Check harness between lighting switch and ground.

HEADLAMP (FOR USA) — XENON TYPE —

Trouble Diagnoses

EL-40


Content   ..  303  304  305  306   ..