Infiniti Q45. Manual - part 719
ENGINE MAINTENANCE
MA-13
C
D
E
F
G
H
I
J
K
M
A
B
MA
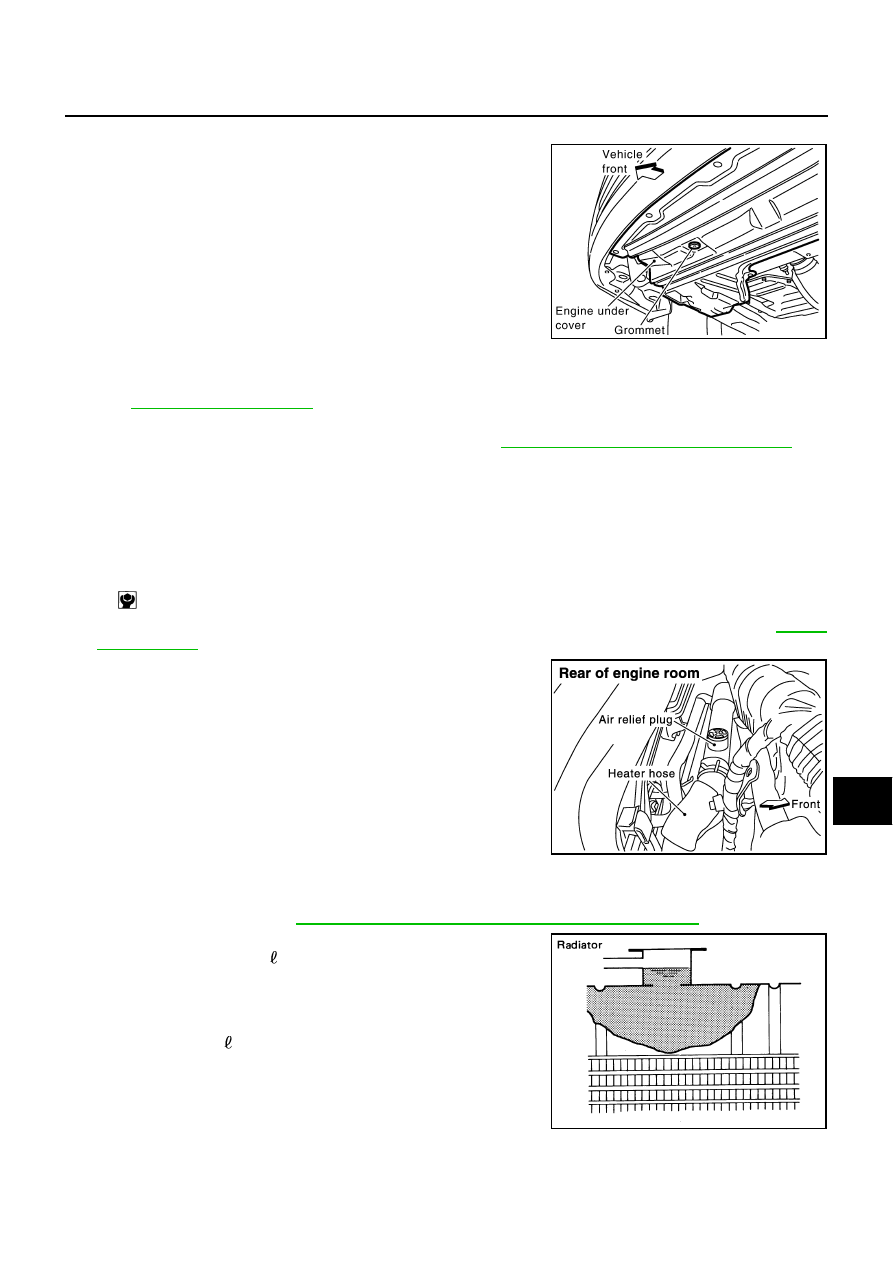
DRAINING ENGINE COOLANT
1.
Remove grommet from engine undercover.
2.
Open radiator drain plug at the bottom of radiator, and remove radiator cap.
When draining all of engine coolant in the system, open water drain plugs on engine cylinder block.
Refer to
3.
Check drained engine coolant for contaminants such as rust, corrosion or discoloration.
If contaminated, flush the engine cooling system. Refer to
MA-14, "FLUSHING COOLING SYSTEM"
.
4.
Remove reservoir tank as necessary, drain engine coolant and clean reservoir tank before installing.
REFILLING ENGINE COOLANT
1.
Install reservoir tank if removed, and radiator drain plug.
CAUTION:
Be sure to clean drain plug and install with new O-ring.
If water drain plugs on cylinder block are removed, close and tighten them. Refer to
2.
Remove air relief plug on heater hose.
3.
Fill radiator and reservoir tank to specified level.
●
Use Genuine Nissan Long Life Antifreeze/Coolant or equivalent mixed with water (distilled or
demineralized). Refer to
MA-10, "RECOMMENDED FLUIDS AND LUBRICANTS"
.
●
Pour engine coolant through engine coolant filler neck
slowly of less than 2 (2-1/8 US qt, 1-3/4 Imp qt) a minute
to allow air in system to escape.
PBIC2775E
Radiator drain plug:
: 1.17 N·m (0.12 kg-m, 10 in-lb)
PBIC0954E
Engine coolant capacity
(With reservoir tank at “MAX” level):
Approx. 10.3 (10-7/8 US qt, 9-1/8 Imp qt)
SMA182B