Infiniti Q45. Manual - part 320
VEHICLE INFORMATION AND INTEGRATED SWITCH SYSTEM /WITHOUT
NAVIGATION SYSTEM
DI-147
C
D
E
F
G
H
I
J
L
M
A
B
DI
Vehicle Condition Setting Is Not Possible
NKS001D4
1.
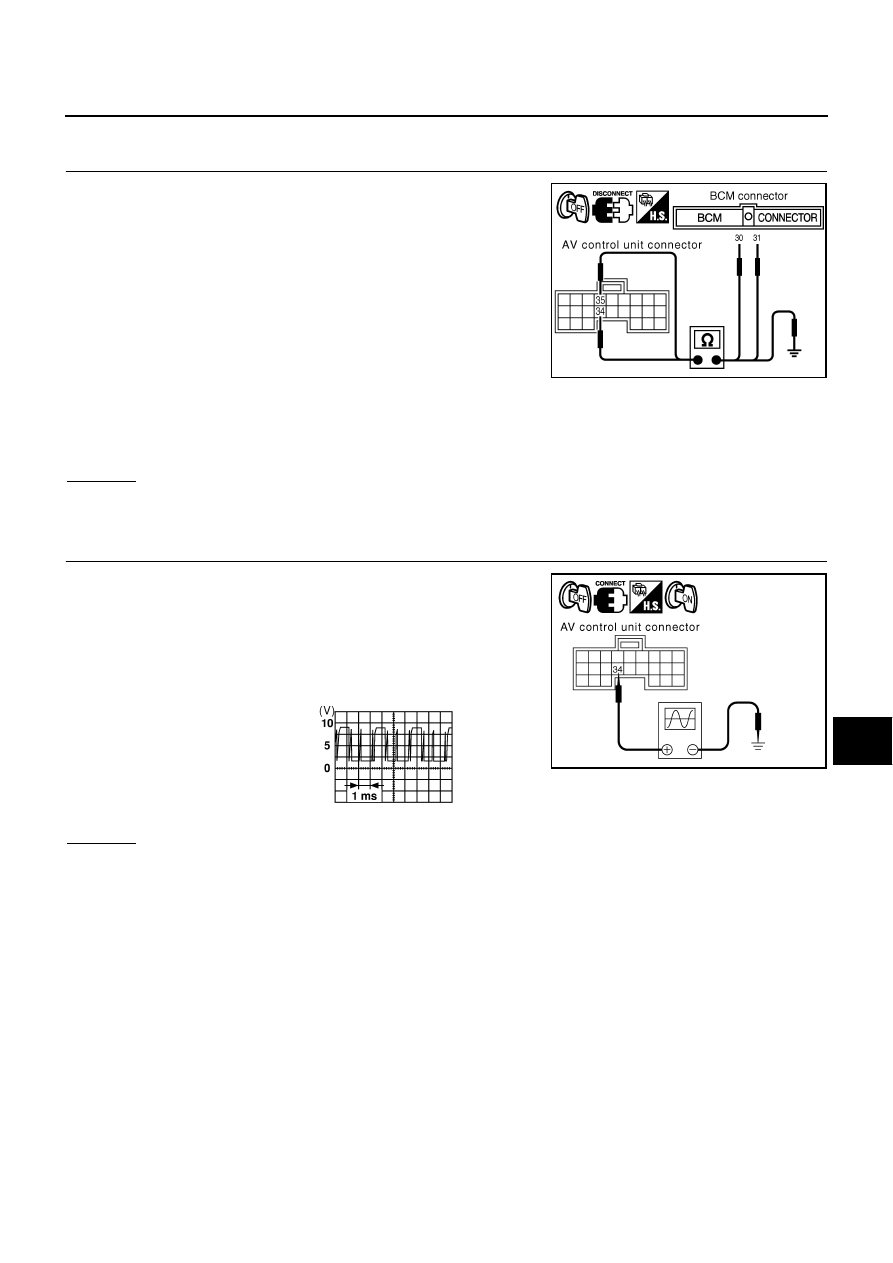
CHECK HARNESS
1.
Turn ignition switch OFF.
2.
Disconnect connectors of AV control unit, combination meter
and BCM.
3.
Check continuity AV control unit harness connector M77 termi-
nal 34 and BCM harness connector M4 terminal 31.
4.
Check continuity AV control unit harness connector M77 termi-
nal 35 and BCM harness connector M4 terminal 30.
5.
Check continuity between AV control unit harness connector M77 terminals 34, 35 and ground.
OK or NG
OK
>> GO TO 2.
NG
>> Repair harness or connector.
2.
CHECK COMMUNICATION SIGNAL (AV-ME)
1.
Connect connectors of AV control unit, combination meter and
BCM.
2.
Turn ignition switch ON and display “VEHICLE ELECTRONIC
SYSTEMS” screen.
3.
Check voltage signal between AV control unit harness connector
M77 terminal 34 and ground.
OK or NG
OK
>> GO TO 3.
NG
>> Replace AV control unit.
34 – 31
: Continuity should exist.
35 – 30
: Continuity should exist.
34 – Ground
: Continuity should not exist.
35 – Ground
PKIA9708E
34 – Ground:
PKIA9709E
SKIA0169E