Infiniti M45 (Y34). Manual - part 654
PARKING, LICENSE PLATE AND TAIL LAMPS
LT-123
C
D
E
F
G
H
I
J
L
M
A
B
LT
6.
CHECK RAP SIGNAL
1.
Turn ignition switch OFF.
2.
Disconnect headlamp battery saver control unit connector.
3.
Check voltage between headlamp battery saver control unit har-
ness connector M34 terminal 10 (Y/R) and ground after turning
off ignition switch.
OK or NG
OK
>> GO TO 8.
NG
>> GO TO 7.
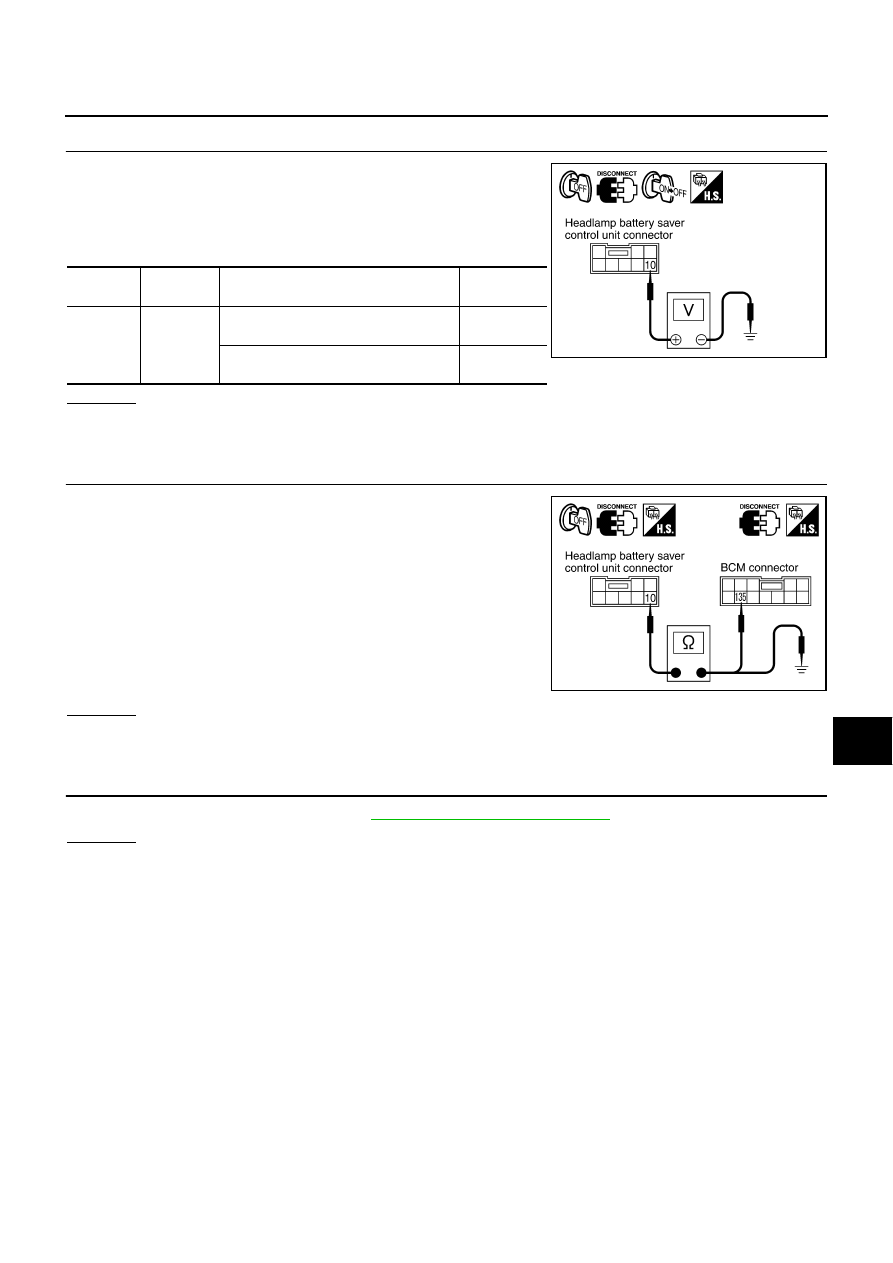
7.
CHECK HARNESS CIRCUIT
1.
Turn ignition switch OFF.
2.
Disconnect BCM connector.
3.
Check continuity between headlamp battery saver control unit
harness connector M34 terminal 10 (Y/R) and BCM harness
connector R4 terminal 135 (Y/G).
4.
Check continuity between headlamp battery saver control unit
harness connector M34 terminal 10 (Y/R) and ground.
OK or NG
OK
>> Replace BCM.
NG
>> Repair harness or connector.
8.
CHECK LIGHTING SWITCH
Check continuity of lighting switch. Refer to
LT-102, "Switch Circuit Inspection"
.
OK or NG
OK
>> GO TO 9.
NG
>> Replace lighting switch.
Connector
Terminal
(Wire color)
Condition
Voltage
M34
10 (Y/R)
Within 45 seconds after ignition switch is
turned off
Less than 1V
Front door is opened or more than 45
seconds after ignition switch is turned off
Battery
voltage
PKIA5944E
10 (Y/R) - 135 (Y/R)
: Continuity should exist.
10 (Y/R) - Ground
: Continuity should not exist.
PKIA5945E