Infiniti M45 (Y34). Manual - part 164
REFRIGERANT LINES
ATC-141
C
D
E
F
G
H
I
K
L
M
A
B
ATC
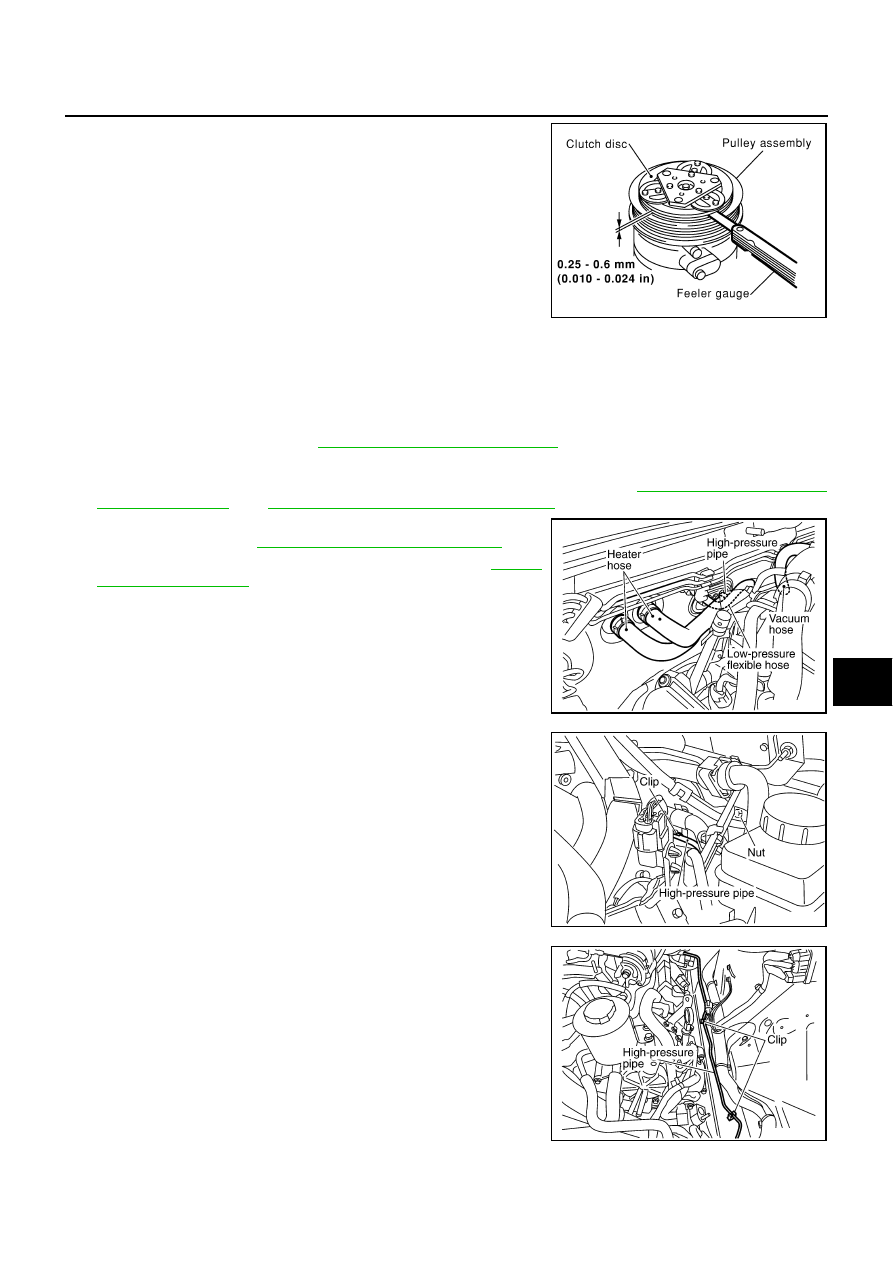
6.
Check clearance around the entire periphery of clutch disc.
If the specified clearance is not obtained, replace adjusting
spacer and readjust.
Break-In Operation
When replacing compressor clutch assembly, always carry out the break-in operation. This is done by engag-
ing and disengaging the clutch about thirty times. Break-in operation raises the level of transmitted torque.
Removal and Installation of Low-Pressure Flexible Hose
AJS0008Q
REMOVAL
1.
2.
Use a refrigerant collecting equipment (for HFC-134a) to discharge the refrigerant.
3.
Remove tower bar, air cleaner assembly, air duct and air inlet pipe. Refer to
and
EM-16, "AIR CLEANER AND AIR DUCT"
.
4.
Drain the coolant from cooling system, and disconnect two
heater hoses. Refer to
MA-12, "Changing Engine Coolant"
5.
Disconnect vacuum hose from intake manifold. Refer to
.
6.
Remove accelerator wire bracket.
7.
Remove high-pressure pipe from the clip.
8.
Disconnect high-pressure pipe from condenser and evaporator.
9.
Remove clip from low-pressure flexible hose.
10. Remove mounting bolt and nut from low-pressure flexible hose.
CAUTION:
Cap or wrap the joint of the pipe with a suitable material such as
vinyl tape to avoid the entry of air.
11. Remove low-pressure flexible hose.
Disc to pulley
clearance
: 0.25 - 0.6 mm (0.010 - 0.024 in)
RJIA0965E
RJIA1320E
RJIA1321E
RJIA1322E