Infiniti M45 (Y34). Manual - part 127
ASSEMBLY
AT-393
D
E
F
G
H
I
J
K
L
M
A
B
AT
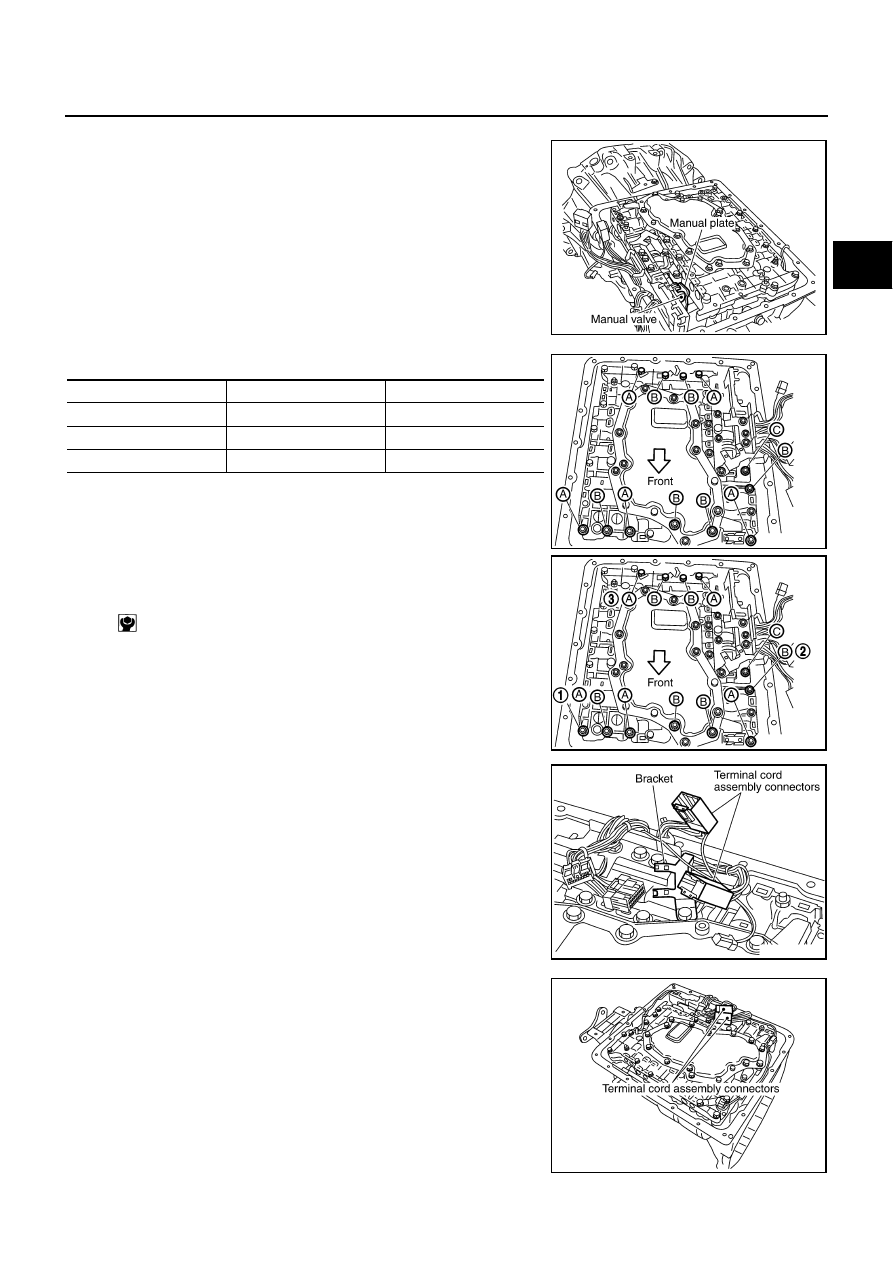
CAUTION:
●
Hang down terminal cord assembly and revolution sen-
sor harness toward outside so as not to disturb installa-
tion of control valve assembly.
●
Make sure that turbine sensor securely installs turbine
sensor hole.
●
Assemble it so that manual valve cutout is engaged with
manual plate projection.
b.
Install bolts A, B and C in control valve assembly.
c.
Tighten bolt 1, 2 and 3 temporarily to prevent dislocation. After
that tighten them in order (1
→
2
→
3), and then tighten other
bolts.
12. Install terminal cord assembly connectors in bracket.
13. Connect terminal cord assembly connectors.
SCIA2812E
Bolt symbol
Length mm (in)
Number of bolts
A
42 (1.65)
5
B
55 (2.17)
6
C
40 (1.57)
1
: 7.9 N·m (0.81 kg-m, 70 in-lb)
SCIA2312E
SCIA3170E
SCIA2584E
SCIA2309E